|
JCM800 2204 "Jeanie" and "Vickie" (twins)I originally built these two amps to sell but that proved very hard to do. I ended up selling one to The Sonic Arts Center where I work and another to a guy in California who is enjoying it greatly. They are just too expensive for me to make one or two at a time. Here is a bunch of information that may help some of you independent builders out there. Where to start? Okay, I guess I need names for these to amps. I thought about maybe Castor and Pollux as I am a Gemini, but I am not really into astrology. Also, amps are traditionally named after women. Who are some famous women twins? Mary Kate and Ashley? Hell no! These are classy amps and they need classy names. I guess I will go with Jeanie and Vickie after Jeanne and Victoire de Valois, twin daughters of Henry II of France and Catherine de' Medici. Man, am I nerdy or what! Every amp should have a history behind it, so there's the story of the names...
08.31.07
10.04.07
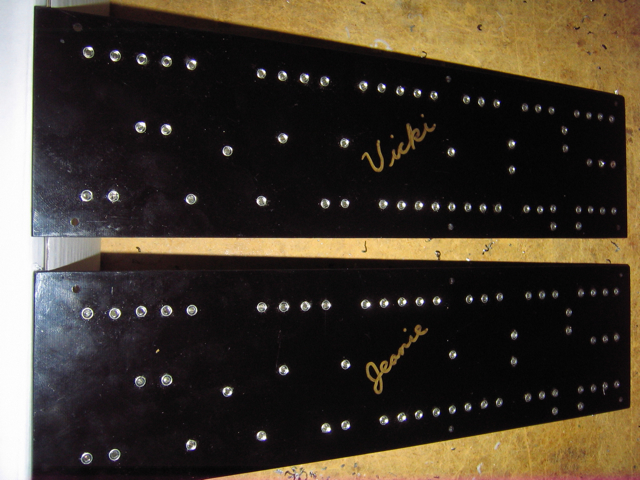
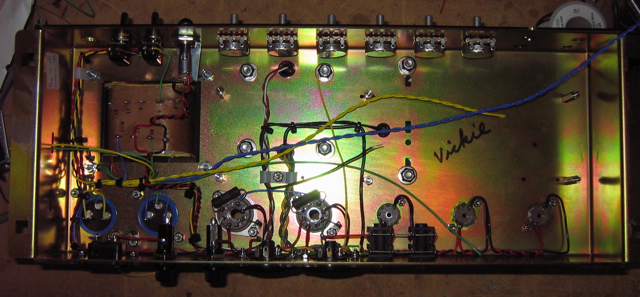
Here is Vicki...
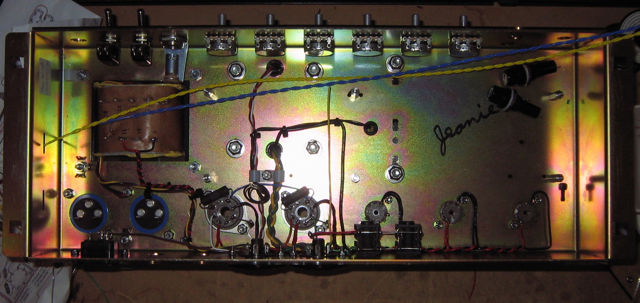
Here is Jeanie...
Here is a finished chassis. I don't know which one!!!
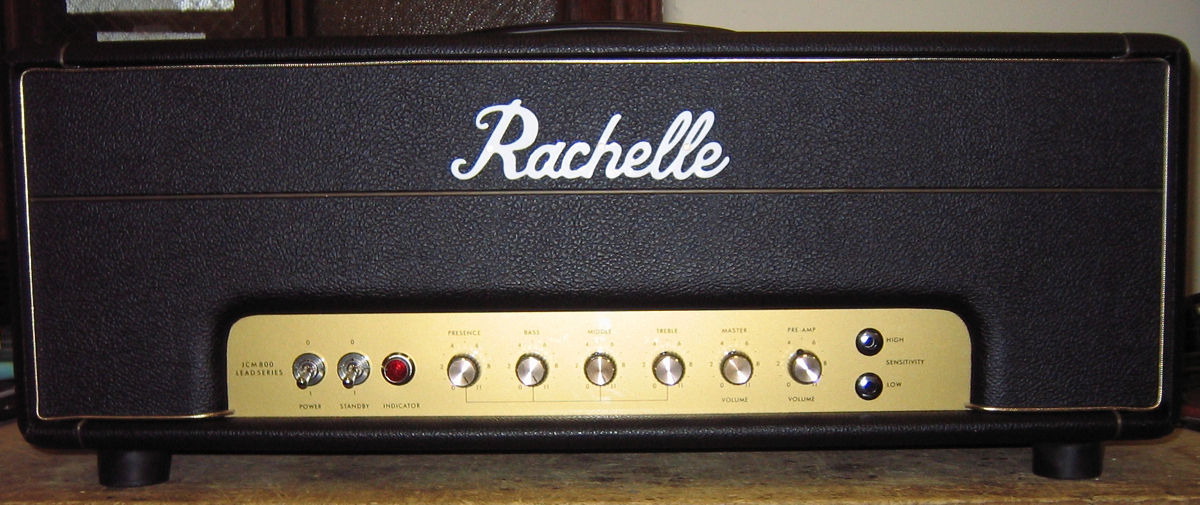
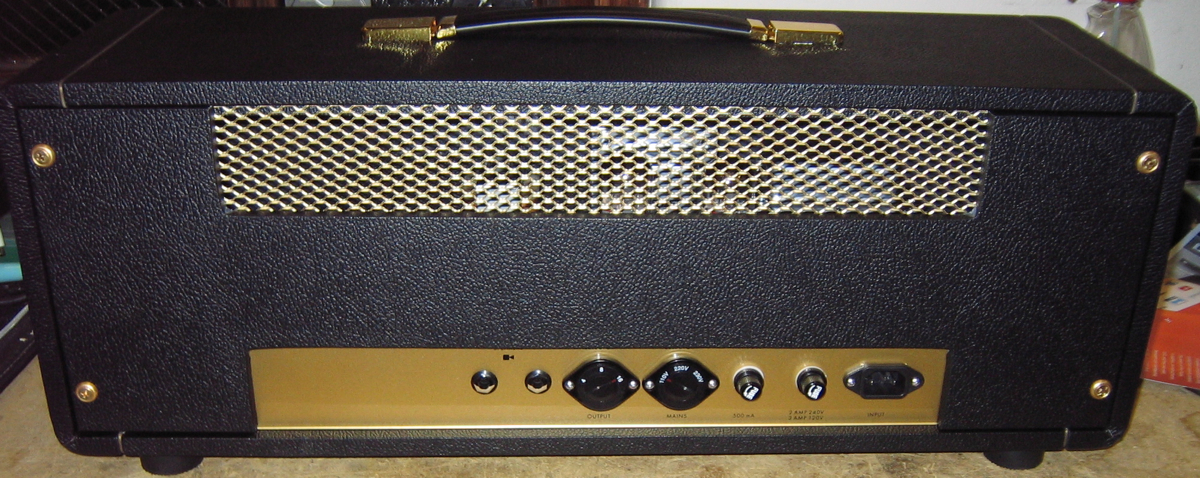
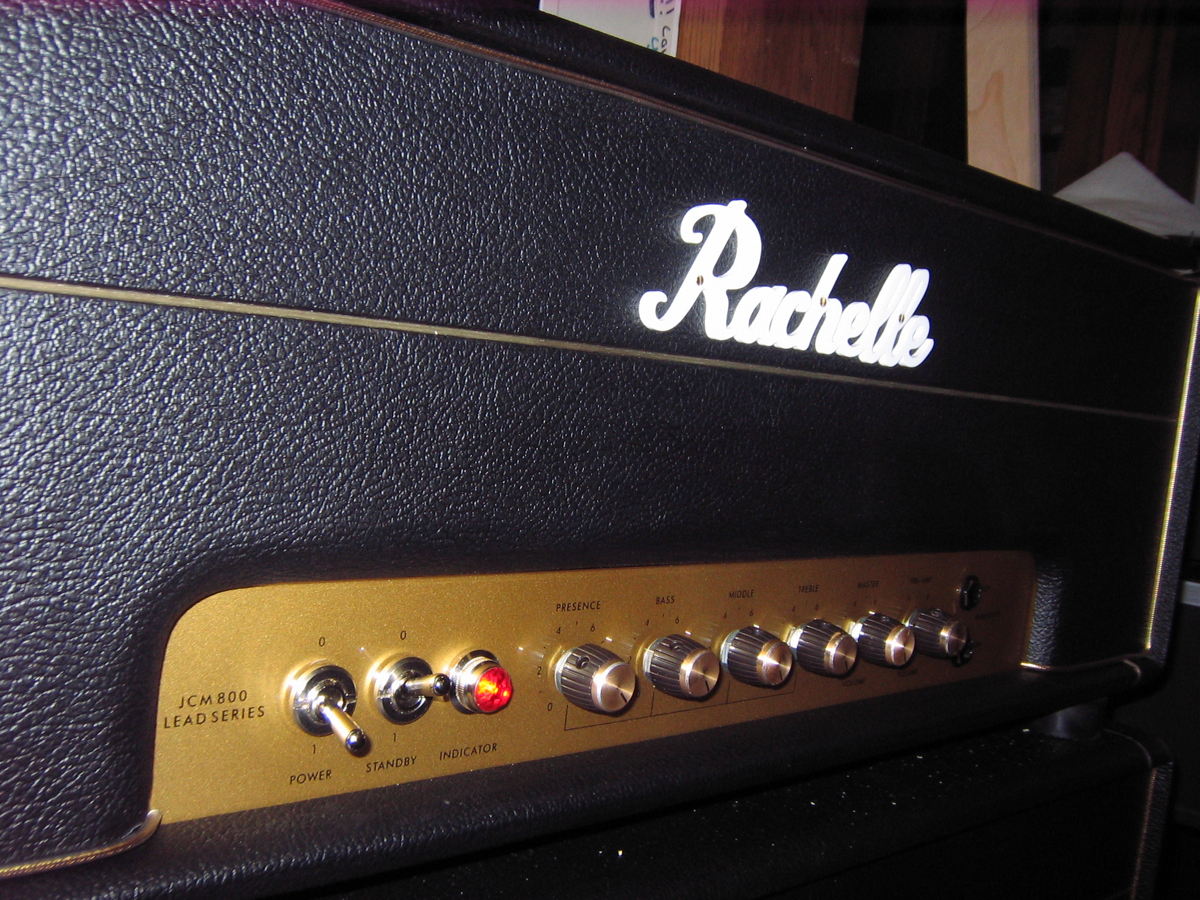
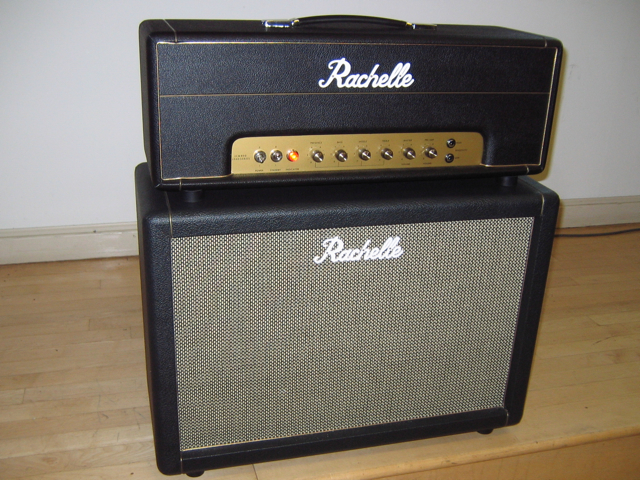
I was not able to continue a step by step blog of these amps but here is more information. Look at my other JCM800 blogs if you need any more information. Here are some shots of the outside of the amp. It differs from a JCM800 in that I house the amp in a Plexi style small head box. This is in my opinion the best looking Marshall head cabinet ever made. The cabinet is made by Mojo and is of the highest quality. It is covered in black levant and is trimmed with gold piping.
The back of the amp has a gold tone grill. I replaced stock Mojo chrome screws with brass ones that have trim rings - looks a lot nicer!
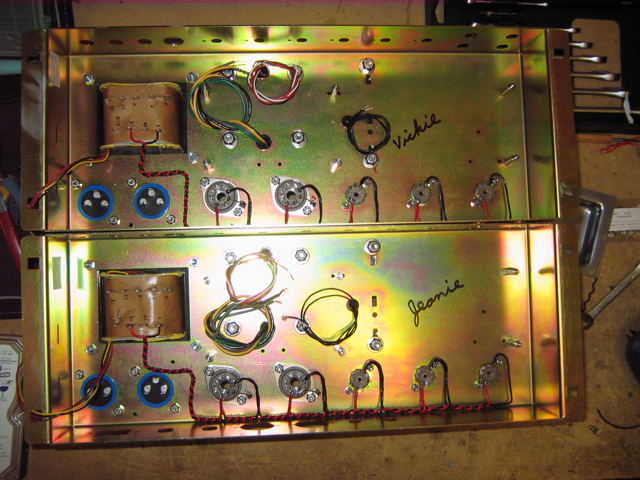
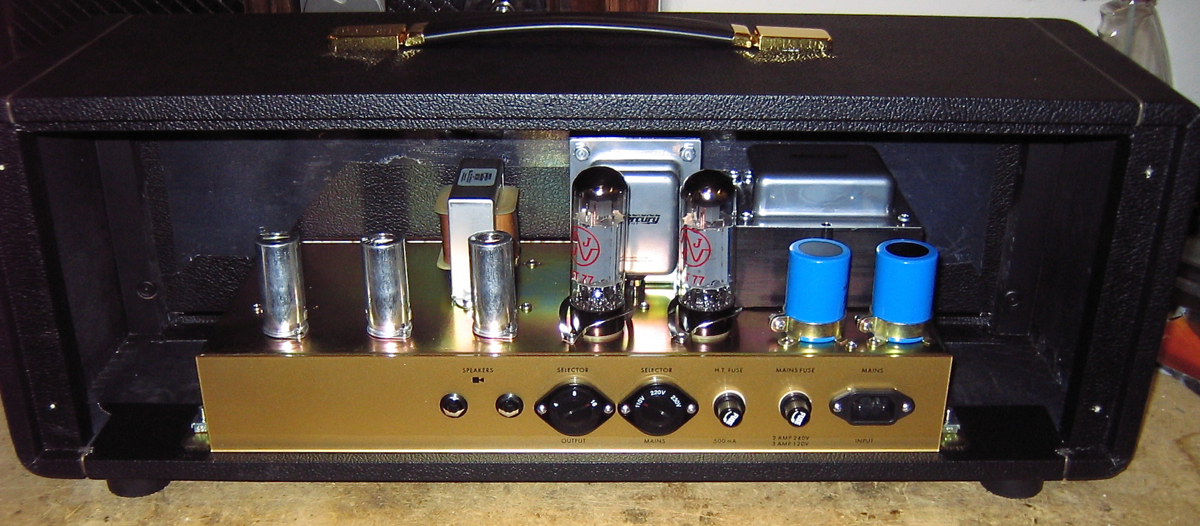
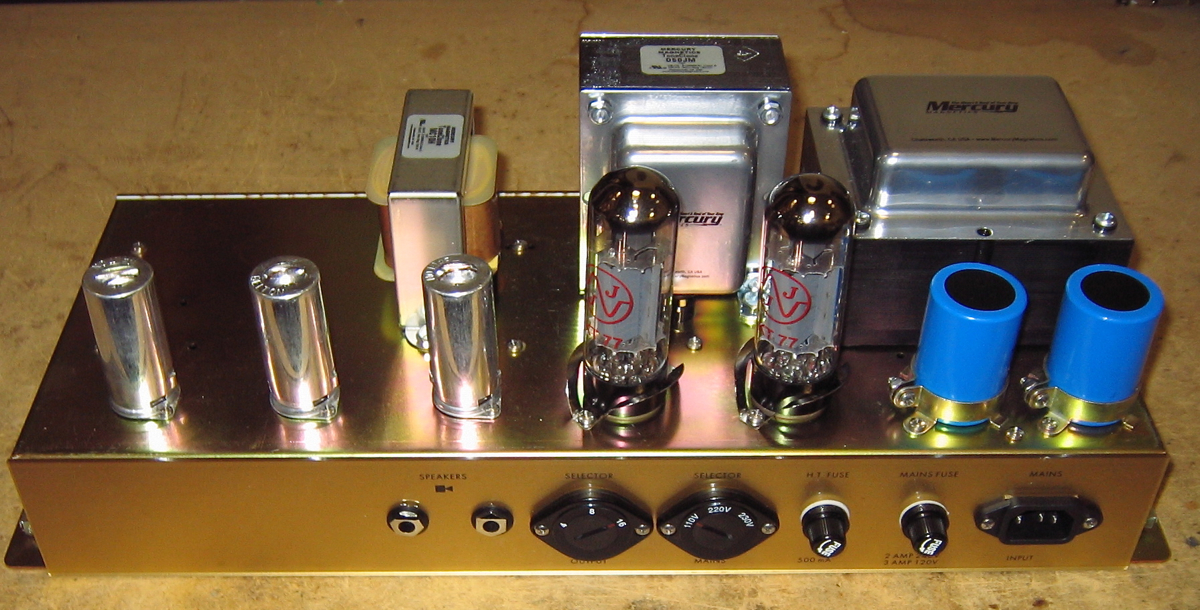
Here is Jeanie with her back off. All tubes are purchased from Doug's Tubes and this guy knows his stuff! The power tubes are a matched set of JJ KT77. The KT77 has a more articulate sound and better highs and lows than an EL34. In my opinion, they make the crunch sound less mushy. The preamp tubes are Tung-Sol 12AX7 Reissue in V1, and Electro-Harmonix 12AX7 in V2 and V3. All preamp tubes have balanced triodes. I chose the Tung-Sol for the gain characteristics. It really adds a beautiful break up compared to the other 12AX7s I have tried. The Electro-Harmonix 12AX7 is known for being very durable with low microphonics. I chose them in V2 and V3 to bring reliability to the amp. They sound great in these positions as well.
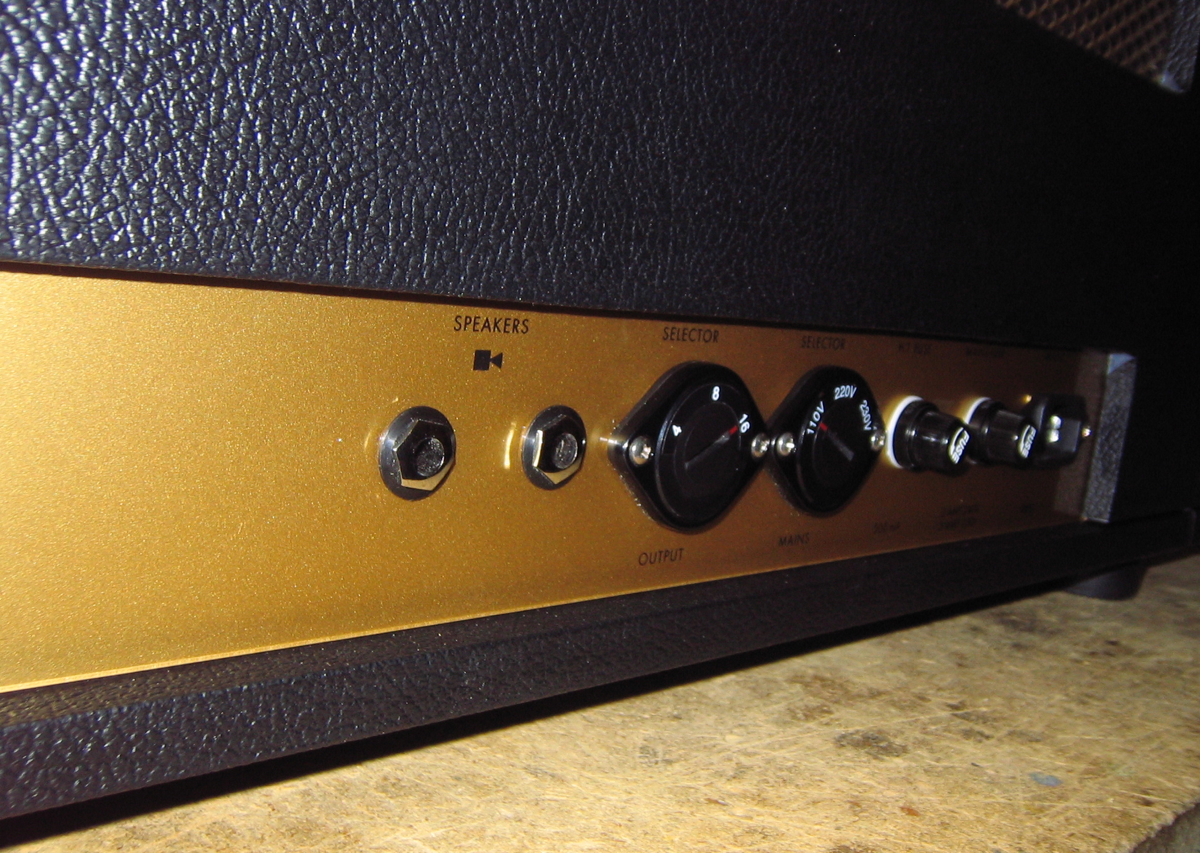
A close up of the back of the amp. There is a voltage selector and an impedance selector for flexible connectivity. There are also 2 speaker jacks and easy access to the amps 2 fuses.
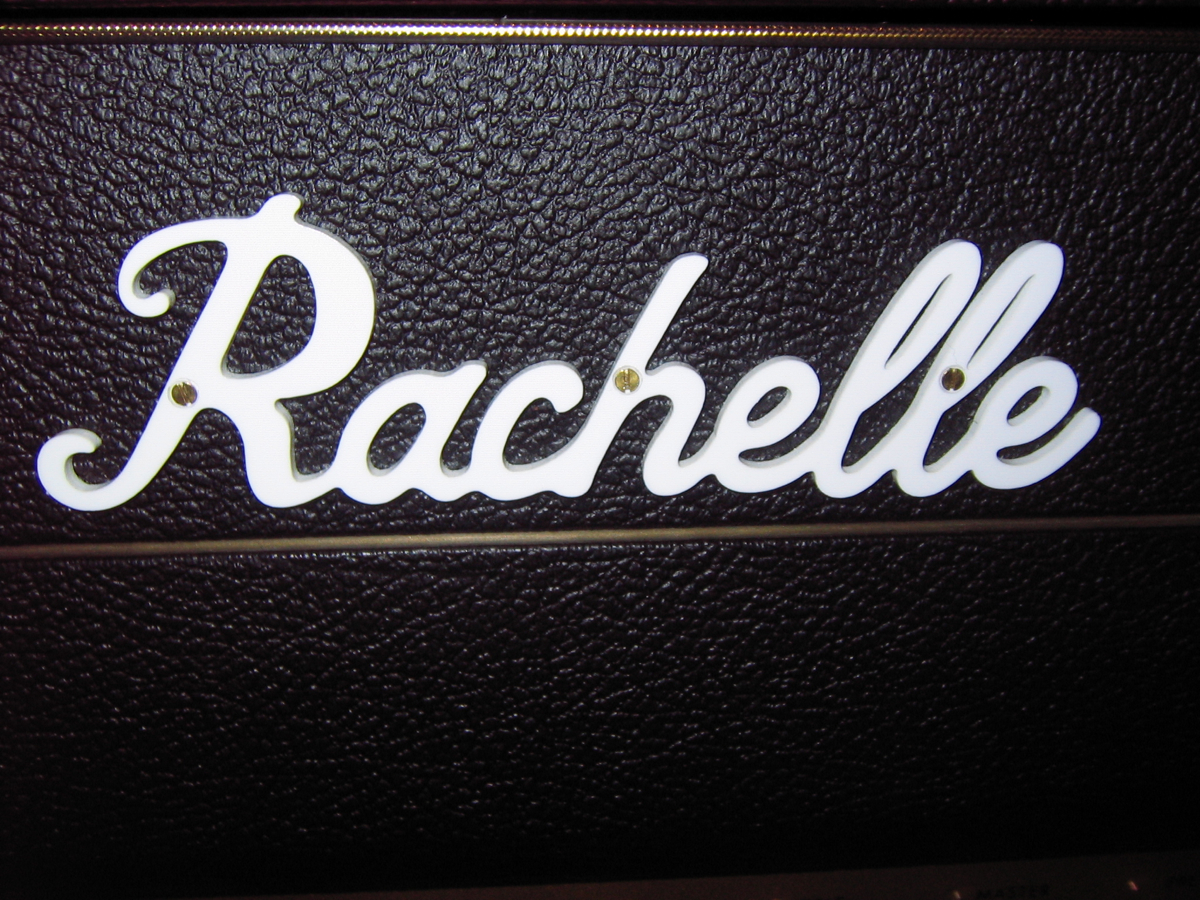
A close up of the logo. It is laser cut white Plexiglas and attached with three brass screws.
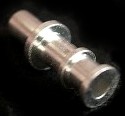
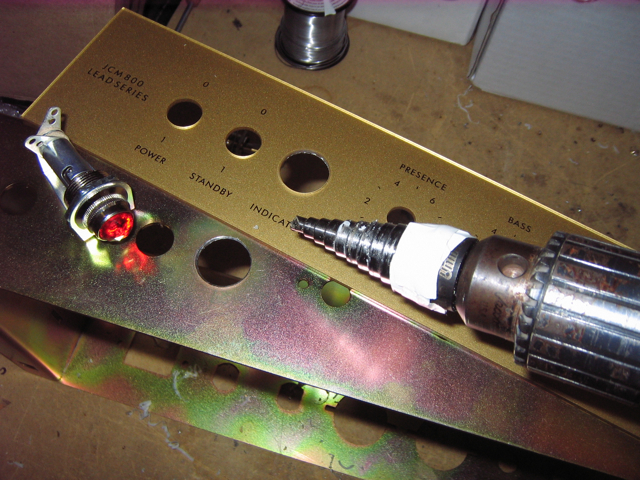
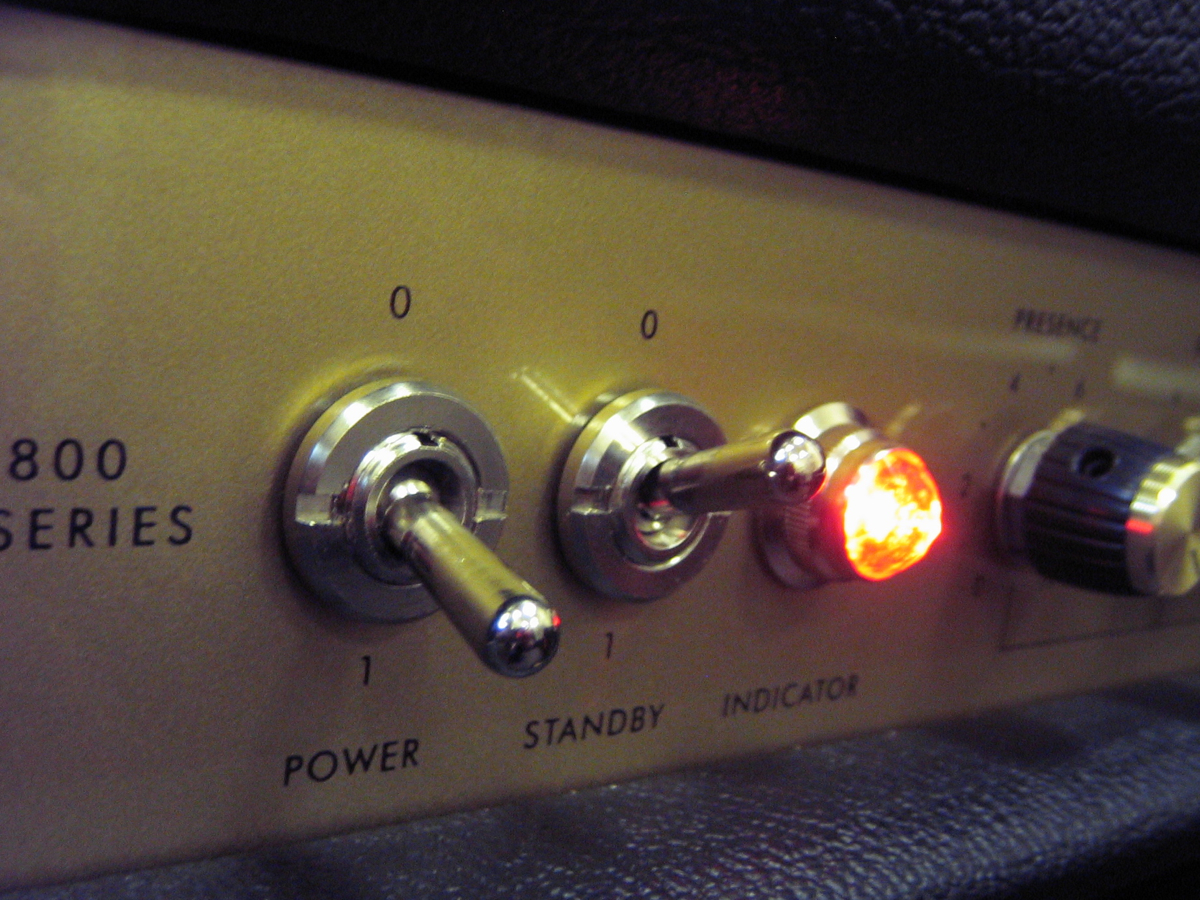
A close up of the front panel. Notice the Fender Style pilot light. It makes it easy to change lamps and jewels (the glass lens). The face plate is gold plexiglas and the indicator numbers go up to 11!
An extreme close up of the Carling long bat toggle switches. I also use the expensive Plexi style chrome trim rings on the switches.
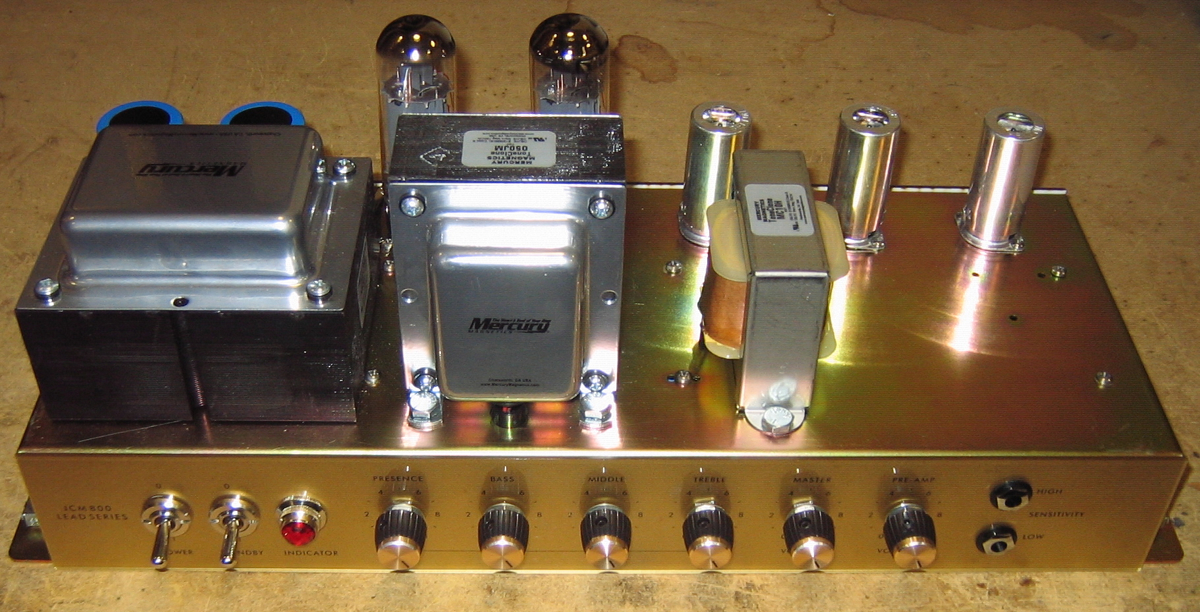
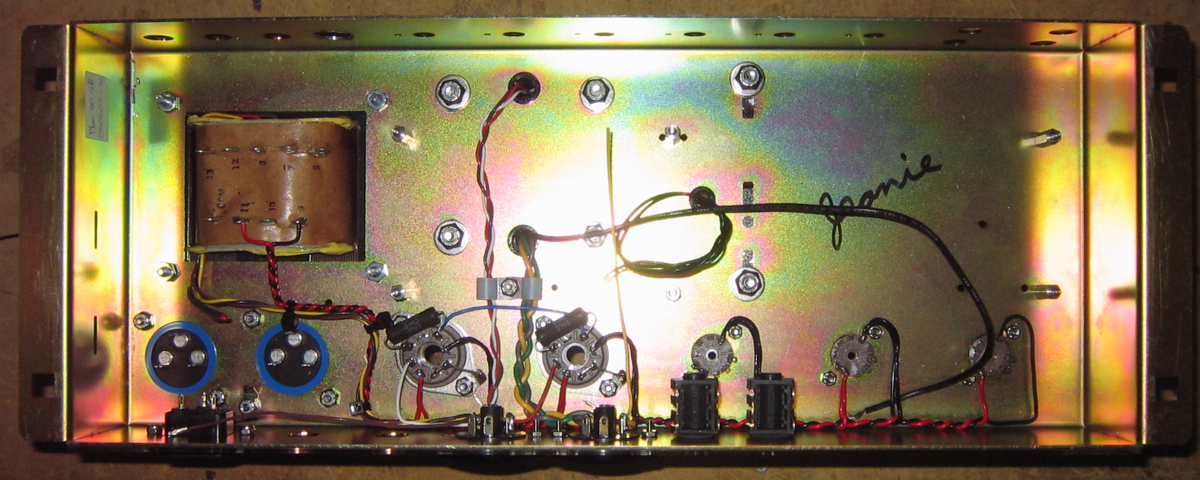
A beauty shot of the completed chassis. The transformers are actually Plexi 50 watt specification from the finest transformer maker in the world - Mercury Magnetics of California. The power transformer is a Mercury Magnetics ToneClone P4550JT-G2, the output transformer is a Mercury Magnetics ToneClone O50JM, and the choke is a Mercury Magnetics ToneClone MC10H.
A beauty shot of the completed chassis from the back. High quality Belton Micalex tube sockets are used for all tube positions.
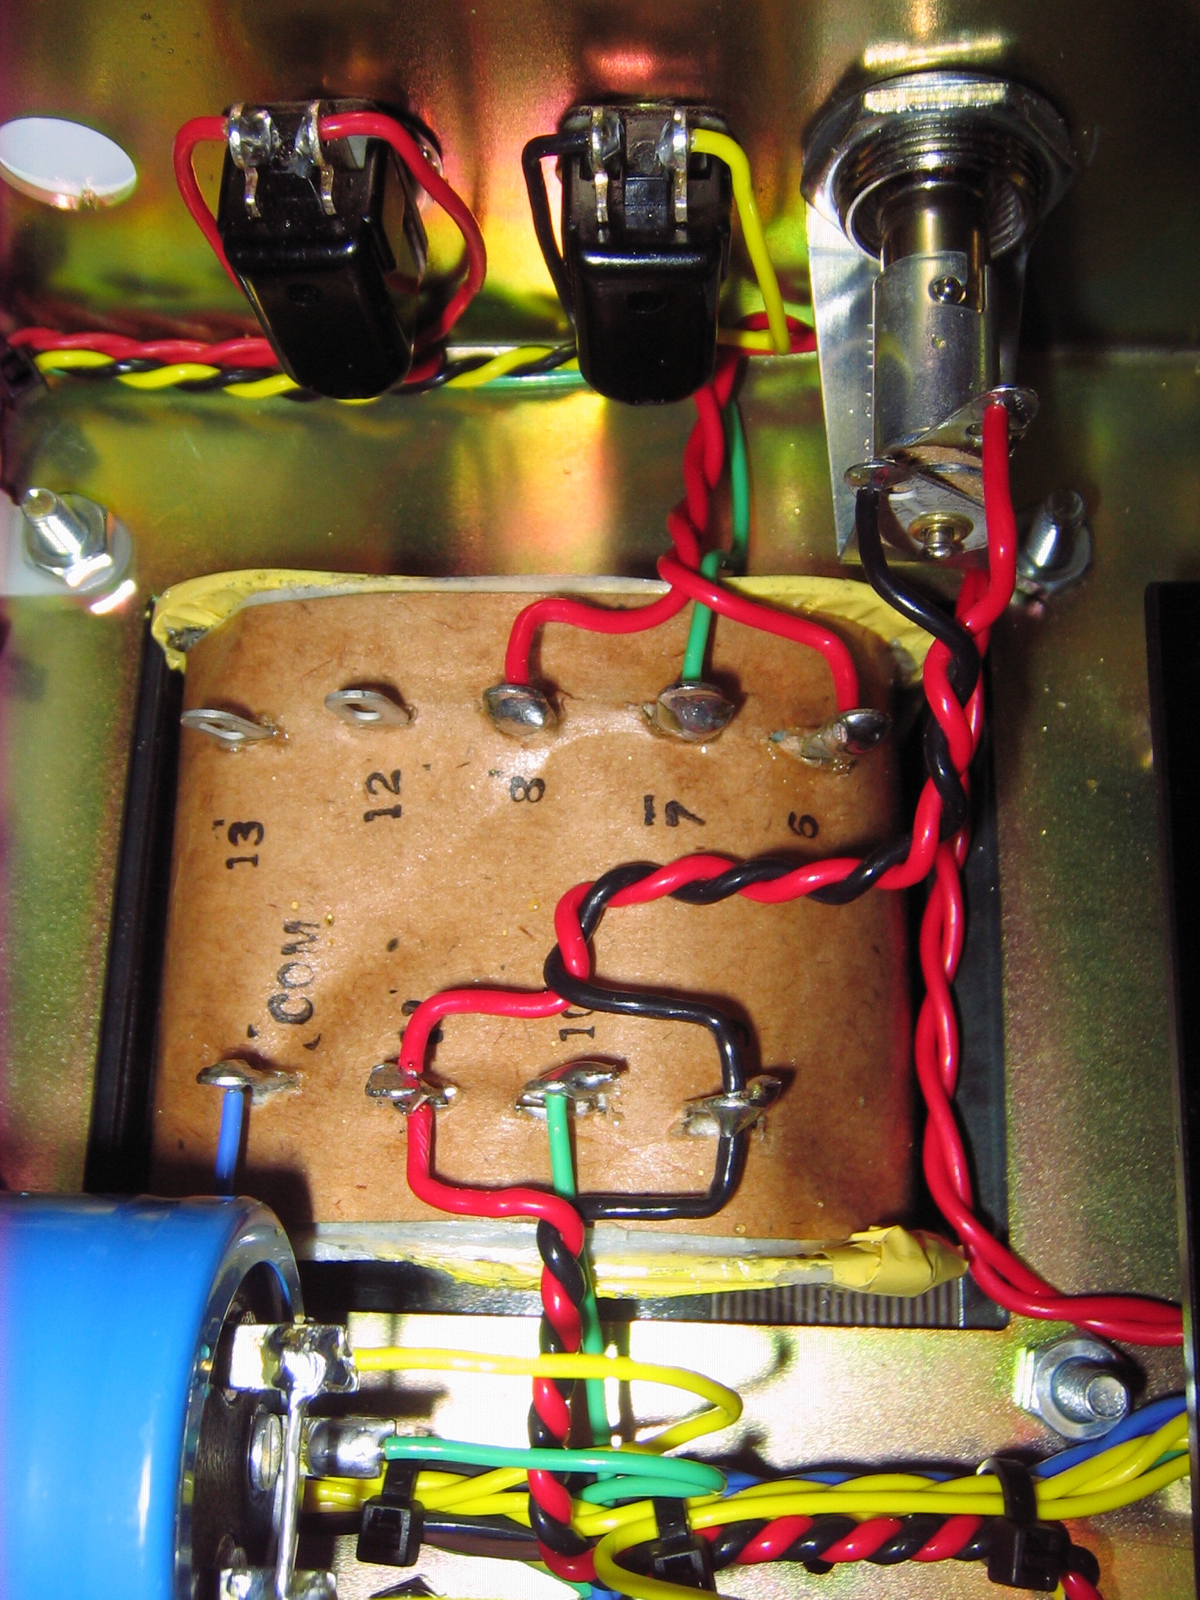
A shot of the steel chassis with extremely beefed up hardware. I use all stainless steel hardware everywhere on the amp. I also incorporate stainless Nylok nuts wherever possible. OT and Choke are mounted with 1/4" bolts and all 4-40 hardware has been increased in size to 6-32 where possible. This makes the amp very sturdy and resistant to shock damage. The stainless hardware means no rusty hardware ever! Notice the heater wires that are carefully twisted to reduce hum.
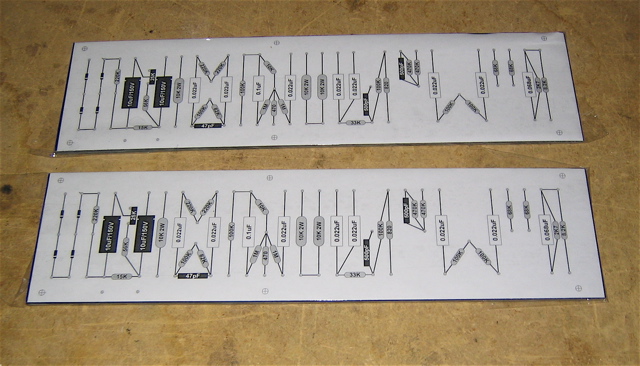
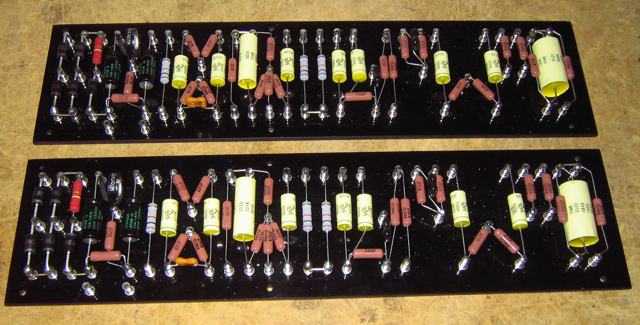
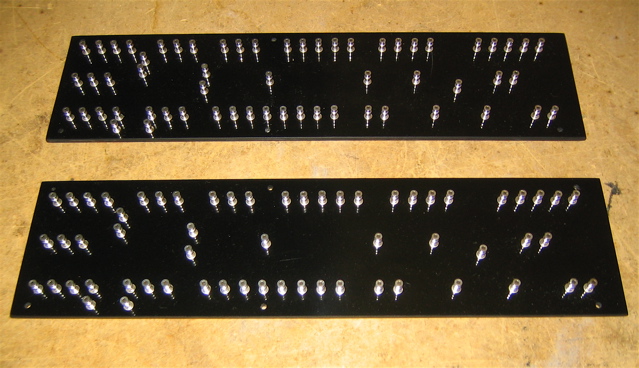
The turret board is hand drilled and turrets set by hand. There are also no extraneous turrets doing nothing.
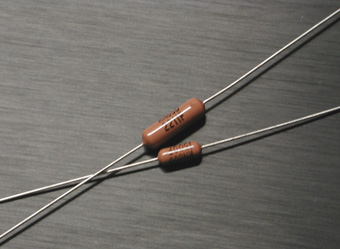
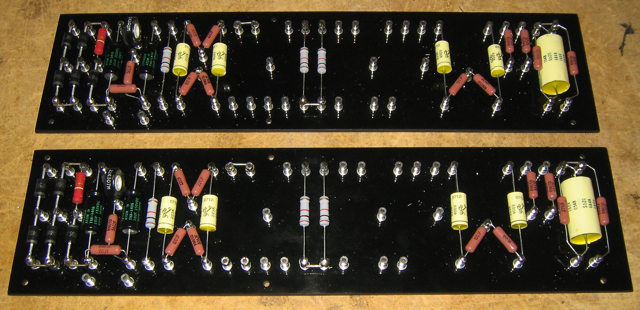
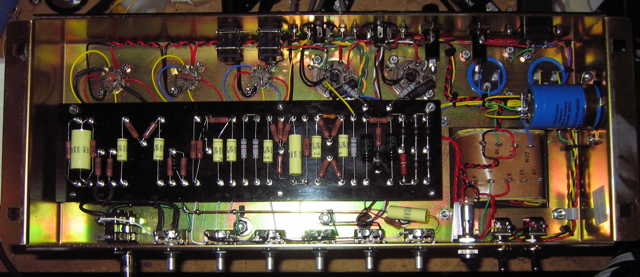
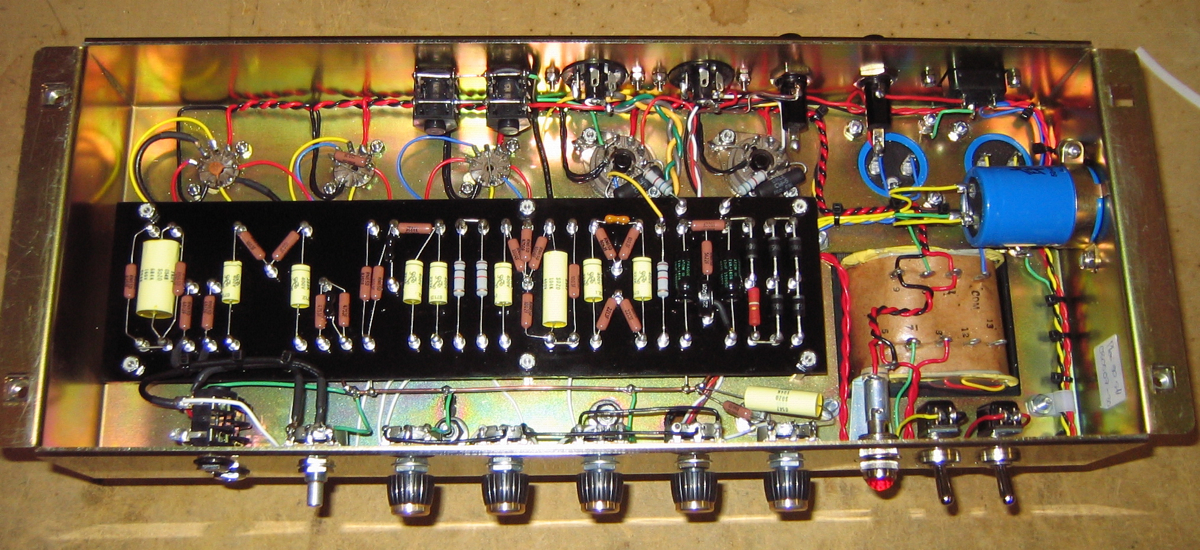
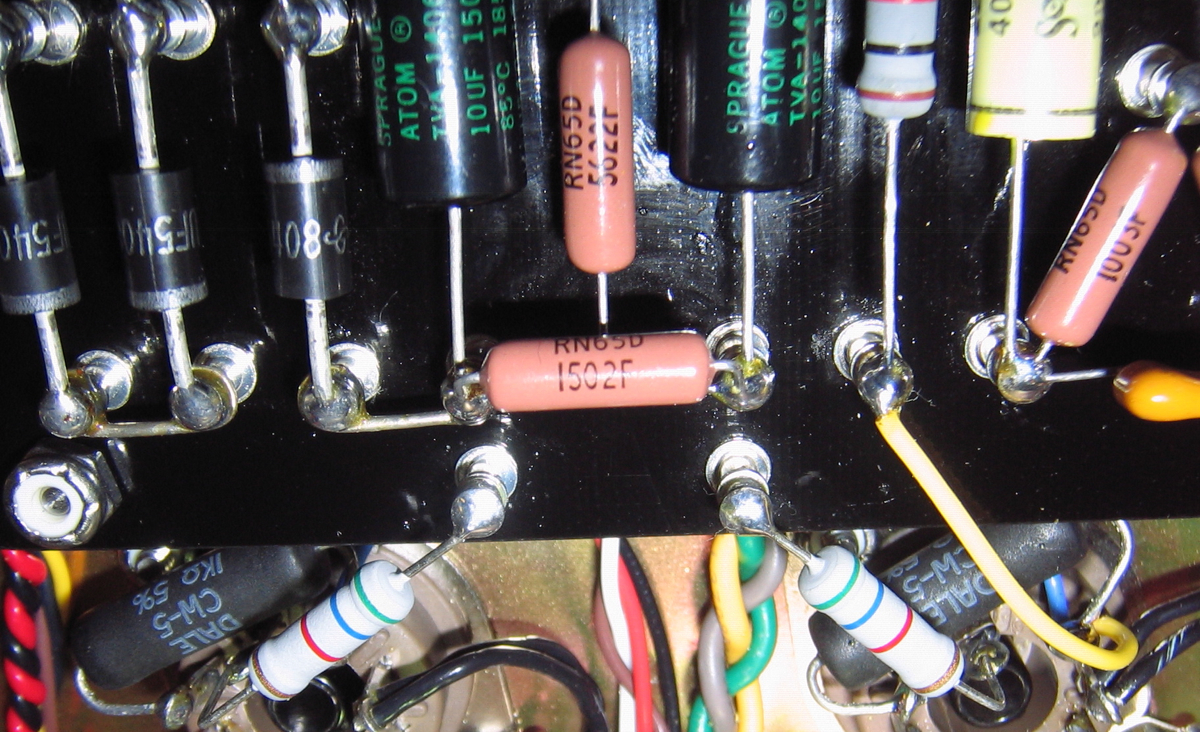
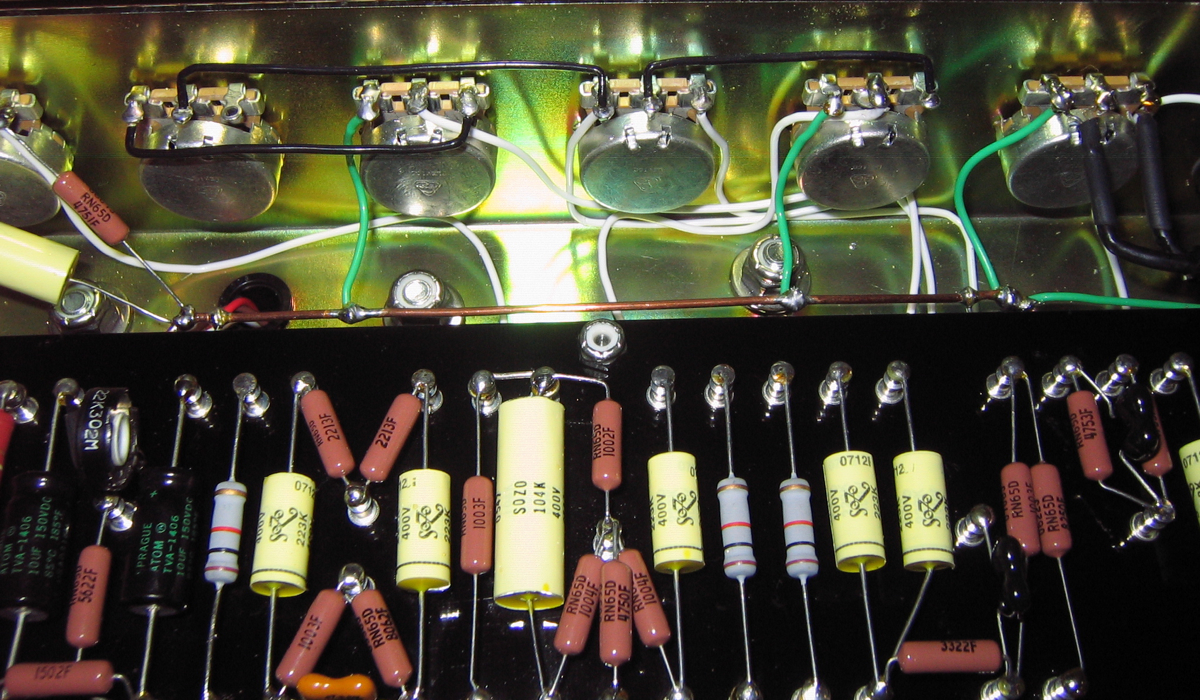
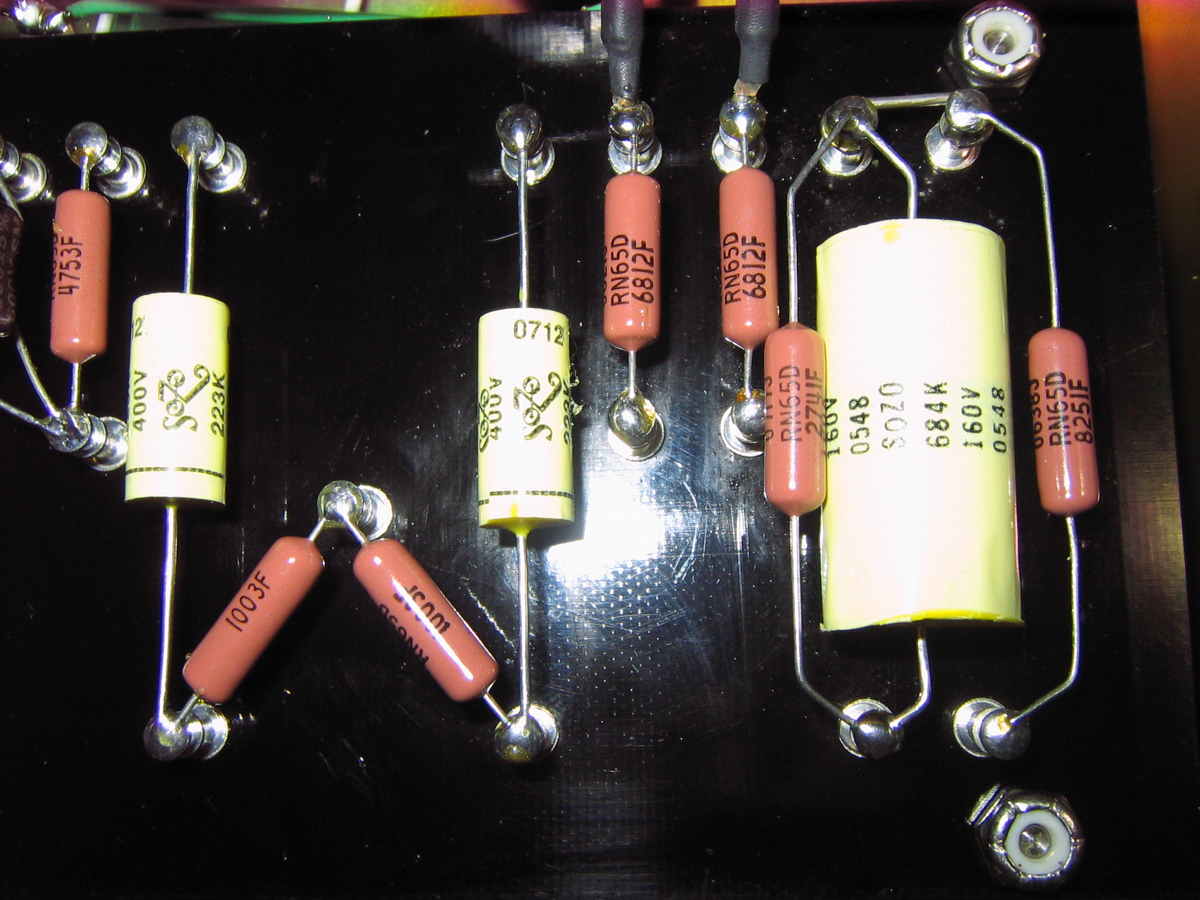
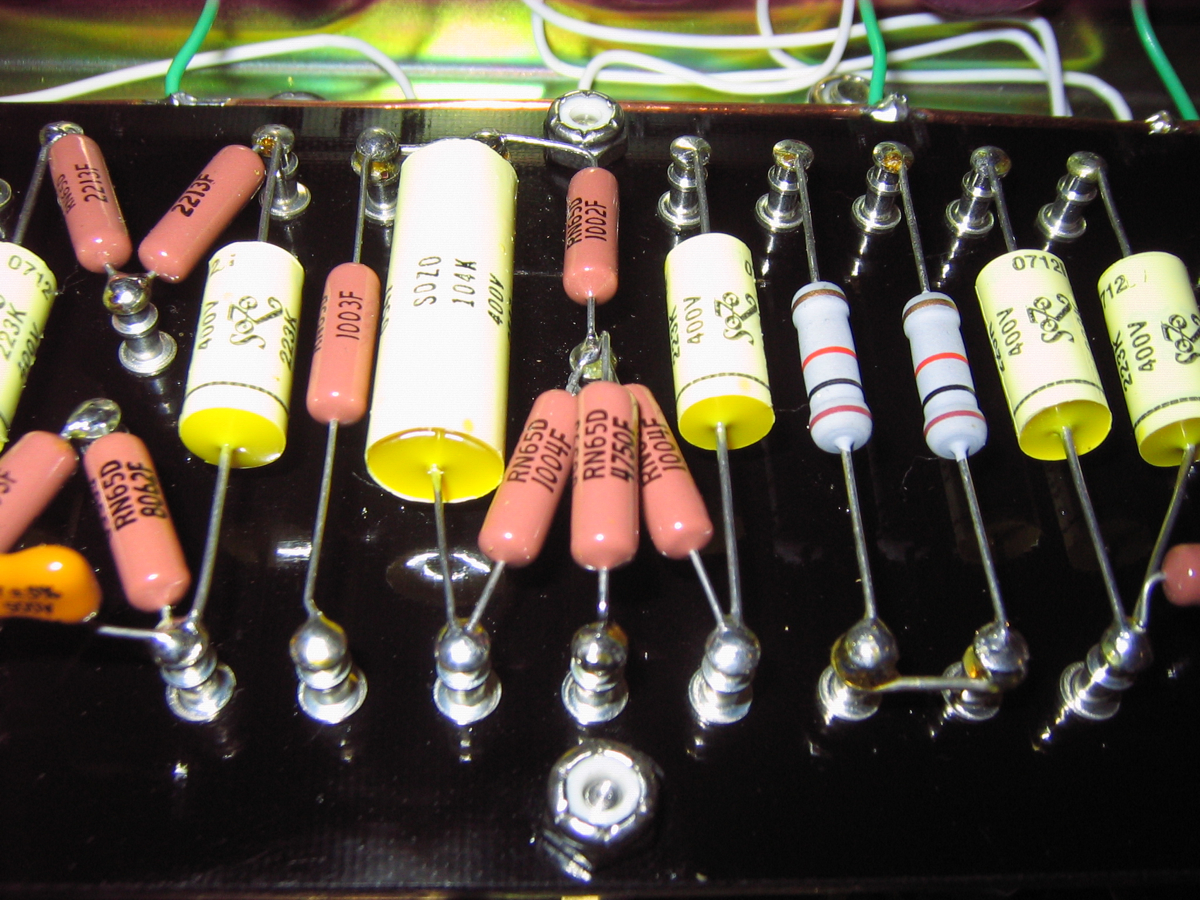
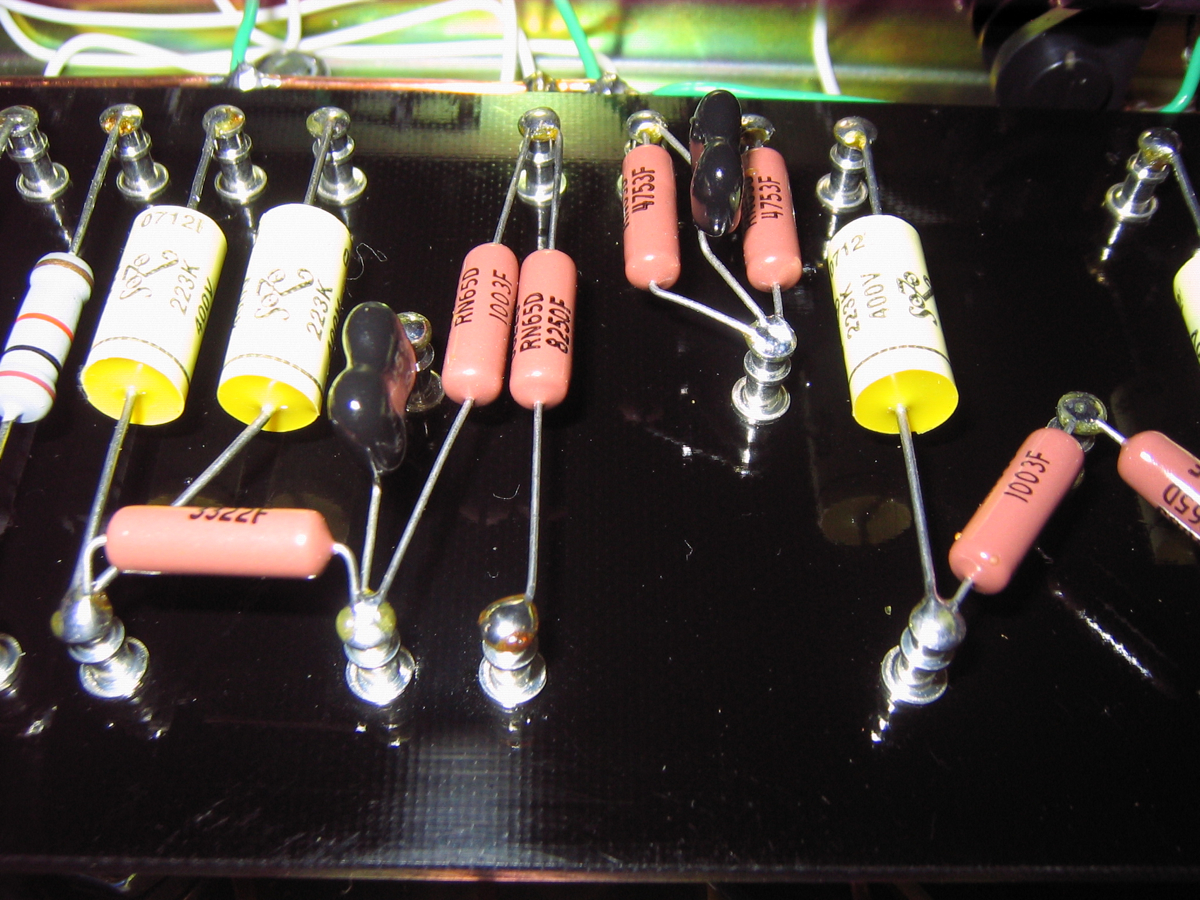
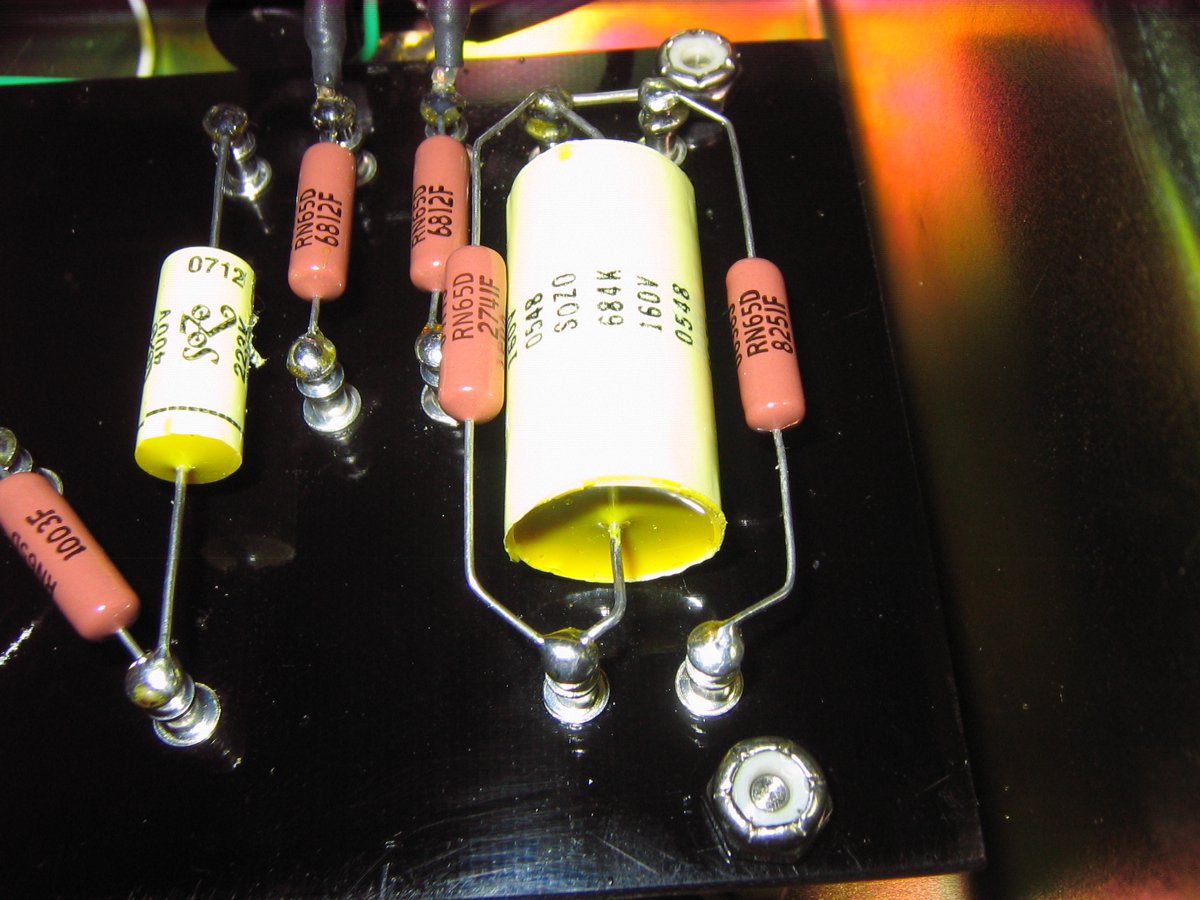
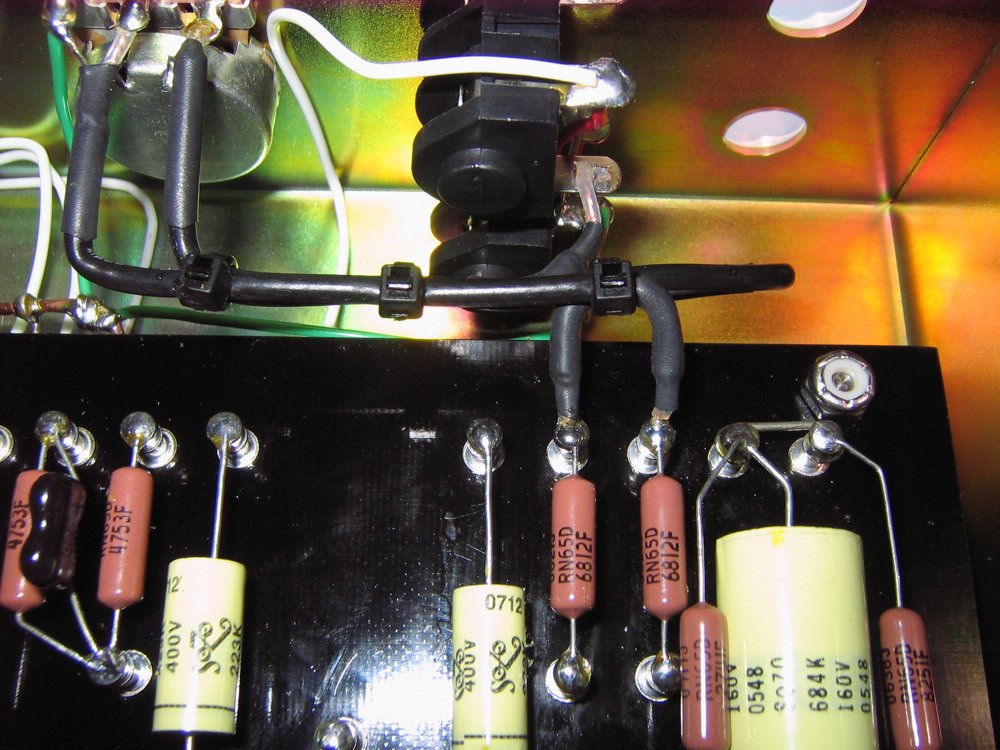
A chassis shot with all premium components. Capacitors (yellow components) are Sozo Mustard Cap Premium Line and are only available from Sozo directly. Don't confuse these with the common standard line - these are the best made! The resistors (brownish-orange components) are Vishay Dale metal film military spec and have the tightest tolerances in the business. The amp will sound good for a long time as these maintain there value over a longer period.
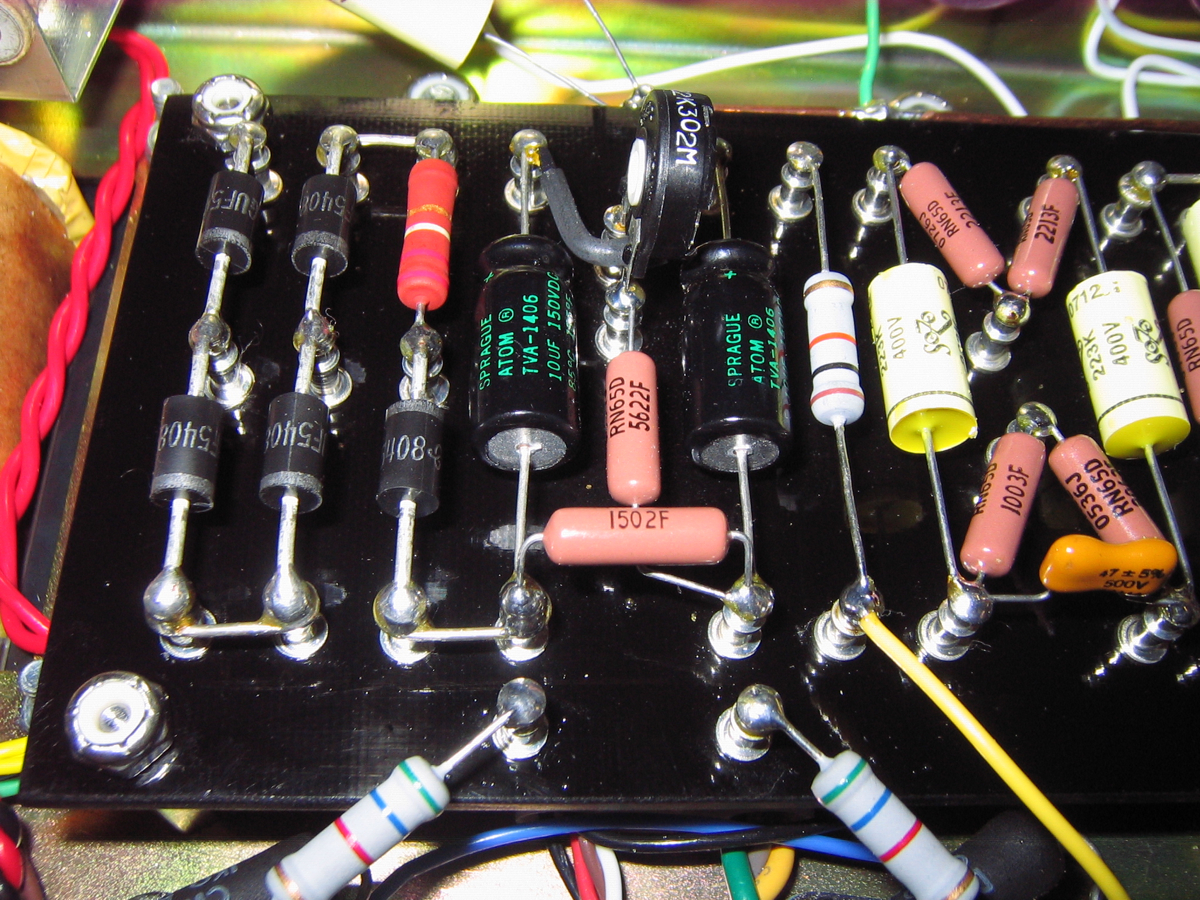
The black components are the famous Sprague Atoms electrolytic caps and are considered the finest in this position.
The two gray resistors in the bottom of the shot are 2 watt metal oxide. Instead of connecting to wires that usually flop around under the turret board, I have installed 2 extra turrets to provide stability and reliability.
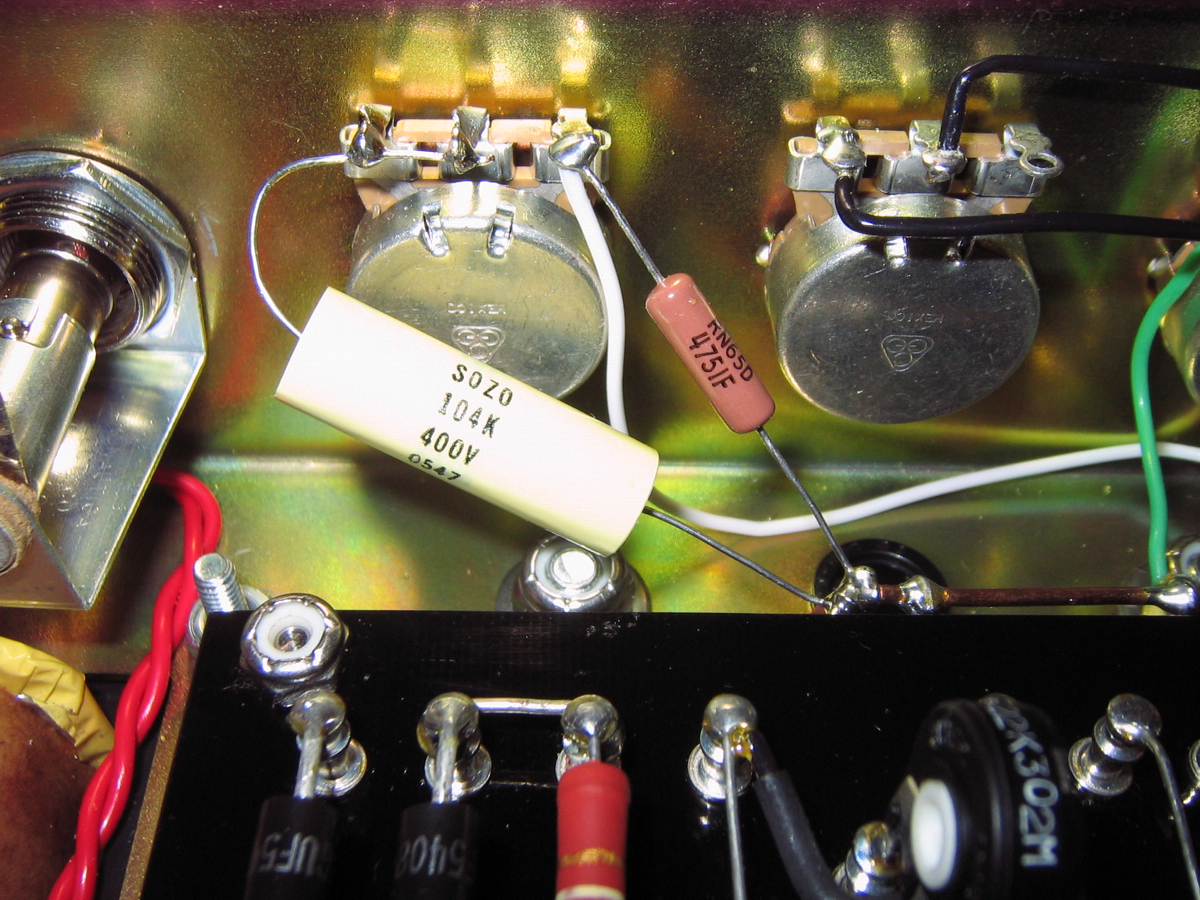
CGE Potentiometers are used. These pots are considered the closest to the coveted CTS type found in Marshalls from late '67 on. You can also see the incorporation of a ground buss bar that provides a very consistent ground source. It is routed to a single point on a transformer bolt eliminating the possibility or ground loops.
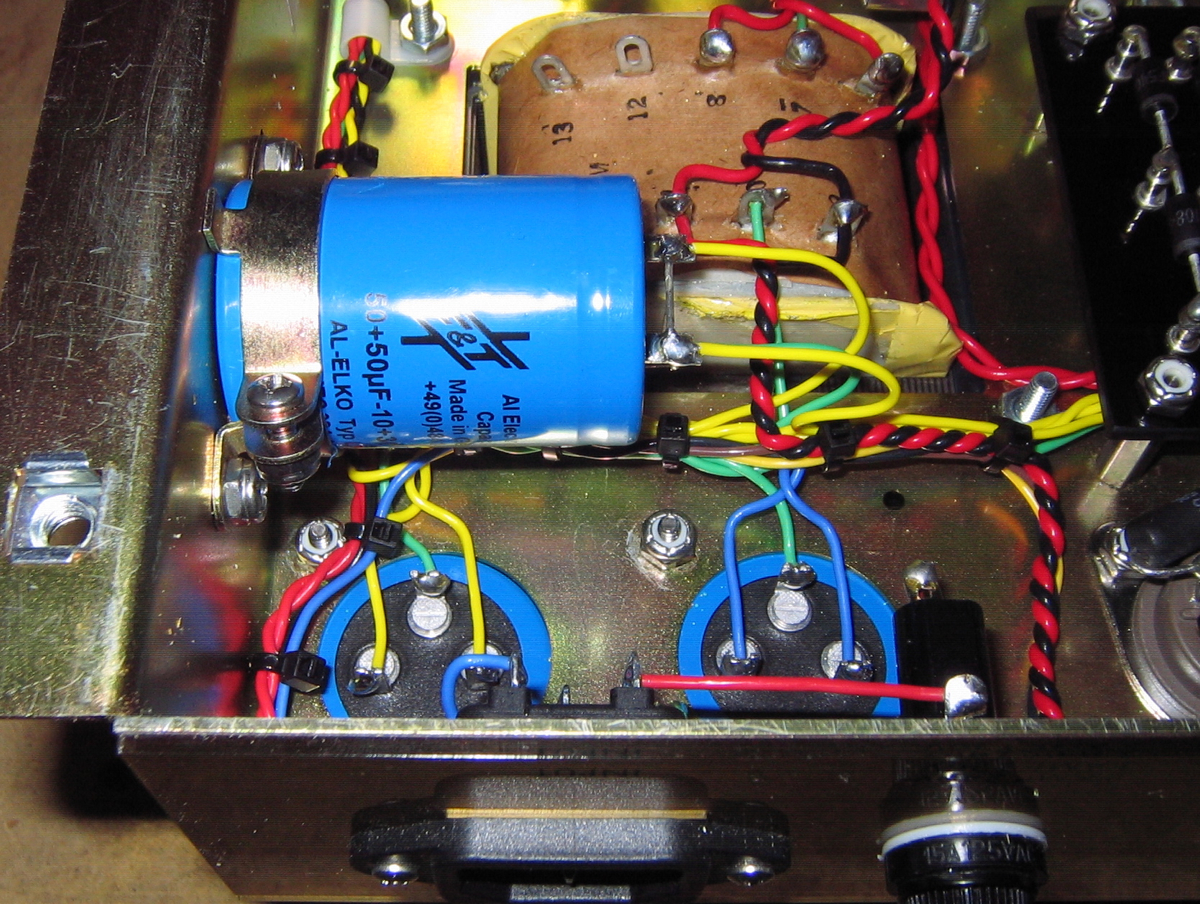
F&T Cap Cans are used. These are the best made!
The soldering throughout is top notch. I am not bragging but I have been soldering for over 20 years and I hand wire studios for a living. No cold solders on this baby!
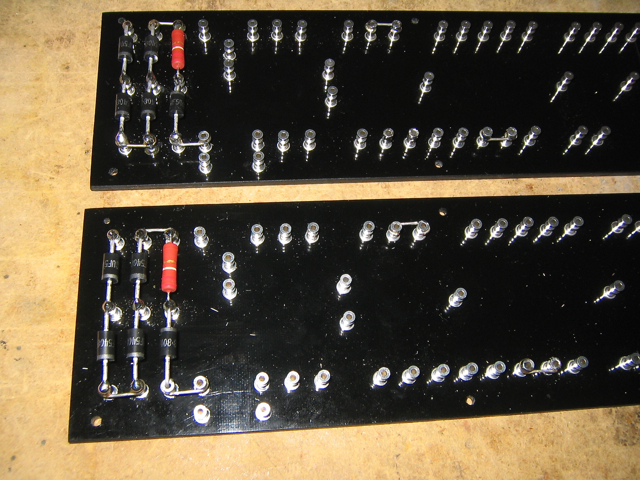
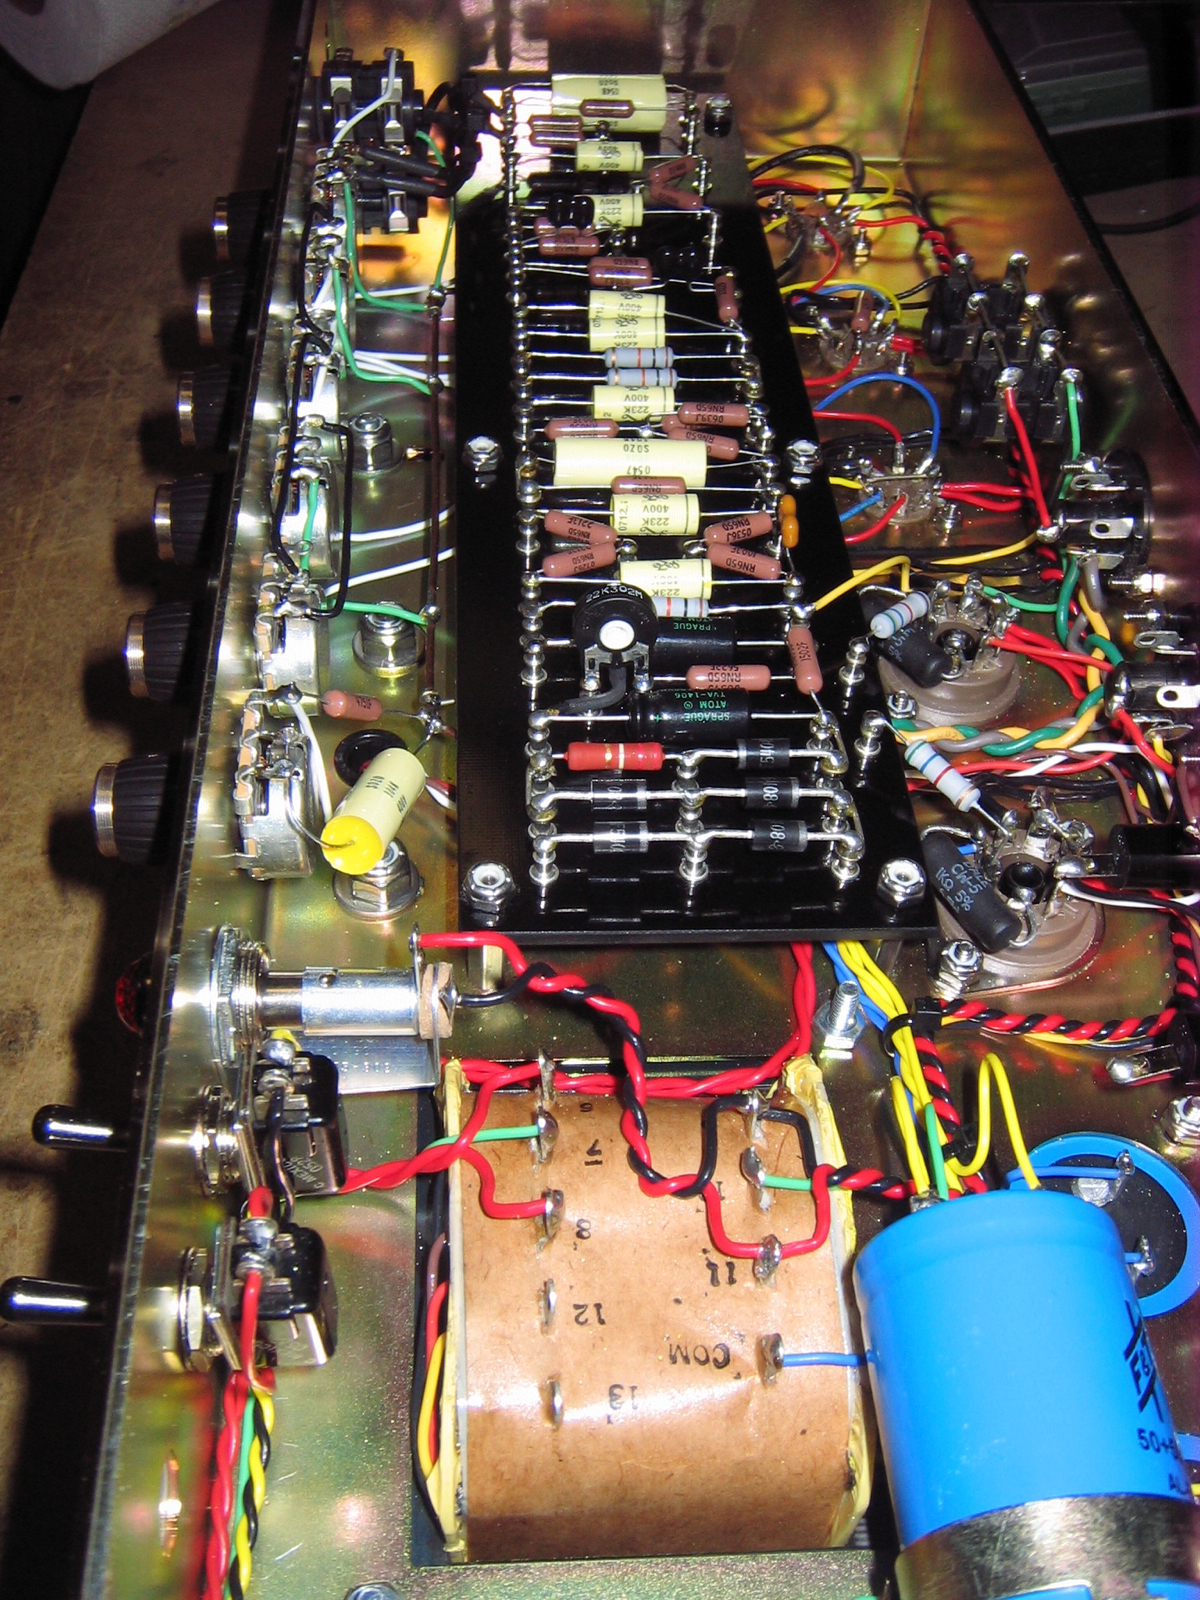
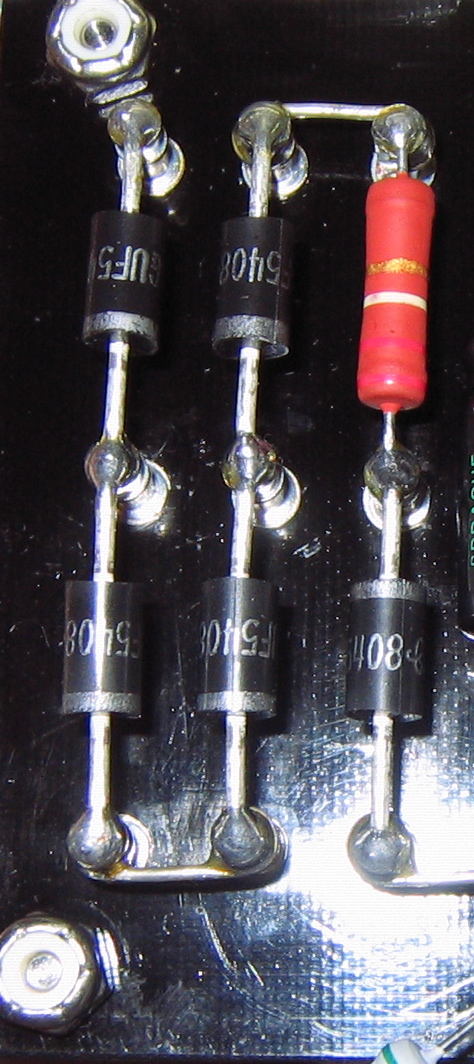
The power section has been beefed to industrial strength. Instead of the standard 1 watt resistor it has a 3 watt! The standard 1 amp rectifier diodes have also been upped to the 1N5809 fast recovery 3amp variety. The power section is 3 times as robust as stock.
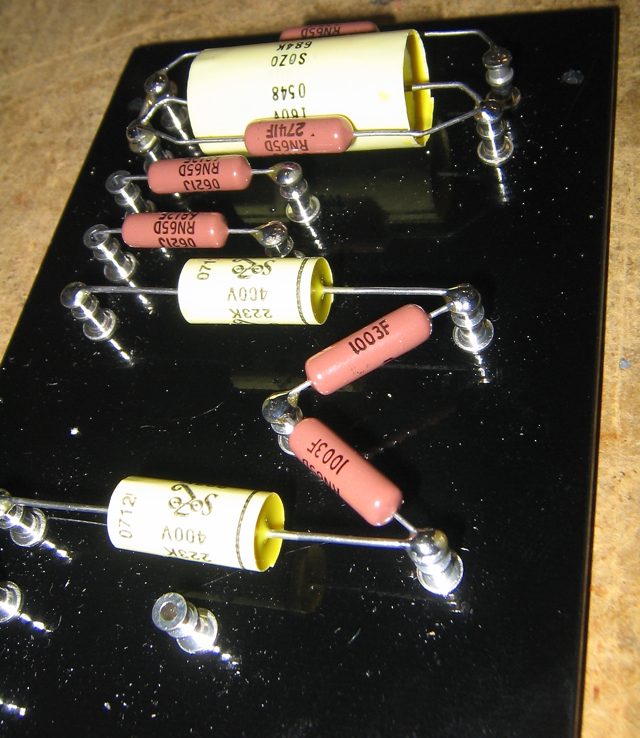
Some close ups of the turret board from left to right.
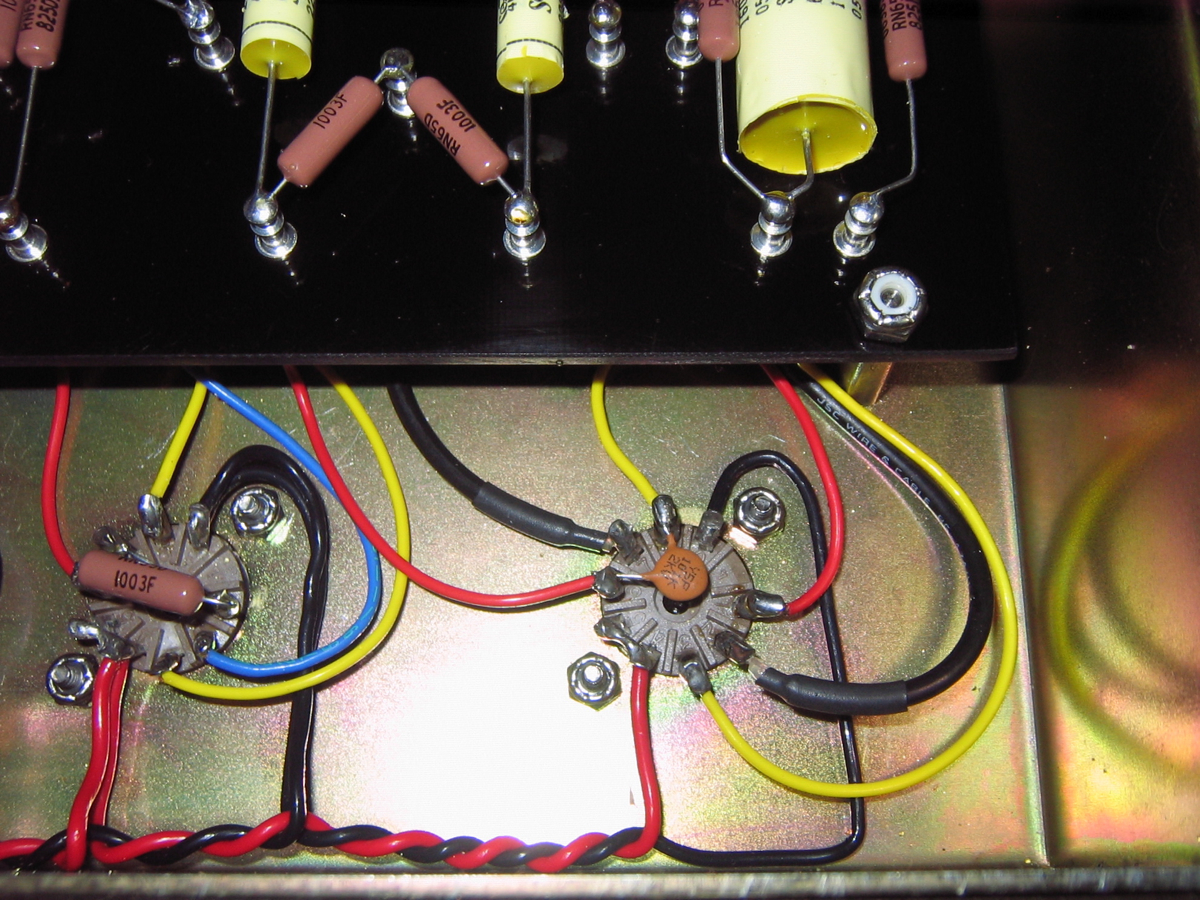
The cathode resistor (farthest to the right) has been lowered to 8.2k to slightly increase gain.
A close up of the presence pot wiring.
Power transformer and power switch wiring detail.
Shielded wire is used from the inputs all the way to V1 tube socket. The 68K resistors have been mounted on the turret board instead of hanging off of the input jack for a sturdier design. You can also see in this picture that the treble peaking circuit has been eliminated. This is a common modification to make the amp sound better at lower volumes. It also unclutters the signal path from the guitar to the first gain stage.
JCM204 Builds #3 & #4 - Jeanie and Vickie
Modifications over a standard JCM800 kit
Premium Components
Cabinet
Chassis
Turret Board
Tubes
Here is the recording rig. Read more below!
Recordings: The twins are very versatile amps. They can even to a pretty good clean. If you reduce the volume know on your guitar the amp cleans up very nicely as well. I find by using the volume knob I don't require channel switching. So you can see how this amp really sounds I kept the recording set up simple. I used a Digidesign Mbox with Pro Tools 7.3.1 cs4 software and a Shure Beta 57. No effects or pedals of any kind were used! The guitar is a Fender California Series Telecaster with a single Dimarzio Virtual Hot PAF DP214 F spaced pickup in the bridge. The guitar volume control is a push-pull type to make the pickup a single coil. The strings are Ernie Ball Power Slinkys. The cabinet is a StoneAge Custom Cabinets 2X12"B"with a closed back. The speakers are Southbay Ampworks Scumback. The left speaker in the 2x12 is actually a Scumback H55 bas cone and the right speaker is a Scumback H75. I mic'ed the right cone for all recordings. The speakers are 8 ohms each and are wired to provide the amp a 16 ohm load.
HOME |


I don't mind questions
but please donate!
Other Builds:
JTM45
JCM800 2204 "hell"
JCM800 2204 "Prototype"