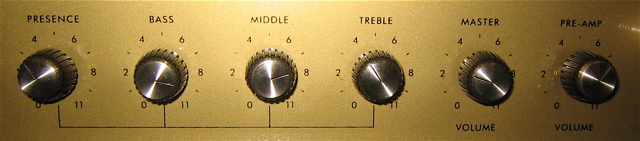
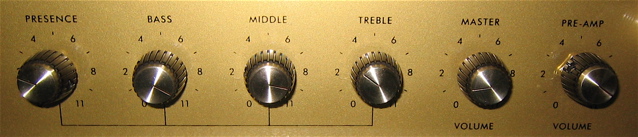
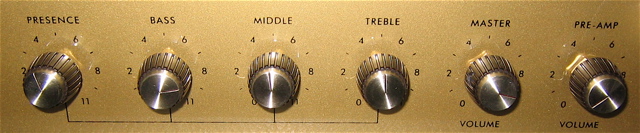
|

JCM800 2204 "hell" Amp Build
Well the last JCM800 2204 Clone I built sold on eBay in
one day! It was unbelievable. In 6 hours there were 17 watchers! I guess guitar isn't dead! I thought I killed it personally
back in 1997 but I was wrong. The members of my band, The
Hornrims, were extremely upset with me because it sounded so dang good. I told them not to worry - I can build another one.
They made me promise that I will not sell it. So since I am going to be keeping this amp, I am going to use the absolute
best of everything that money can buy. This is not an amp to sell so here I go. That being said everything has it's price...
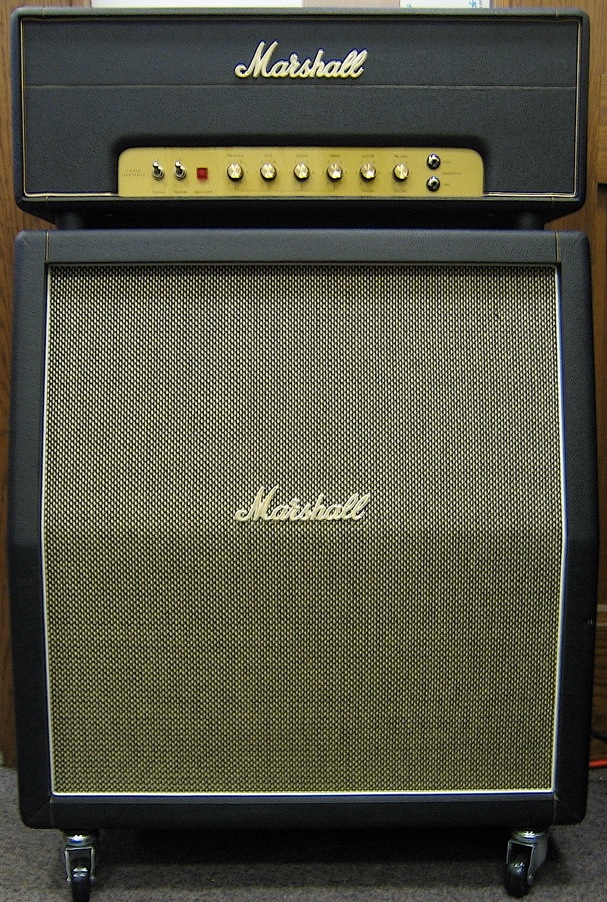
This is the last Marshall JCM800 Clone I built and sold. I still recently sold the Mojo cabinet.
I now have a StoneAge Custom Cabinet so I can fit the rig into a NYC Yellow cab
 . .
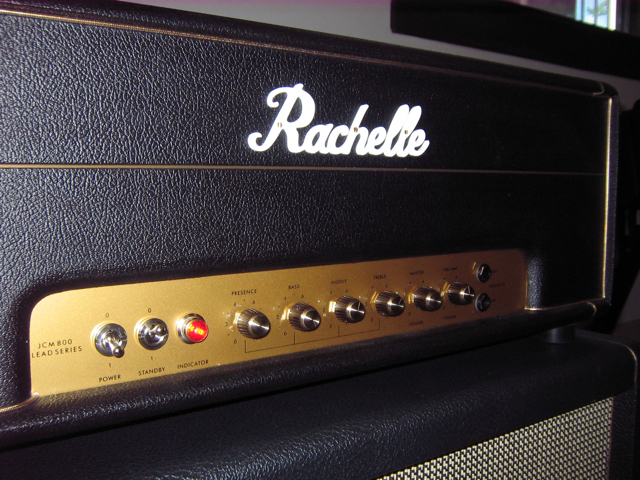
I do not use Marshall logos anymore as
the amp community thinks this is so wrong. My friend designed my own logo pictured above.
04.27.07
The first thing I obtained for this new build was a set of SoZo capacitors and a few carbon composition resistors (which I am not sure I will use) for the custom
turret board I would be making from scratch. These are considered by many to be the closest sounding to old Marshall caps as you can get. They were not cheap but not horribly
expensive. I ordered all of the values from Tube Depot. They have a lot
of cool parts and ship very quickly. I was actually going to put these in my last amp, but it sounded so good that I did not
want to rebuild the turret board from scratch to get these installed. I just decided to save them for this amp. 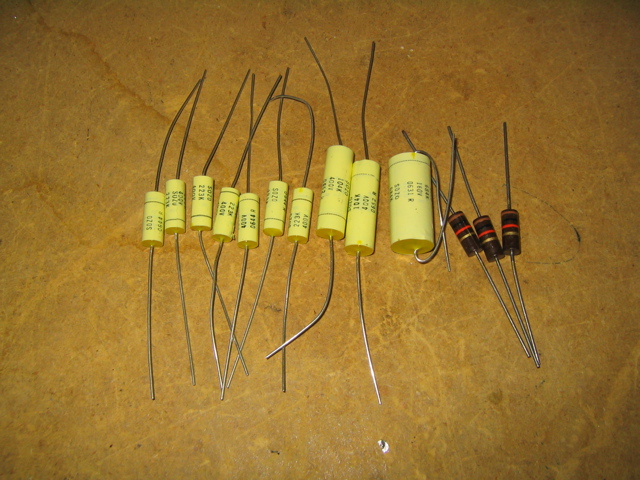
05.08.07
I was going to need a chassis and control plates so I emailed my main man Nik Azam at Ceriatone in Malaysia and he gave me a swinging deal on the chassis, the
front and rear plates, voltage and impedance switches and a few other various small parts. He asked if I needed a blank turret
board and I told him I would be drilling and staking my own custom layout turret board. 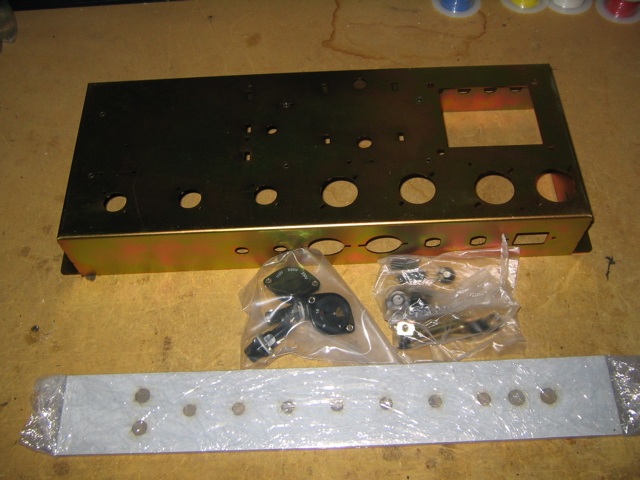
05.11.07
I ordered a bunch of turret lugs, a blank piece of
turret board material, and a staking tool from a really cool place call Hoffman Amplifiers. I ordered the wrong turrets! I wanted the bigger ones, but I am sure I will use these
for some diabolical scheme later. I also ordered a Fender style jewel lamp. I know - I am a blasphemer! A Fender style jewel in a Marshall you say! Egads!!! I
am no amp snob and it just looks cooler than the plastic Marshall "indicator". Gonna be doing some drilling though! 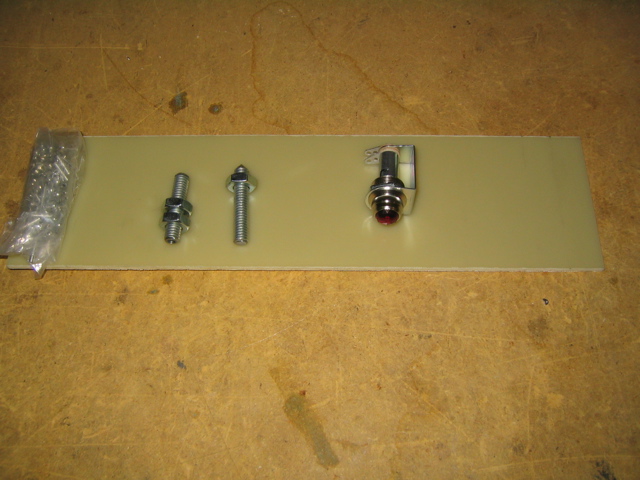
05.12.07
Well, sometimes you just get lucky! I was on the 18watt.com forums and S2 (His forum name) was organizing a group buy for
Mercury Magnetics transformers. I
saved about $100 over what I was going to pay retail by getting in on the buy. Mercury Magnetics are considered by many to be
the best transformers in the world by many builders. A lot of boutique builders use them like Mojave Amp Works. I am definitely shooting for the best of everything
on this amp. S2 also has a cool store called S2 Amps with a
lot of great amp building resources at good prices. Nice guy too... 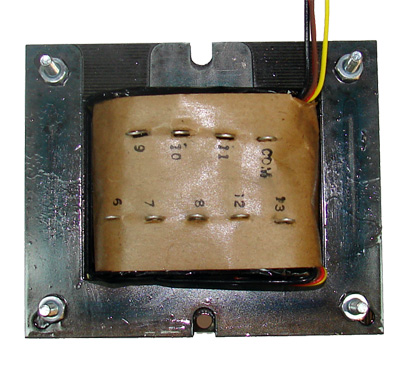
05.14.07
I wanted to get some parts ordered so I could get going on the build. My stock of resistors is comprised of 1/8 and
1/2 watt so I needed to get some 1 watts to get this thing built. I decided on carbon film resistors as many builders say that
it is a good compromise between the sterile low noise of metal film resistors and the noisy but toneful carbon comp resistors.
I put in an order with Metropoulos Amplification for
resistors. I also got some great quality Belton Micalex tube sockets while I was at it. 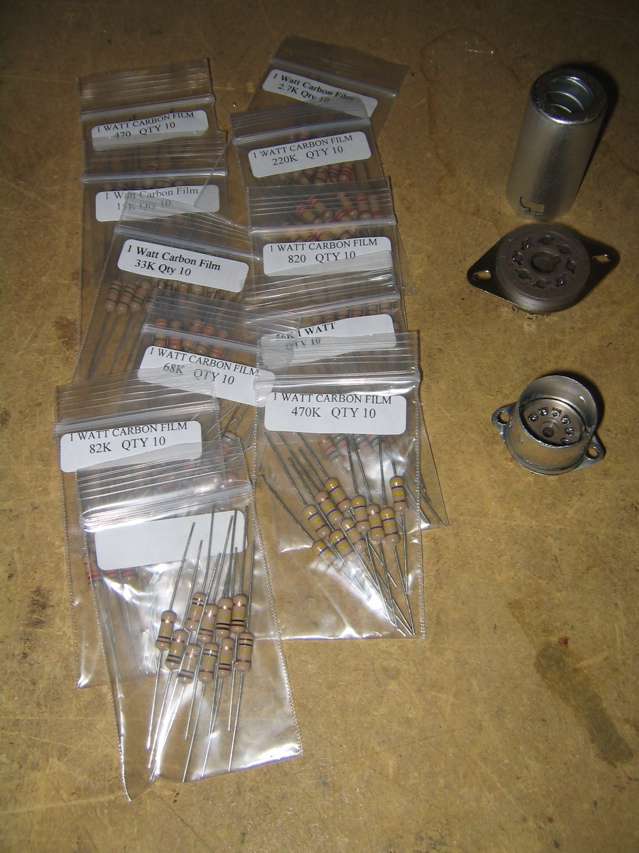
What about wire? Some of the wire on my previous build was Teflon coated silver plated wire and some was PVC coated silver
plated. Teflon is more resistant to temperature and does not melt as easily when soldered so I ordered a decent stock of Teflon
coated 20AWG and 22AWG for the build. I found a company called Powerwerx that has great prices and
excellent quality wire. How can you not order from a company that calls itself Powerwerx? That's just cool spelling. Sweet
wire too! 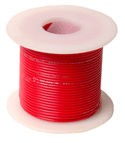
05.15.07
Since I will be drilling my own turret board, there was no way I was going to just use my hand drill and have
crooked sloppy holes. I want the holes perfectly drilled so the turrets are tightly seated. Part of my concept is to make a
very durable amp. Some people think I am a freak about stuff like this, but I like to go over the top - it seems to reduce
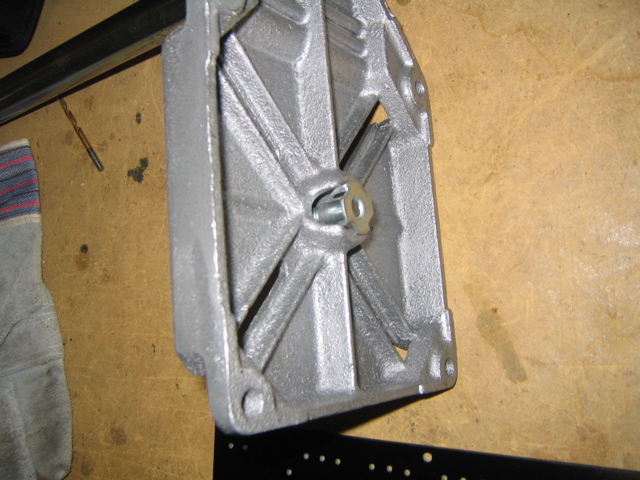
variables later in the build. I ordered a Wolfcraft 3408 Drill Press stand at the advice from Hoffman Amplifiers turret lug tool usage page from Aubuchon Hardware. 
05.17.07
I found this company online called Turretboards.com that
has really cool colors of turret board material. Who could resist black? Black is rock-n-roll. So I ordered a new turret board
blank. I also ordered the right sized bigger turrets for the custom board I will be drilling. I also ordered a couple #33 bits
from them that create the perfect sized hole for the large turrets they sell. 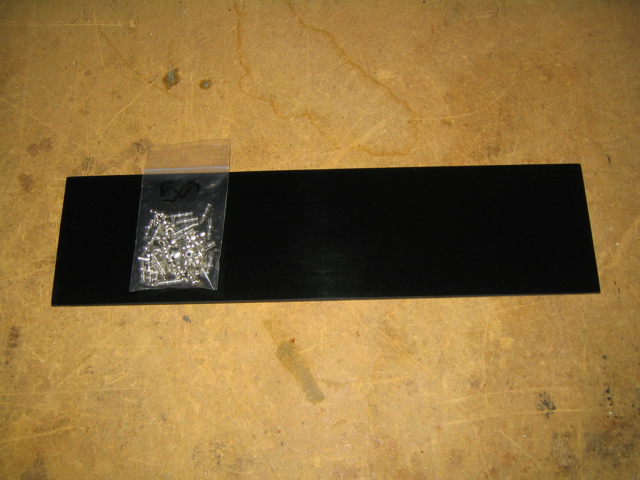
05.21.07
I ordered a Marshall style small box head cabinet made
by Mojo from a great company called Port City Music. This is the same head cabinet
as my last build. I really like the quality and finish . Good stuff. Daniel the proprietor, helped me with a UPS claim from my
last build. The speaker cabinet I ordered got dinked by the UPS goons (I can say that, I used to work for UPS) and he followed
up non-stop to make sure the claim got paid and I was satisfied. 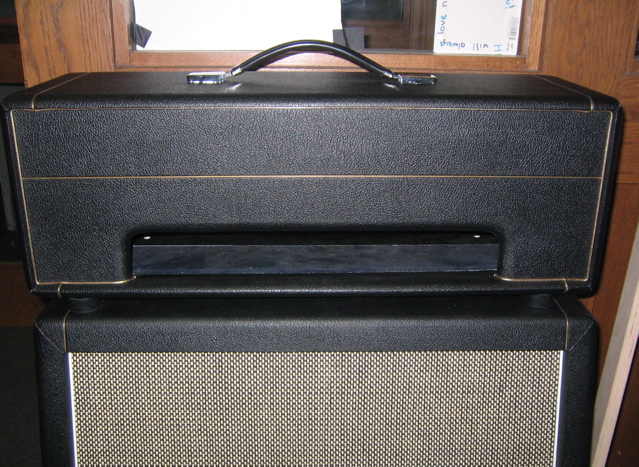
The money cleared for my last amp that I sold so I went crazy at the Metropoulos Amplification parts store! Some of the items I ordered are insane. Including 6 Plexi replica
knobs for $42!!! No, I am not rich - possessed I think is what clinical psychologists call it. Here is what a $7 knob looks
like. Can most mortals tell the difference? No. Worth it? Absolutely! 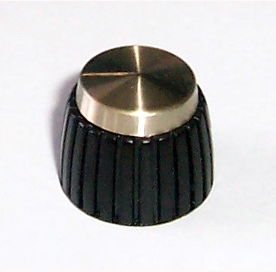
5.22.07
I worked like a madman on this layout in Concept Draw.
I wanted it to be exactly to scale so when I get the turret board material I can just tape it on and start drilling. I use this
program quite a bit for my day job designing studios. It's a great program and it runs on a Mac. If you don't have a Mac, buy one
now - you will get so much more work done! 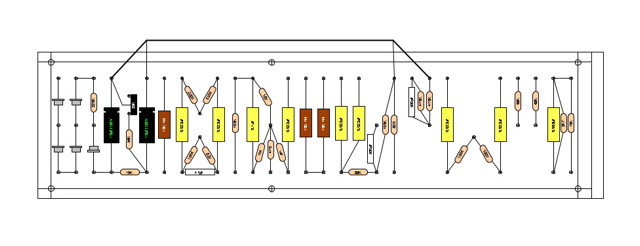
05.23.07
Holy crow! The head cabinet arrived already! I noticed it was better packed than the last one and Daniel told me he
packed it himself! Another point for Port City
Music! Good customer service is your best friend.
Where the heck is my drill press it's only shipping from Mass.???
05.24.07
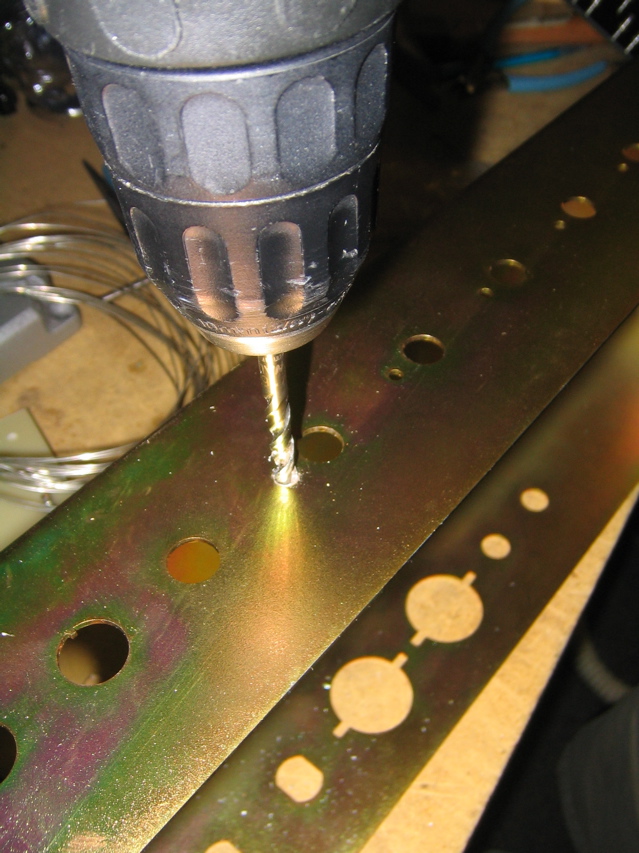
I wanted to start some kind of work on the amp today so I just drilled the holes in the head cabinet for the
chassis bolts. Not very exciting but it needs to be done and done accurately once or the bottom of the amp will look like swiss
cheese! No one looks at the bottom of their amp so does it really matter? Well, I often look at the bottom of my amps but I am
a very sick man. Here I am taping, measuring, remeasuring, and finally drilling the durn holes! 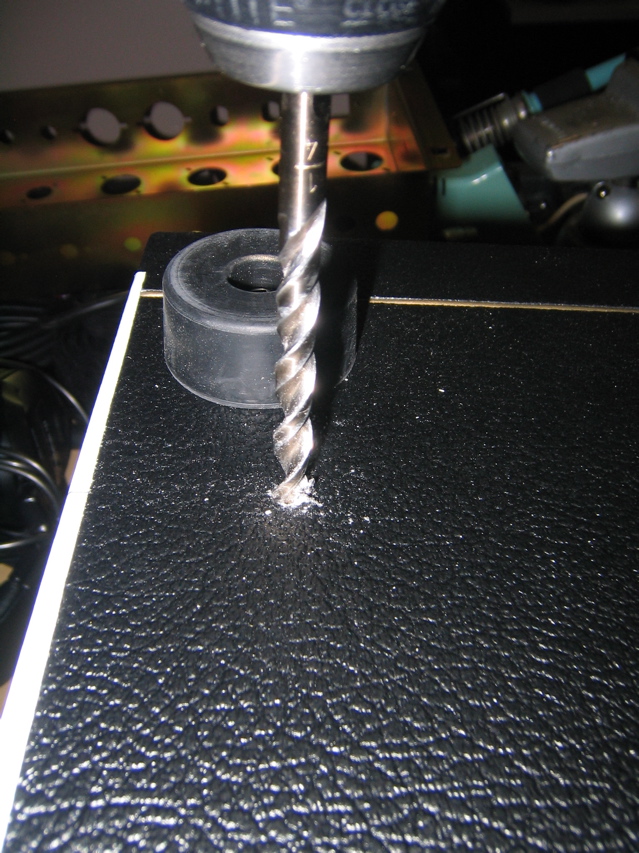
I cleaned out the excess levant (tolex) with an X-Acto knife so it does not
get caught in the threads of the chassis bolts. 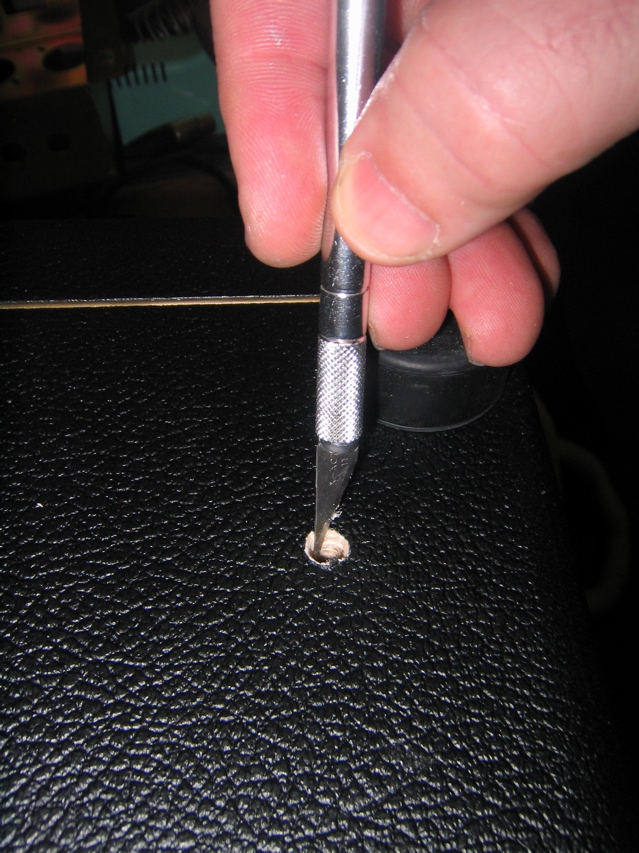
I also marked the head cabinet with a paint pen so I can line it up quickly after doing adjustments to the amp. Smart cookie,
huh? 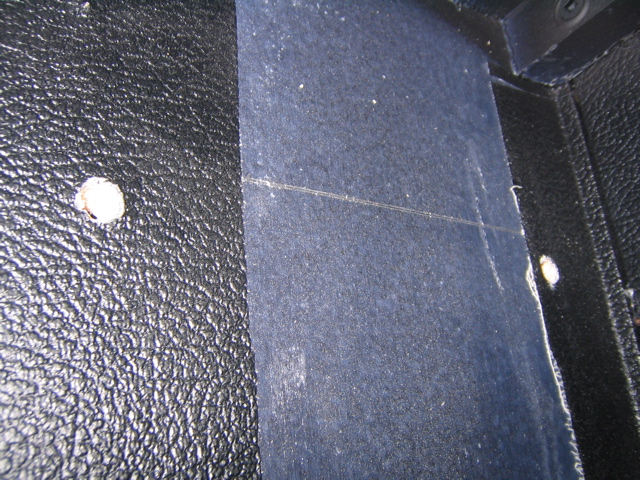
05.25.07
I was tracking my drill press on UPS.com and I new it would be here today so I printed out my layout and taped it
to the blank turret board material. To the guy who invented tape - you are genius and I thank you! 
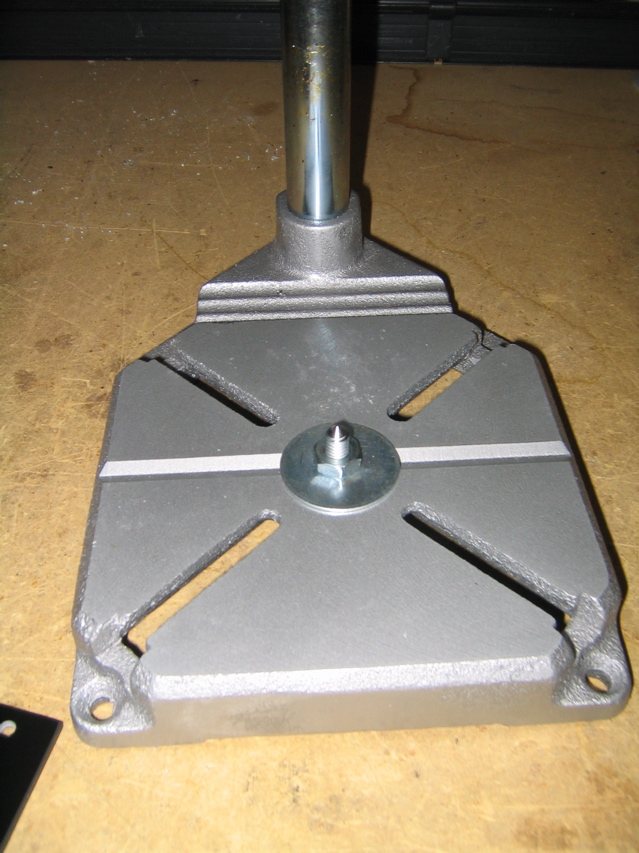
My drill press finally arrived and I quickly put it together. I
mounted my old trusty corded Dewalt Drill "Old Yella" that I appropriated from my boss into the mount. It's not a nifty as a
full blown press but it was $40 and very small. 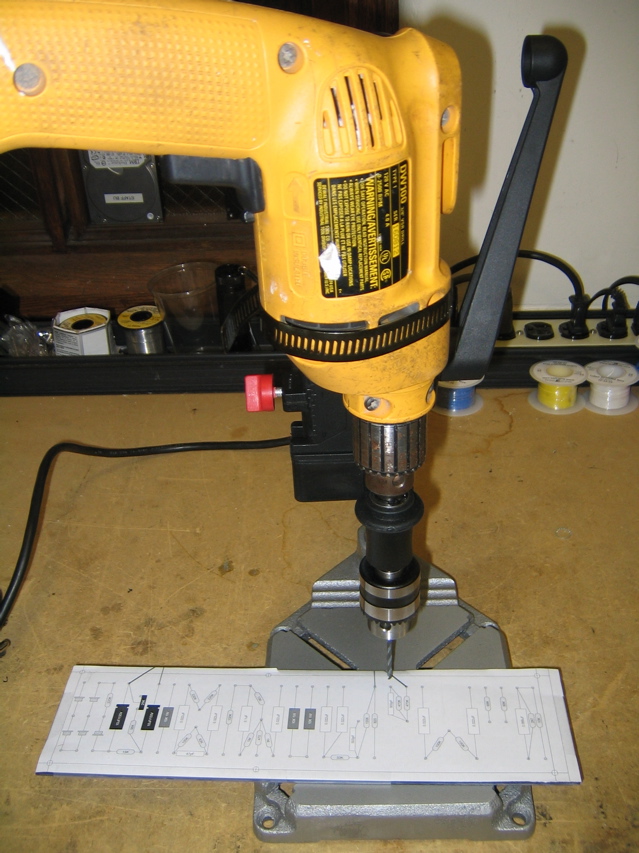
I can't drill and take pictures! Last year, I bad accident with a drill where a metal plate spun around and gashed my hand so I
am ultra careful nowadays. It was gross accident but if you want to see gruesome pics click here for the cut, and here for the stitches. Please clamp you work to the
bench or press you are working on, and wear goggles, ear protection, and gloves. We are guitar players and we need our hands
- don't abuse them!
Using the #33 bit, I drilled all of the holes. The drill was on high speed and went through the turret
board material like butter. After the first few holes, I put on a respirator mask for fear of inhaling the fiberglass dust. It
may be a futile attempt as I have been inhaling solder rosin for 15 years. I don't think my brain or lungs can be saved at this
point. But it's never too late to start being safe! Here's the drilled board: 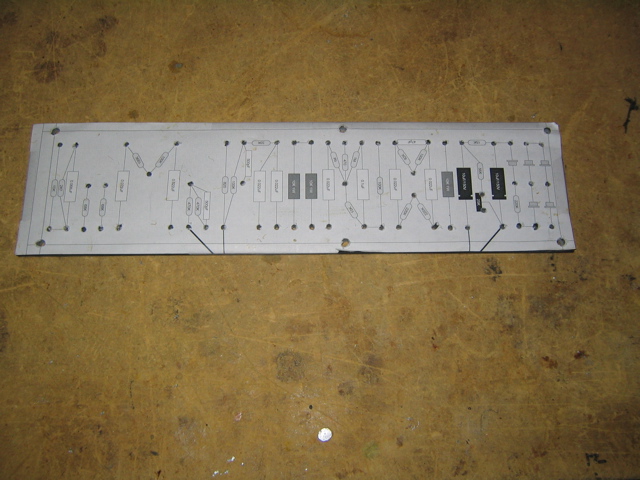
I now needed to press in the turrets. I had to modify the Hoffman
turret staking tool by drilling out the hole to accommodate the larger turrets. Next I had to mount the staking base to to the
bottom of the drill press. I thought about making a plate, but I found a great fix in the form of a T-nut.
It fit perfectly into the base of the drill
press so I bolted it in.
I lined up the
staking tool and tried my first turret.
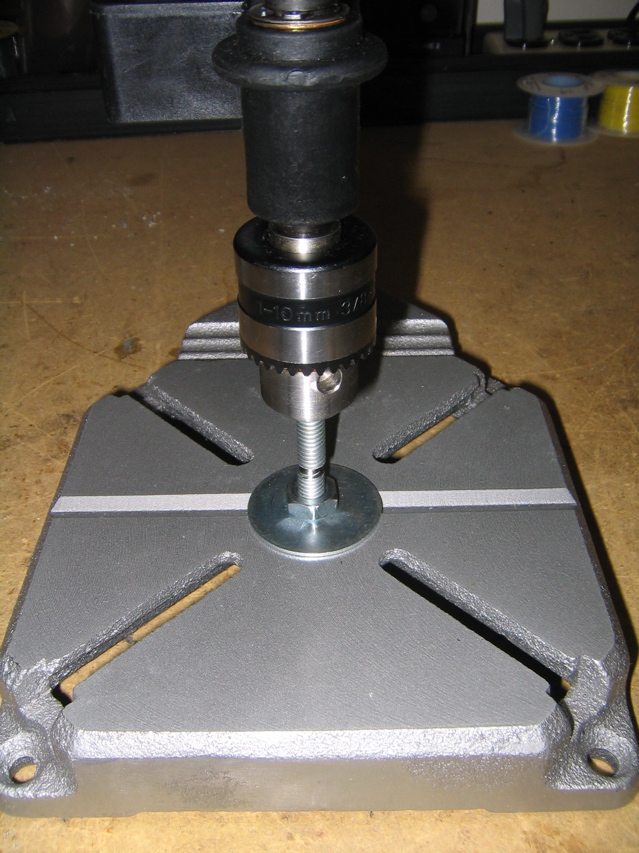
I could
not get enough pressure on the turret because the plastic handle on the drill press was starting to flex and I didn't want to trash the
press. I removed the drill mounted part of the press and just used the base plate and a hammer. This works great and you feel
like you are really making something with your hands. I was careful not to beat too hard, but I got the turrets in nice and
tight. 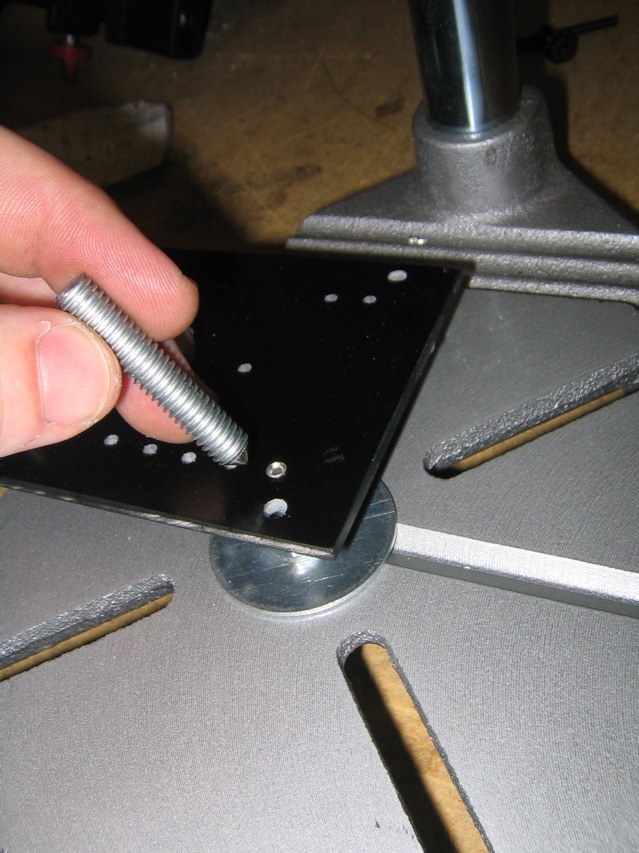
To help level the turret board when I
was working on it. I used my camera case to prop up the board. I didn't want any funny angled turrets. 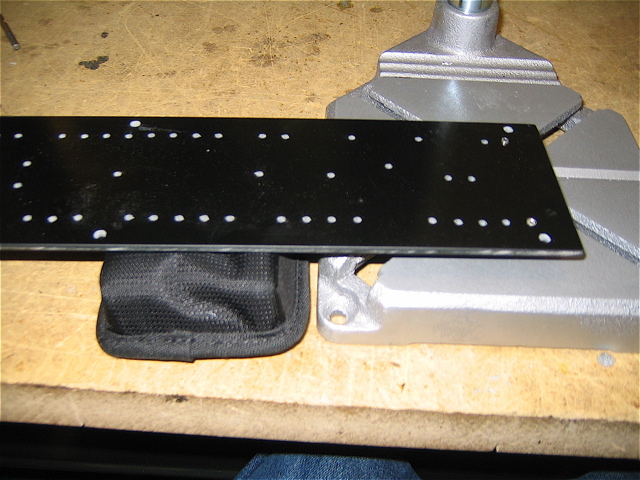
Here is a shot of the staked turret board. 
It
came out so awesome.
*Note: buy thesaurus, find new adjective besides awesome... 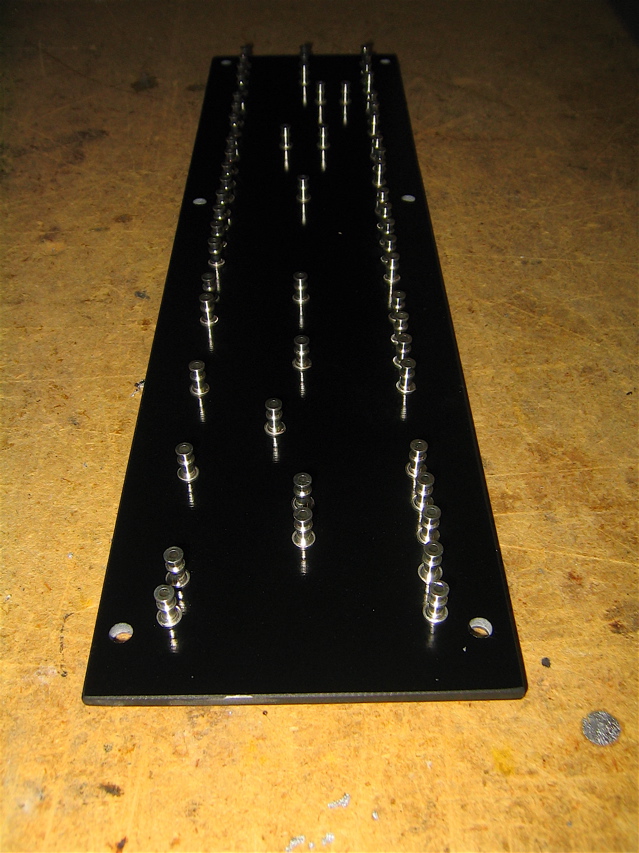
I started to carefully mount the components. I found these
incredibly cool metal case diodes at Metropoulos
Amplification and started to solder them in. I dry mounted the first and got the leads just right. I double checked my
ancient Radio Shack electronics
book to be sure I had the anode and cathode orientation correct. 
05.30.07
I took a few days off from work to finally just relax. I have been working really hard on my own layout drawing
while off from work. It is basically the same as Nik's from Ceriatone
but I wanted to have my own done in Concept Draw so I can modify
it and use a little more detail for my specific build. I am not going to post a pic yet because it needs several corrections
and I don't want anyone to build it and fry their transformers!
I decided that instead of cramming all of the component leads and jumpers into the turrets I would use the second step on the
side of the turrets for mounting certain things. This way if I need to make changes I won't have to struggle and squeeze
everything back into the turret hole. Here's a pic of a jumper on the side. 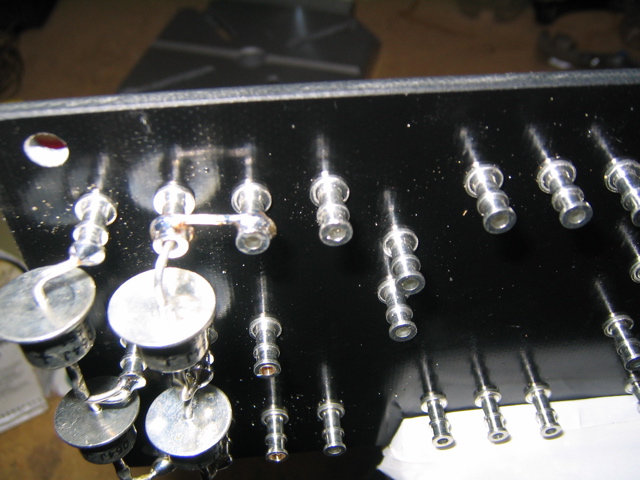
Now I have come to a point where I have decided to change the resistors to a different make. I found these ridiculously
expensive, but very high specification carbon film resistors made by Riken. They have a 1% tolerance which is amazing. They
also have gold plated leads so they look wicked too! Seriously, these things are like $5 a piece but I had to try them. They
are no longer being made and you can hardly get the values you need. I rounded them up from Angela Instruments and Parts Connexion (no, it's not
spelled wrong!). Here's a picture of these blue beauties. 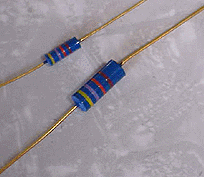
After a few email conversations with amp tweaker Jeff Doyle, the guy
that bought my first JCM800 Build, I decided to try some more
mods after I get the amp up and running. Jeff has done massive web research and testing on JCM800s, and he has referred me to a
bunch of cool modification websites. In order to do one of the mods, I needed an extra turret. So I drilled a hole and staked
one in. I used a straight edge (a piece of blank Hoffman turret board stock) to mark the hole. 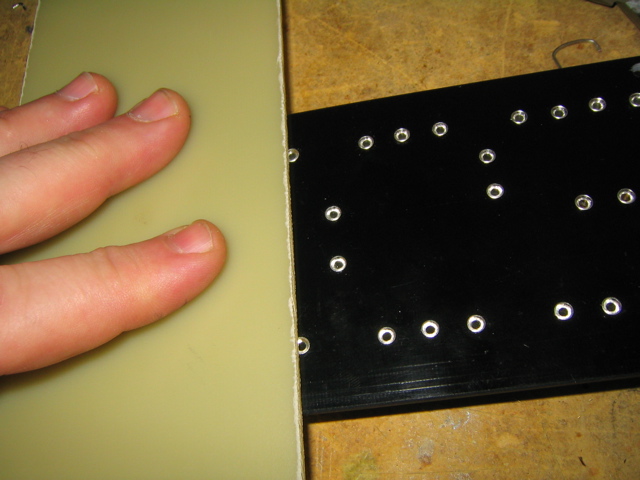
The shaft length on the PEC
pots that I received seemed a little long, and sure enough it was. With production stopped on the
turret board until I get the Rikens, I decided to do some other work. I sawed off .25" off of each of the six pots and cleaned
them up with a grinding wheel. I do not reccomend trying this! I am pretty good with metal work and it took a long time. I
also had to hermetically tape all of the pots up so nothing would get into them. Took forever... 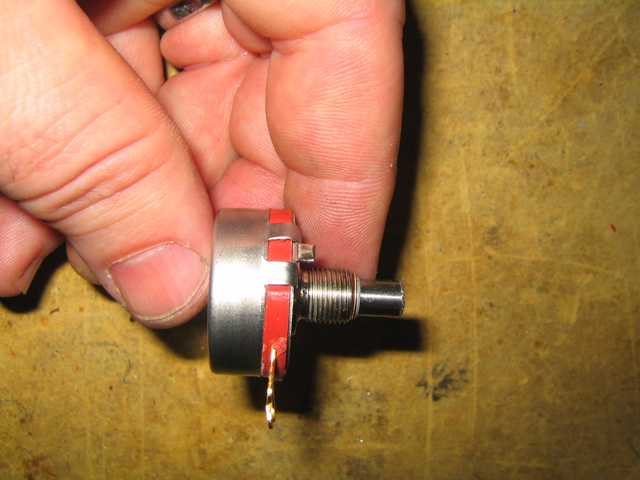
The lock tab did not align with the tab hole drilled in the chassis. I am starting to regret not using good ole Alpha
potentiometers (these just drop right in perfectly)! These are supposed to be the deal though, so I am going to work to get them
in. I drilled out all of the potentiometer lock tab holes in the chassis using a 7/32" bit and the pots now lock right in. I
have spent 3 hours on these pots and they are not even wired! I think there is something wrong with my brain.
The knob distance from the control plate looks perfect now! 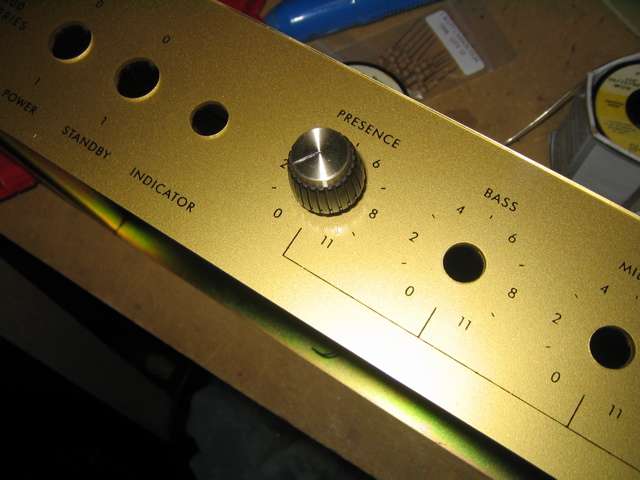
While I was doing some of the odds and end for the job, I looked at the head cabinet back panel of the Mojo small head box and
decided I didn't like the chrome screws that came with it. I changed the screws to real brass ones and also added trim rings.
Looks much nicer. 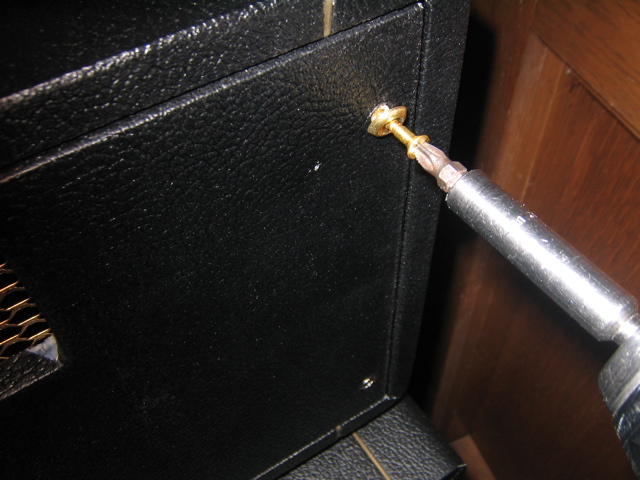
06.06.07
The date of the Devil - 667! Well, close
enough. I have not been able to work on the amp because I have been apartment hunting. If you live in NYC you understand what I
am talking about. It is an evil process with a ton of cash exiting your bank account in a quick fashion. I would rather rub my
head with a cheese grater, while chewing tin foil, and run around the block in asbestos underwear before I want to look for a new
apartment. We found a place eventually so I finally feel settled. I tracked my shipment from S2 and have found that my transformers have arrived. I am going to get them
mounted tomorrow!
I also have a Marshall 1922 2X12 cabinet on the way. Here's a pic. It has Celestion G12T-75W
speakers in it and I am curious to compare those side by side with the Greenbacks. I love the Mojo 2X12 but I
have to face the reality of getting to gigs by NYC yellow cab and I just cannot haul the Mojo cab alone. I am going to experiment with
the Greenbacks in the 1922. If I don't get the sound I want I will keep the Mojo and sell the 1922. 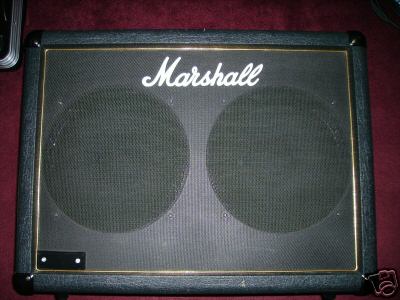
I just found out today that my band The Hornrims will be playing at the world famous Don Hill's for our first show! It is not until September
8th so we have time to get super tight, but I am excited about using this amp at the first show. 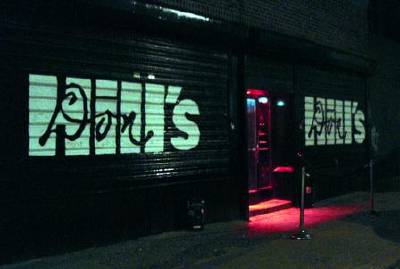
06.07.07
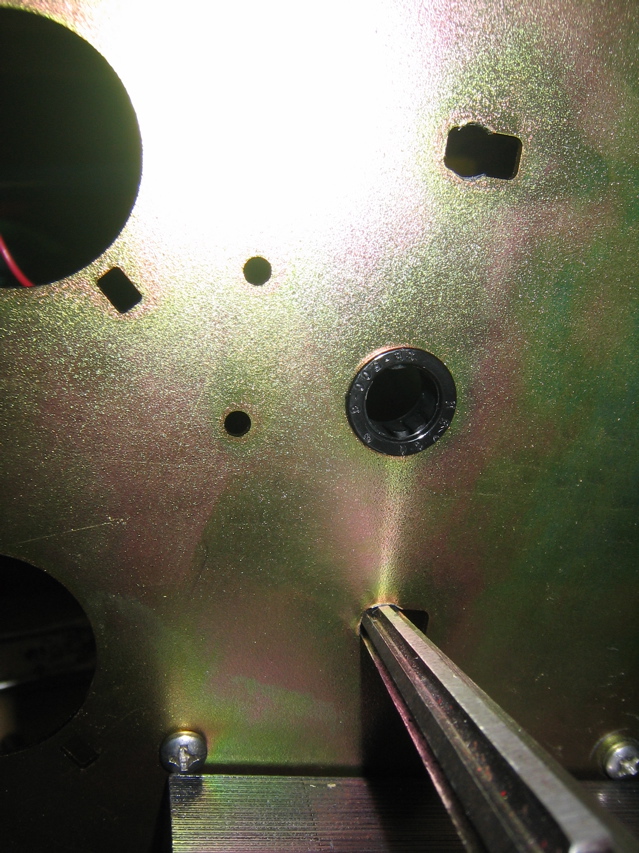
OK, I got back to work on the amp. The first step was to get the pilot hole drilled out to 11/16". I really
didn't want to buy one expensive bit to drill one hole, so I invested in an Irwin #4 Unibit. I always wanted one so I
finally plunked down the 30 bucks to get it. It works like a dream. 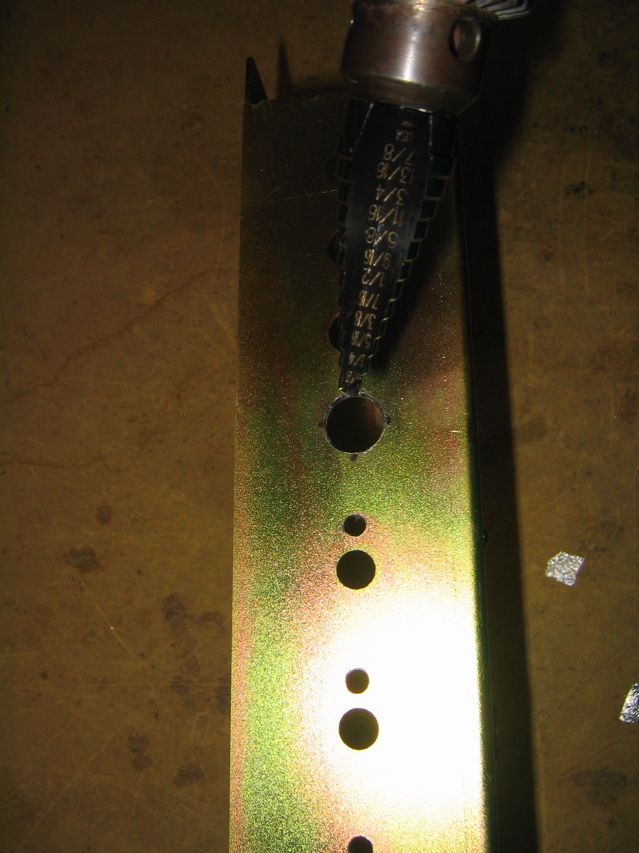
I tested mounting the pilot light. Fits like a glove! I can hear the
Marshall purists mocking me now... 
I used the Unibit on the plexi front panel as well. Works great on plastic too! 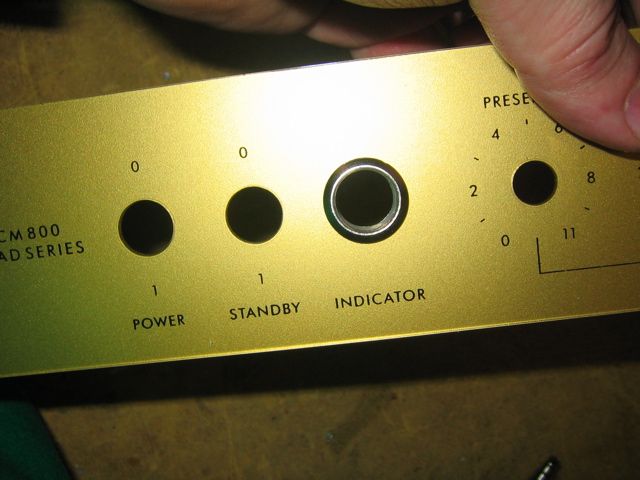
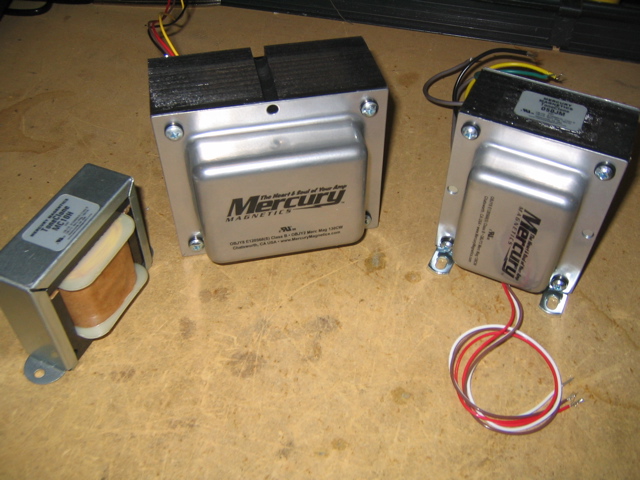
Now I am excited! My Mercury Magnetics
transformers came in! According to the worldwide consensus of amp builders, these are the best tranformers available.
People who have no consideration for cost use these, so the choice for me was simple. They are not that much more money
when you look at the big picture of what it costs to build an amp. This amp is mine - so only the best. The output transformer
is the most critical for tone, but I am not taking any chances. I am using all Mercury Magnetics iron
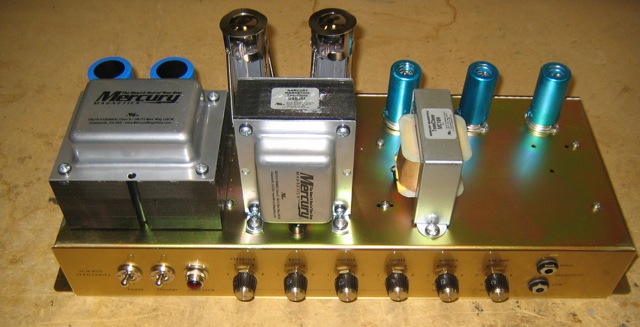
(iron is amp nerd speak for transformers). They look awesome too.
Here's a pic of My Three Sons. Left to right: Choke (Tone Clone MC10H), Power Transformer (P4550JT-G2), and
Output Transformer (O50JM).
I used quarter inch stainless bolts and stainless Nylock nuts for the OT and Choke. I had to widen the holes out with a tapered
reamer.
I actually had to drill a new hole for the choke. It's huge! No problem - 1/4" bit does the job. 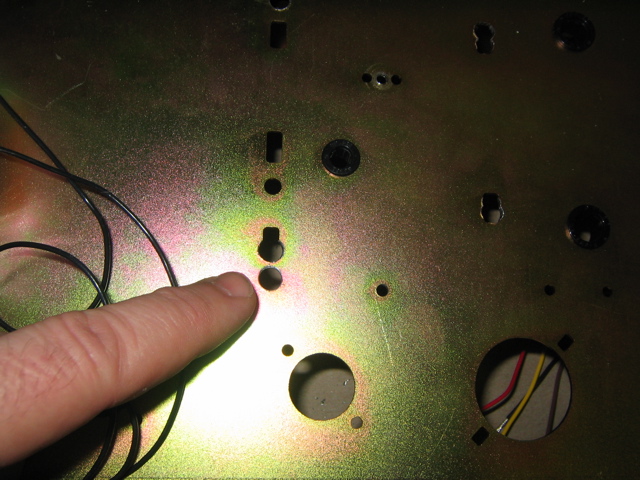
Here's the transformers and choke all mounted up. Please don't drool on your computer! Sooooo Impressive... 
Here's the bottom view. Holy cow look at those fat bolts! 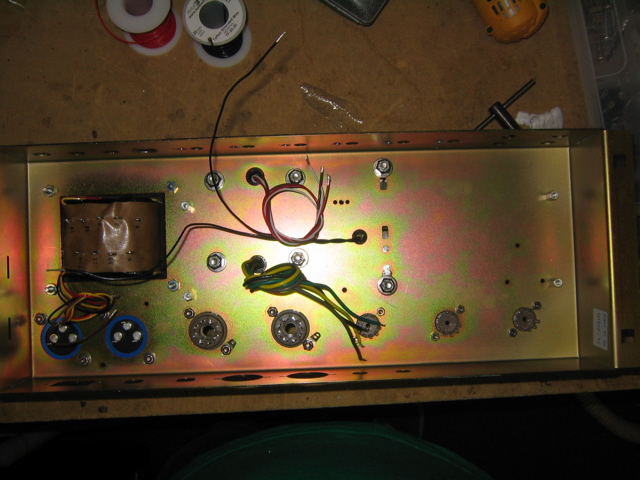
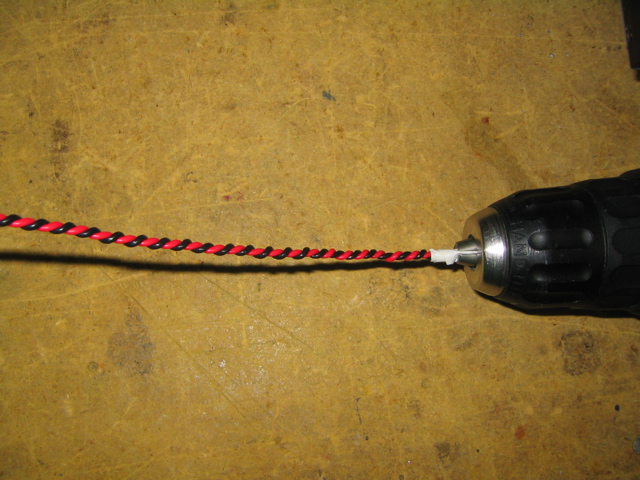
Now comes the time wire the heaters. I read on some of the forums about using a drill to twist the wires.
It works really well. Here is a pic of a practice twist. The red seemed too straight so I redid it to be sure both wires twisted evenly
I completed the heater and pilot light wiring. Man, this takes a long time! 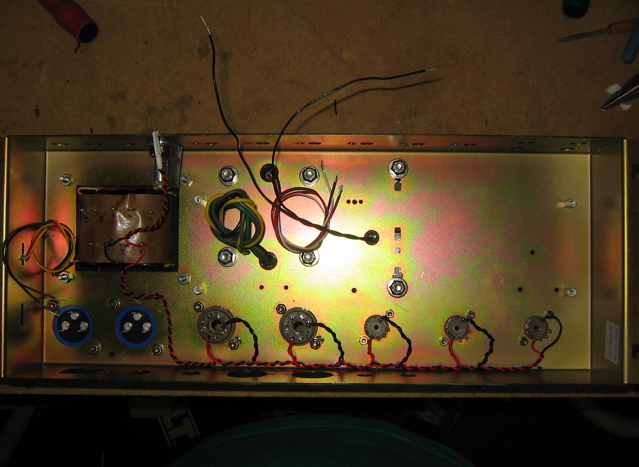
I got a few of the Riken resistors today from Angela Instruments. I wanted to just solder one in to see how it looks. I used an
alligator clip to help dissipate the heat away from the resistor. I am not sure if this trick works, but I saw a guy do it
on another site. I forget where I saw it but thanks to whomever you are! 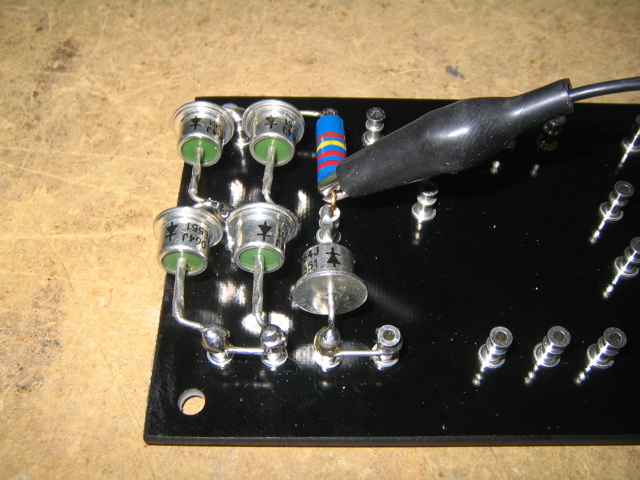
06.08.07
I thought I would wire up the input jacks whilst waiting for the rest of the resistors.
I used shielded wire, but it is such a short
distance I am not sure that it matters. I wired the jacks in more of a standard Marshall way with both tabs facing one way. My
last amp, the top one was flipped to facilitate easier soldering of the 500pF cap and 470K resistor from the input tab to the
1Meg Pot. I am eliminating these 2 components in lieu of a 68K resistor which I am actually mounting on the turret board. 
Next I installed the impedance selector. I braided the wires coming from the OT. I stacked two spools of solder to use as a
stand to get it to the right height to solder it nicely. 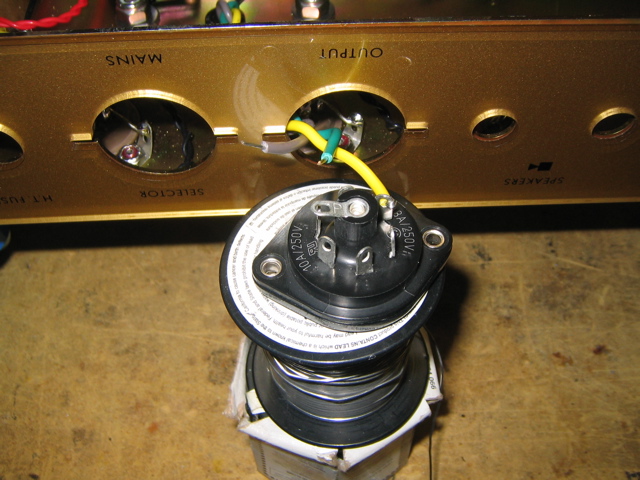
Here's a bunch of wiring done. I know - I'm a freak. 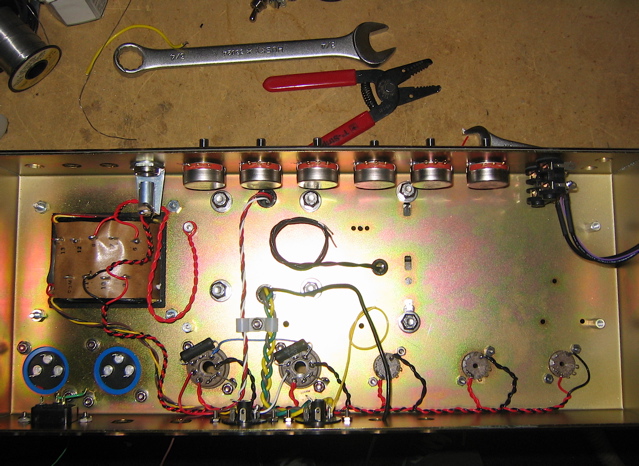
Close up of OT wiring. Trying to keep it neat...
*Note: The OT primary wires are reversed here (as you will read later in
the blog) the white should go on V5 and the red on V4! 
Close up of PT wiring. Looking nice! 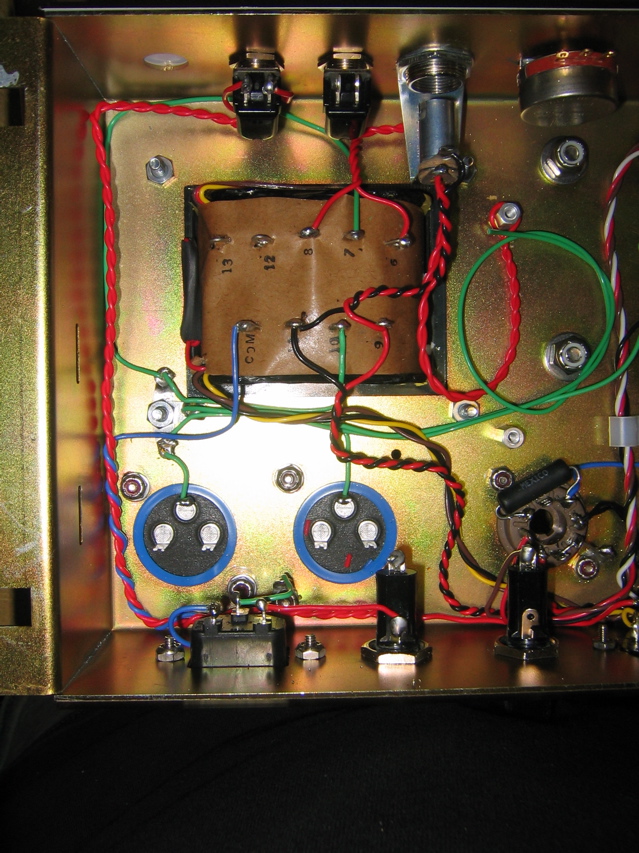
06.09.07
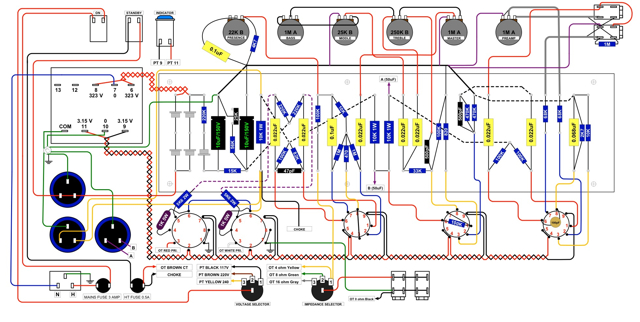
I think the layout is done. It is basically a copy of Nik Azam's from Ceriatone with some very minor tweaks. Thanks Nik!!!
*Note: Lug 7 and the "COM" on the power tranformer are switched! I will fix it soon!
06.11.07
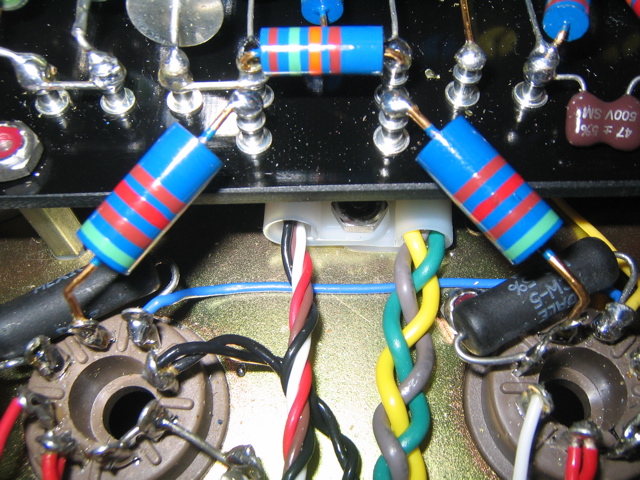
I got all of the resistors today and they look really cool. They are kind of fat, so I had to be creative
when mounting them on the turret board. Here's what I have so far: 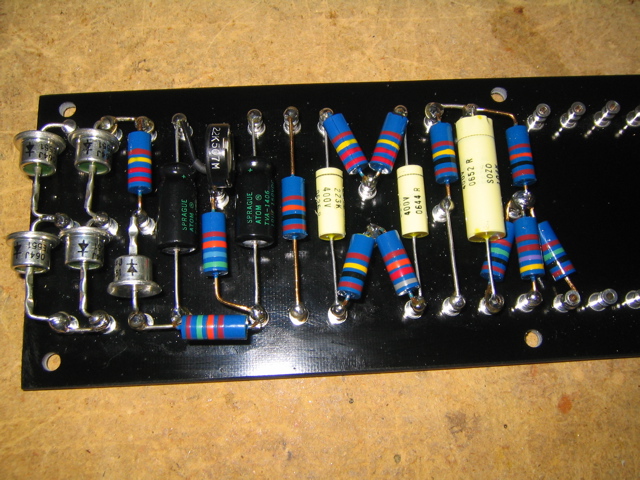
06.12.07
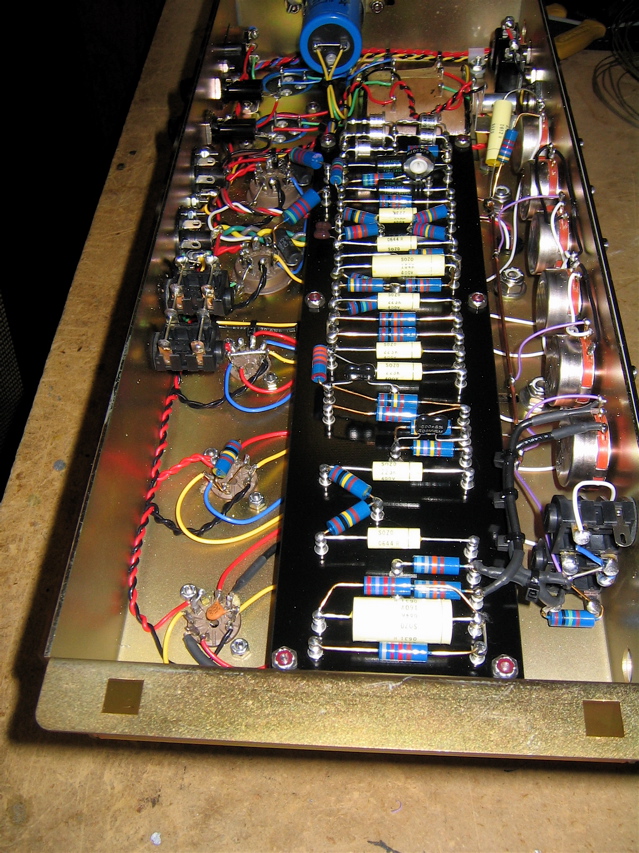
I finished mounting all of the components on the
board. It came out super sweet. I can't wait to fire this baby up. It won't be long now. 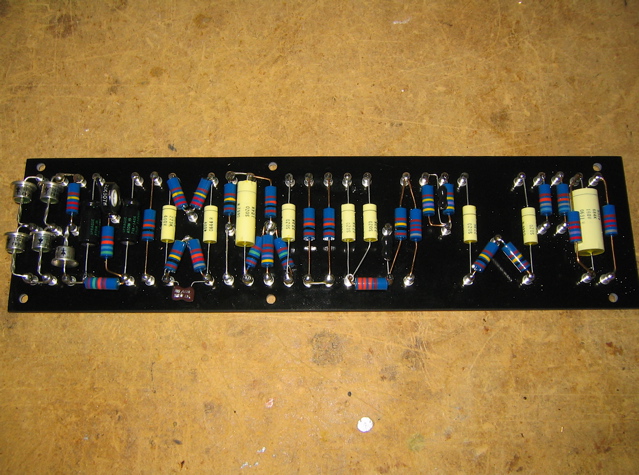
06.14.07
I started to solder all of the leads and jumpers on
the back of the turret board. I had to keep flipping the board over and I was starting to mash my components. Instead of
"component squish" I decided to use some long standoffs to act as a board stand. Works great! 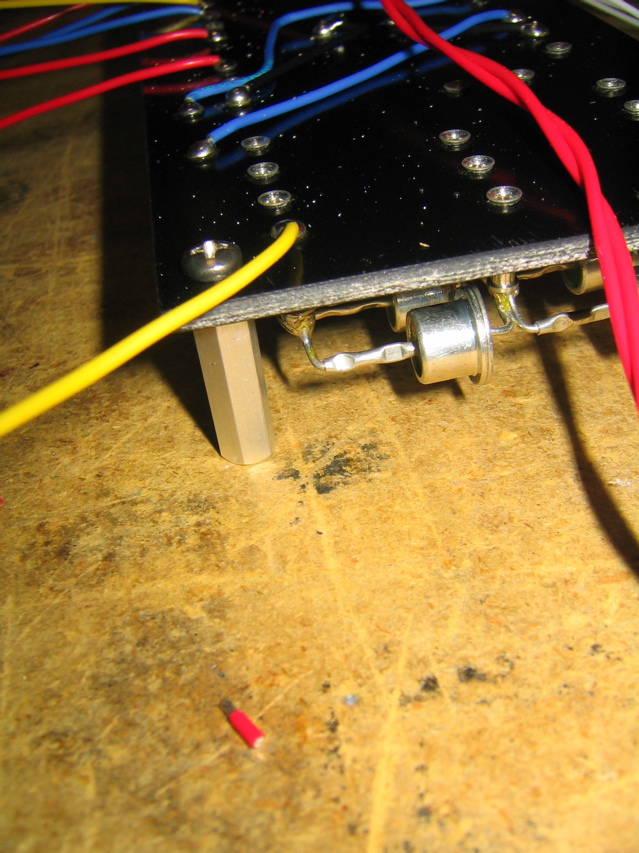
Here is a shot of some of the leads soldered in. Some of the solders need touching up I know, so please don't flood my email
inbox and say I can't solder. Kind of looks like the flying spaghetti
monster! 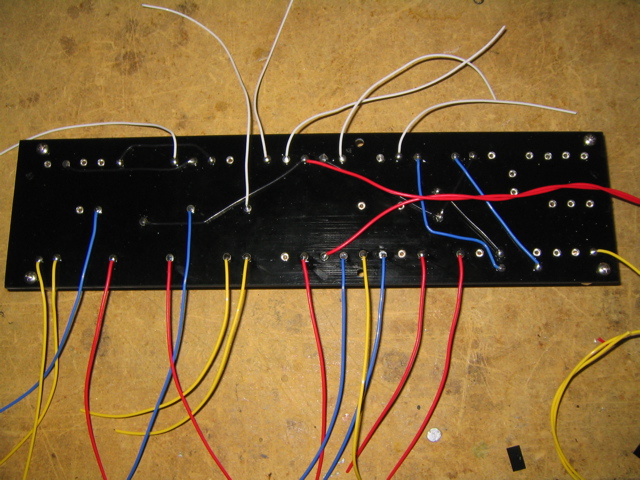
I neatened up the power and standby switch wiring. I make use of nylon clamps to feed the wires through as you can see in
various sections of my build. It's not very vintage but makes for a neat job. No one looks at the inside of an amp when you are
on stage anyway - why do I torture myself?
I dug around and found my favorite stainless steel standoffs and mounted them to the chassis. You will see aluminum ones in
other shots. I don't do aluminum hardware. It's like Heineken compared to Pabst Blue Ribbon. Well, that doesn't really make any
sense - stainless is just stronger. I soldered all of the connections that go on the back of the board by holding the board
perpendicular to the chassis right next to the power transformer. I then "folded" the board down onto the standoffs. This keeps
the wire runs short. Nylock nuts of course. Check out that sweet buss bar that runs along the top of the turretboard!
I am using the same grounding scheme as my last amp
because it worked so well. The buss bar design is actually Nik's from Ceriatone. 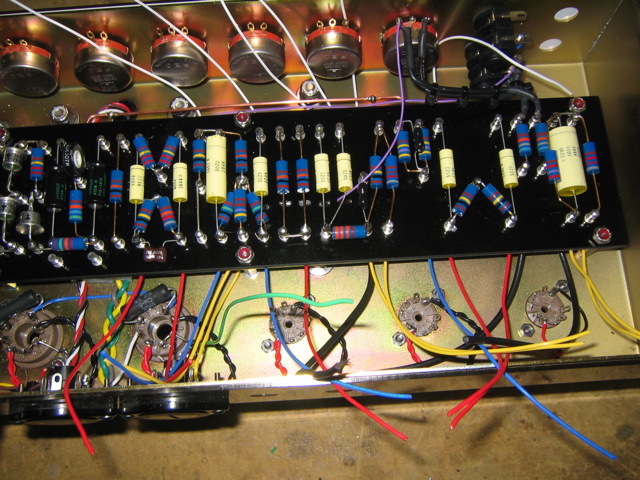
06.18.07
Take my word for it, don't ever move when you live in NYC - it is brutal! I have not had time to work on my amp
until today because I am painting my new apartment. Anyway, enough of my personal jive, back to amp world.
I got mostly
everything finished today, but after doing some continuity checking, I realized I had a few wires transposed. No problem - I just
unsoldered a few wires on the potentiometer side, and the board folded up like a hinge. Then I just fixed the wires and flopped
it back down. Quick, easy, and painless. 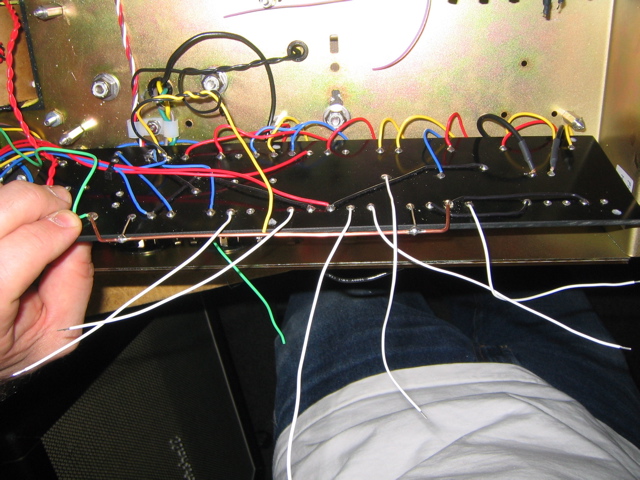
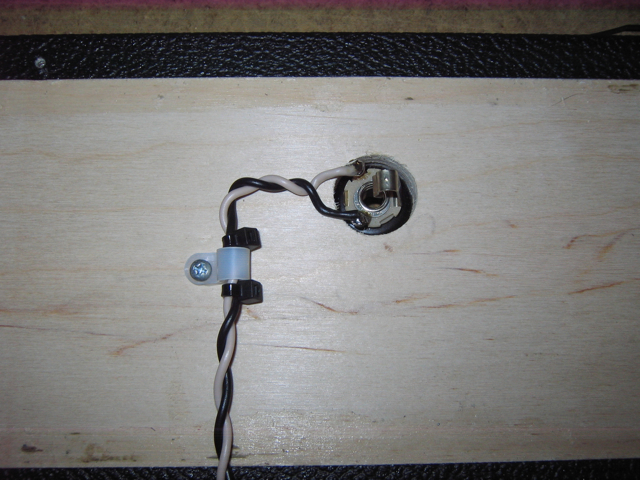
I just have to pop in the speaker jacks... 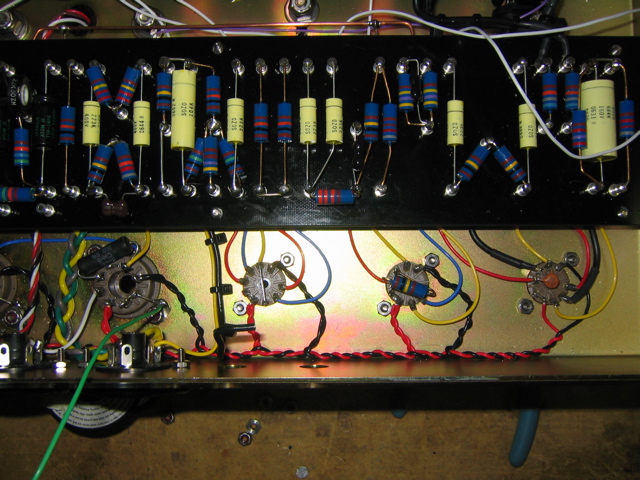
Wow, that was fast! 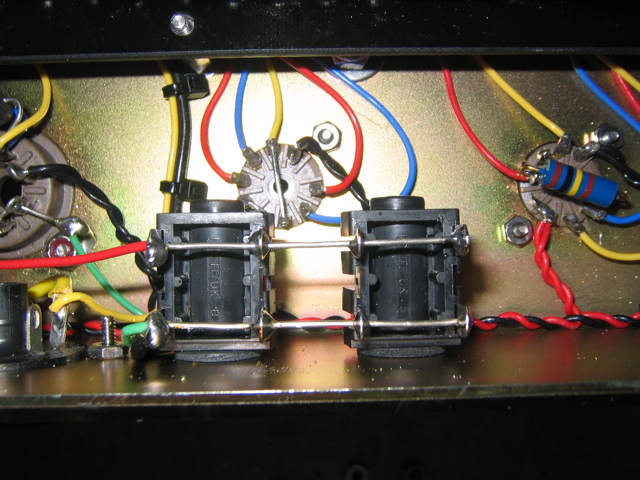
I couldn't stand having my preamp tubes with regular nuts so, you guessed it - I ordered some 4-40 Nylock nuts from a hobby
shop and put them in. I also used them on the voltage and impedance selector switches. Now I can rock like crazy without the
nagging fear of any nuts vibrating off. No double entendre intended... 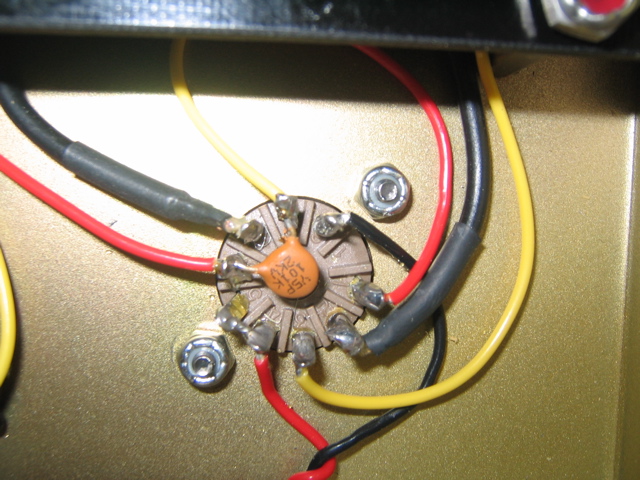
I wired up the cap cans and made it all neat. I am using a single star ground because I had such good results with my last amp.
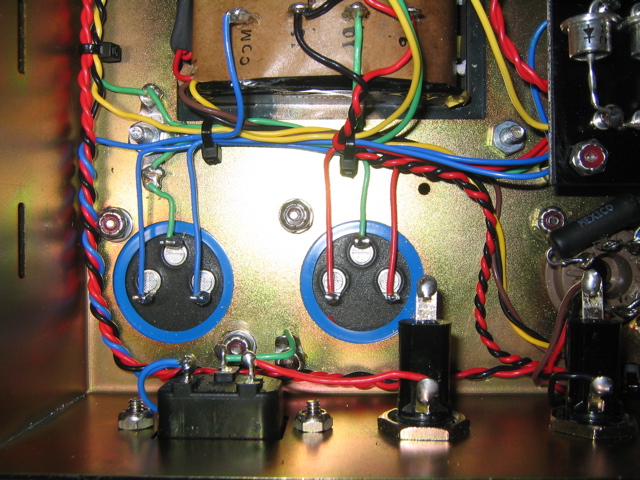
I bolted in the third cap can and wired it up as well. Whoops, forgot to connect the 2 positives! I'll get that tomorrow... 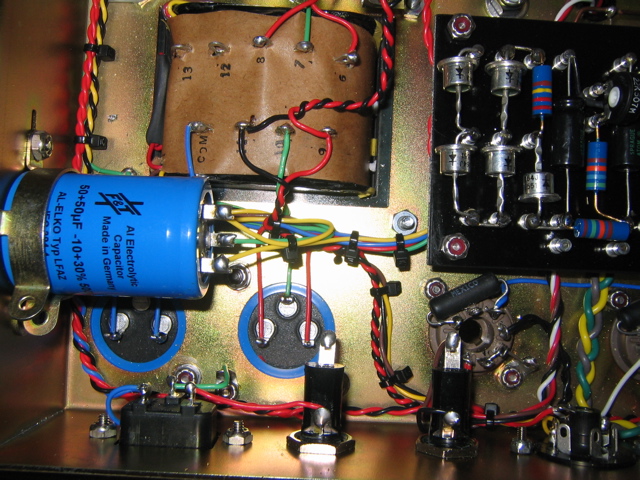
I did a really cool thing here. On my last build, the 2 resistors coming from the tube sockets were kind of just floating
around in the chassis on two wires. I cable tied them and it was fine. For this build, I added 2 more turrets and wired them to
the proper connection points. Now I have a firm mounting point for the resistors coming off of the tubes. It's really sturdy!
I wired the cap and resistor to the presence
pot. I used a cool trick I stole from somebody by twisting the lugs on the pot making it easier to install or replace the cap
if need be. 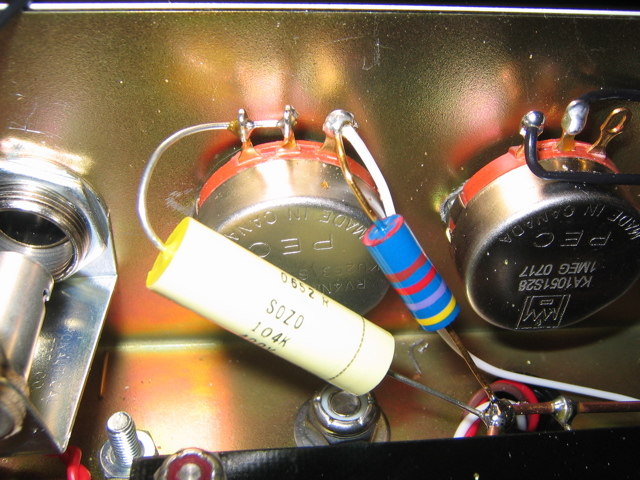
It's almost done! I just need to add a few ground wires to the ground buss. 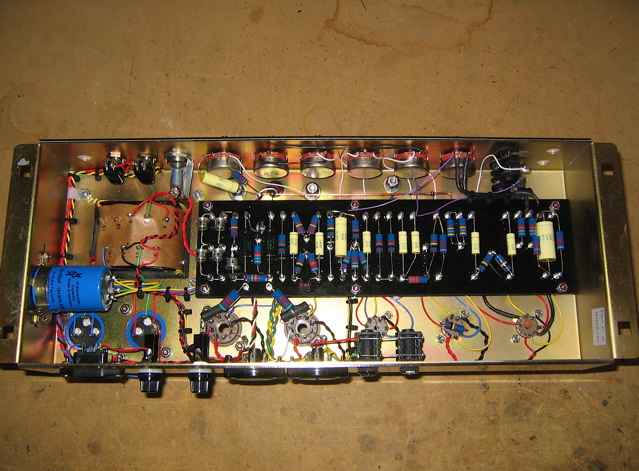
06.20.07
Well it's finished! Here are some shots! 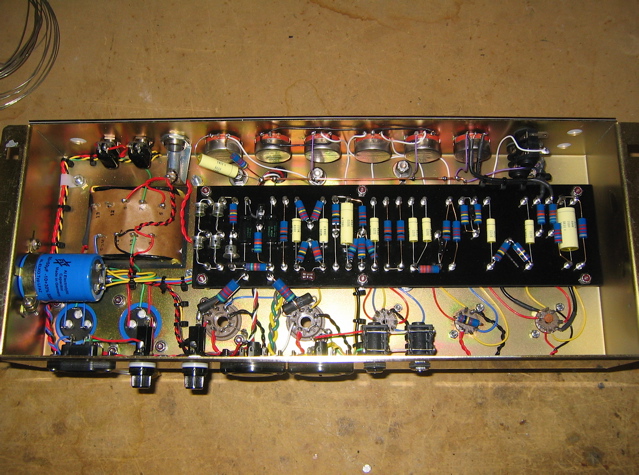
Bummer! I plugged in the tubes and all it did was squeal like a stuck pig! After doing some research and pleading to the
generous folks on the Metroamp Forums it seems that I may just have the output transformer wires switched. I will give this a try
and report back. It seems like the consensus is to also have the SoZo caps with the line facing the tubes. John at Sozo said it really didn't matter so I am going to leave
them unless I hear a real problem. I'll get it tweaked up don't worry...
06.21.07
Wow, I ran up to work to pick up my drill. While there, I thought I would switch the primaries on the output
transformer after some great advice from Scott W and Maschinenmannon on the Metroamp Forums and the amp works incredibly now! I have to run out the
door, but I will report more on Monday. I am so AMPED!!!!
06.25.07
The amp sounds amazing so far. I let it burn in for about 6 hours and there are no problems whatsoever. I wanted
to give a mention to Doug at Doug's Tubes here because he is always so
helpful to me. He turned me onto the KT77s and helps me with all of the tube selections for the amps I have at work. Doug is
the man! For tubes in this amp, I currently have JJ KT77 power tubes. For V1 I have a Tung Sol (with no hum! - see my last build). For V2 and V3, I have Electro-Harmonix. It sounds
really sweet so far. I think I may change the V1 to a RFT ECC83 as I hear the is the the perfect match for a JCM800. Almost $40
for the tube! What the heck... 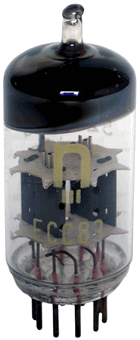
06.26.07
About the only thing I got around to doing today was putting on the very expensive knobs that I ordered from Metropoulos. I am not sure, but I think these things are bakelite. They look so nice. They better for $8 a piece! Maybe
the are diamonds painted brown... 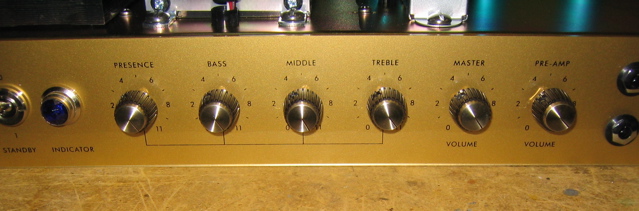
06.27.07
I woke up at 3AM this morning after having a dream that my amp exploded because my signal caps are in the wrong
way around. Even though John from Sozo said it didn't
matter, I want to go with the general consensus from amp builders and orient the caps with the stripe towards the tube side. So
in my OCD way I went to the SoZo site and found that they have these even better
premium caps that are hand made! The logo also looks cooler which is an added bonus. So I ordered them to replace my backwards caps.
That sound you hear is money being sucked out of my wallet. Here is a pic:

So now I have to remove the backwards caps. The amp was sitting on my bench and the first thing I did was grab it and get
zapped by the one of the big cap cans! Not a bad shock, but enough to remind me to be extra careful. This is my first shock to
date as I usually discharge the caps before I touch anything. Please do this if you are working on amps - you can die! I made a
little kickstand for the amp because it was rolling around on the bench by using a spool of teflon wire. It works great! 
I didn't want to overheat the severely overpriced
resistors so I did the alligator clip heat sink trick to help dissipate the heat away from the resistor. 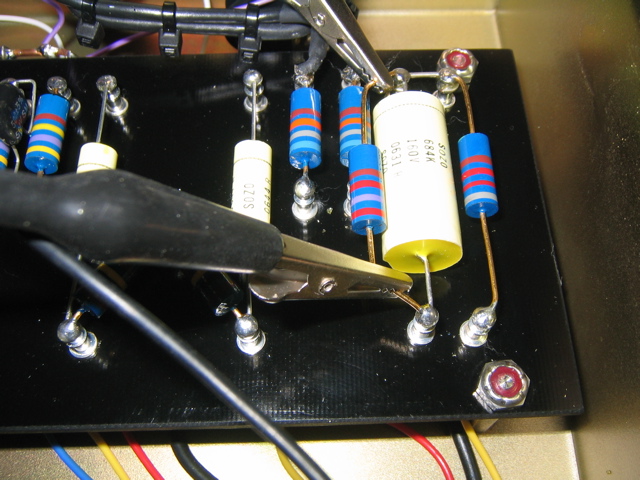
I realized many years ago that it's better to heat the solder joint,
remove the component, and then use a solder sucker to remove the excess solder. If you use the solder sucker first, you end up
heating the component excessively. I have a huge solder sucker, it's bigger than yours! 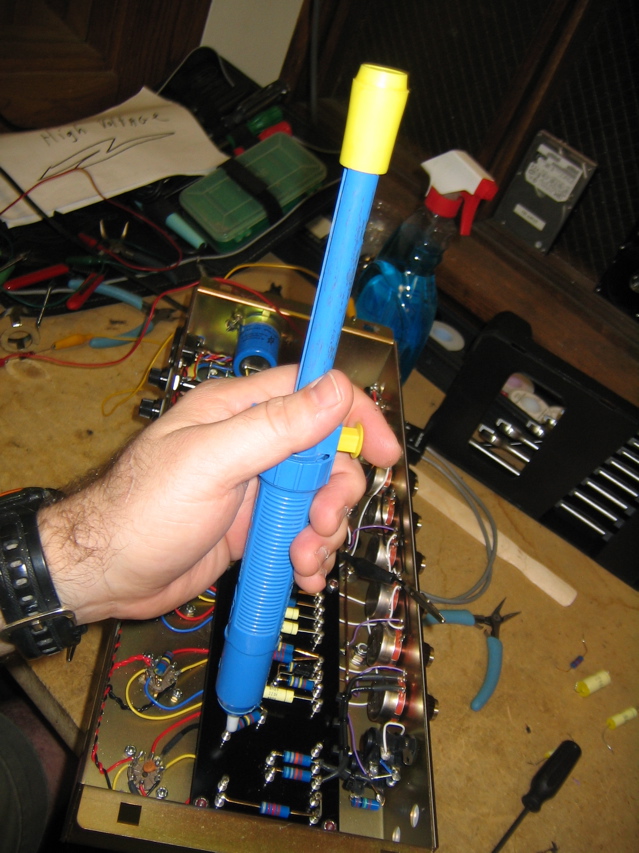
Here are the removed caps. I will probably save them for another
project. Poor little misguided guys never had a chance to break in properly... 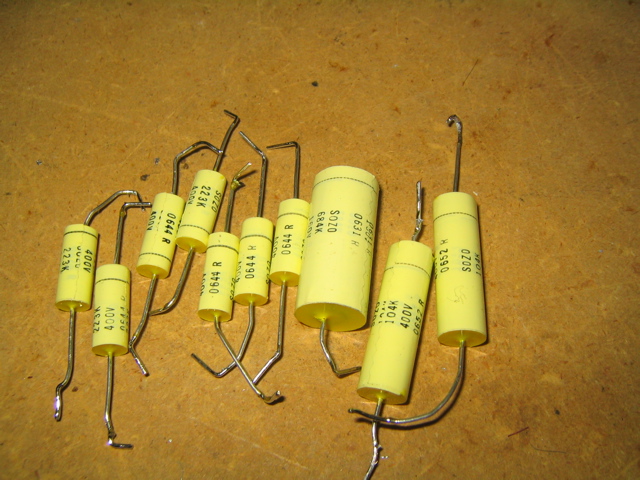
Here is the board prepped and ready for the new caps to slide right
in. I used a drill bit to clean out the turrets. 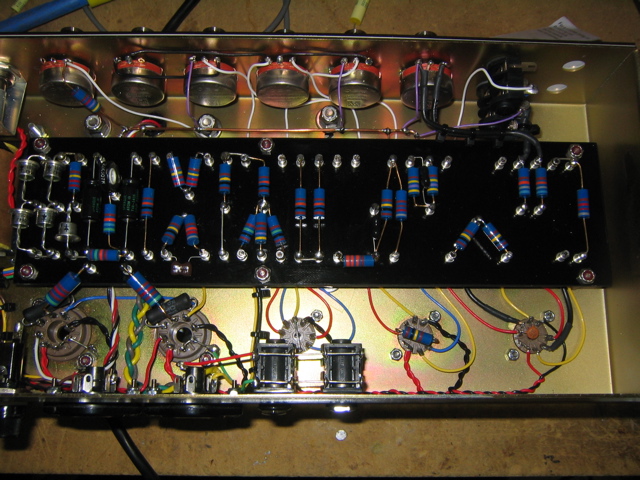
I always forget to put on the tube retainers when I am bolting in the tube sockets. This took forever to put these on
since the amp is wired and I had to work around wires. It reminds me when I build a guitar cable and I forget to put the barrel
of the connector on! 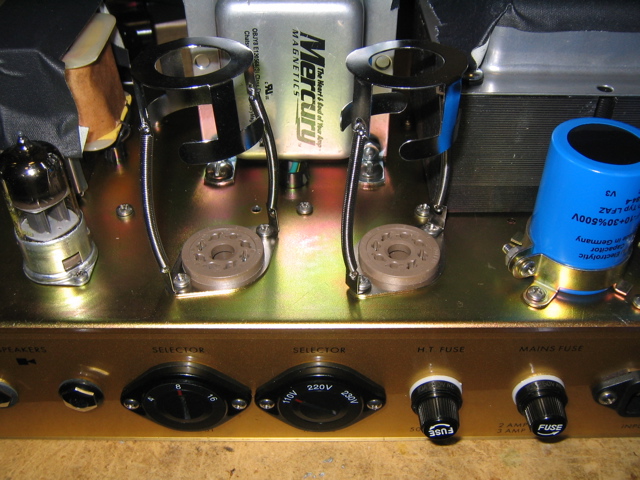
I ordered some blue tube
shields for the preamp tubes. Not sure if I like them. I'll leave them on for now. Email your votes for blue or silver. 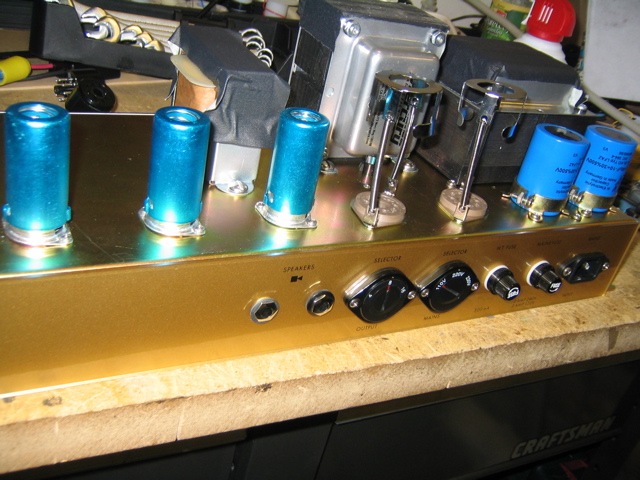
06.28.07
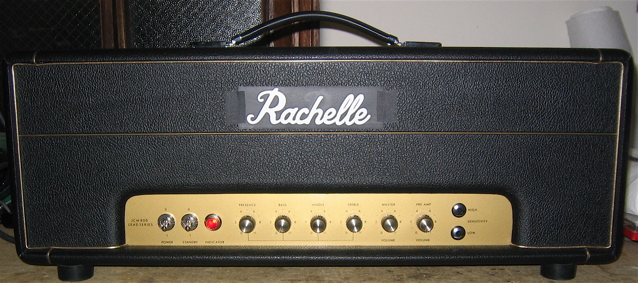
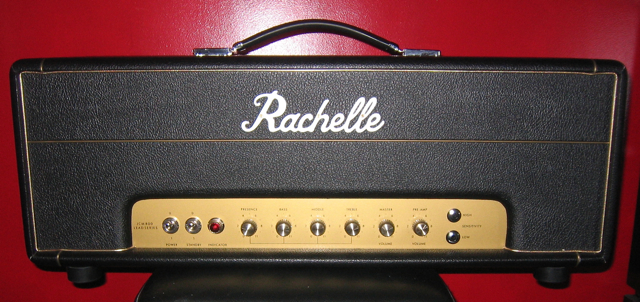
Ok, this is a big secret! Since Marshall purists think it is criminal for me to put Marshall logos on my amps, I
went totally punk rock and went with a Marshall inspired logo of my own. Named after my wife, the amps are now going to be
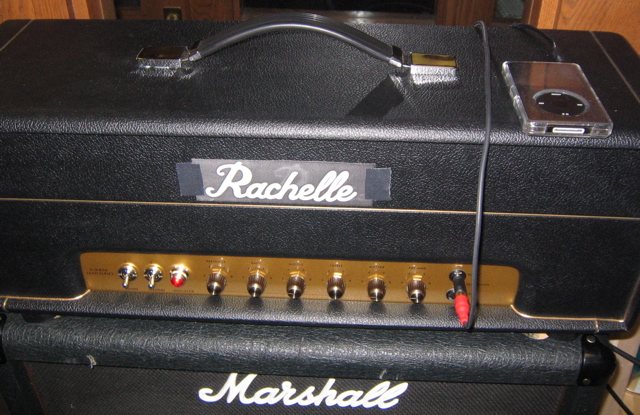
called "Rachelle". I can hear the kids in a few years..."Man, look how many Rachelle stacks that guy has!" - precious... *Up date Note 02.01.09 - I am now divorced so I trimmed off the "Rac" and the last "e" so now they are called "hell" amps! Ha Ha! I still have a sense of humor even after my divorce...
Here's a picture of a mock-up stuck on my amp head cabinet done by graphic genius and The Hornrims drummer - Tylor Durand. Don't tell my wife, it's a
surprise! 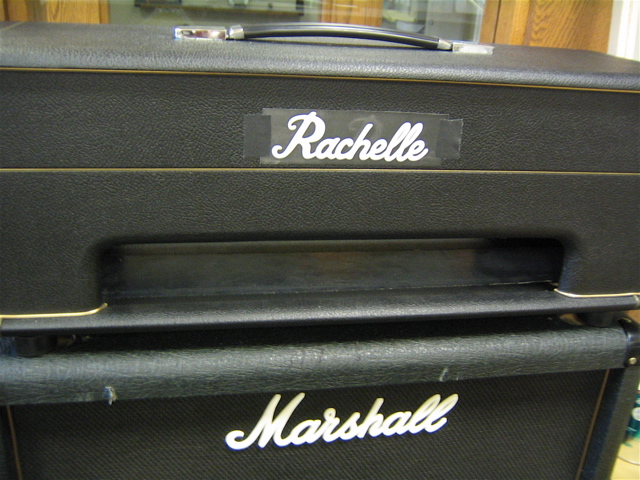
07.02.07
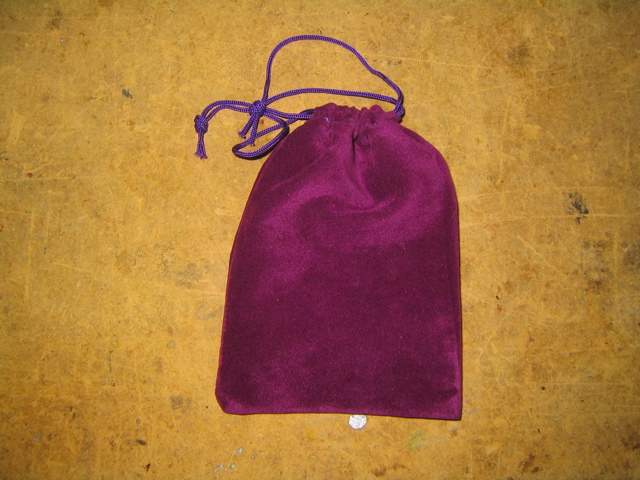
I received a package from Sozo
and I was excited because I knew it was the
premium handmade capacitors.
I opened the box and low and behold - a luxurious maroon velvet bag! There hasn't been a cooler packaging concept since
Crown Royal had
those blue bags we used to get from our dad's to keep our
Space Invaders quarters in.
I popped open the bag and I was a little bummed. Not all of the caps had the new killer logo. It doesn't really matter I guess but
I really like the new logo. Maybe it does matter after all, you amp nerds are all looking at this page aren't you? I mean amp nerds as a compliment.
I went ahead and soldered the new caps in. I had prepped the board well so it only took a few minutes.
I also faced the lines of the caps towards the back of the amp on the caps that had a line. The rest I oriented with
the words on the cap the same as the lined caps. Now I can sleep at night...

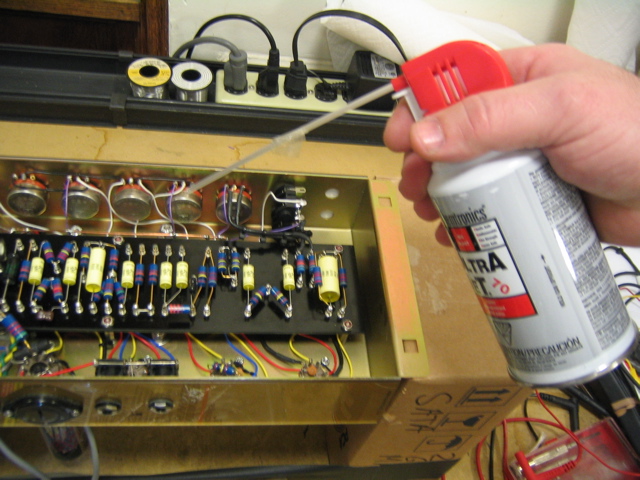
Next, I cleaned the board and chassis with some good ole
CAIG Deoxit Red D5 cleaner.
I don't want any little drops of solder bouncing around in side the chassis. I actually had a mixer stop working on me one time because of a
little piece of solder that got stuck on the printed circuit board. Printed Circuit Board?!?! Bah humbug - Point to Point baby!!!
I then blew the whole chassis out with some canned air. People can actually sell you a can of air? It should be free...
Good news! I called an old friend and genius actor Paul Potenza who owns Design One Jewelers in Clearwater, Florida.
He is going to make the "Rachelle" amp tags for me out of silver and then gold plate them. These will be for the amp head case and the speaker cabinet.
This is going to look amazing! I will have to insure this amp with Lloyds of London,
the insurance firm that insures Keith Richards fingers and Michael Jackson's fake nose.
07.03.07
Time to start the biasing process. I did some reading on how to bias an amp on the very informative and helpful
Metroamp Forum and used a post made by "toner"
to guide me in the biasing process. Click here
for the link to thread.
Since KT77 power tubes are an EL34 type tube, they have a max wattage of 25 watts. According to toner "You want to set the bias to be
between 60% and 70% maximum dissipation watts. (60% = 15 watts; 70% = 17.5 watts). Divide your
desired wattage by your plate voltage."
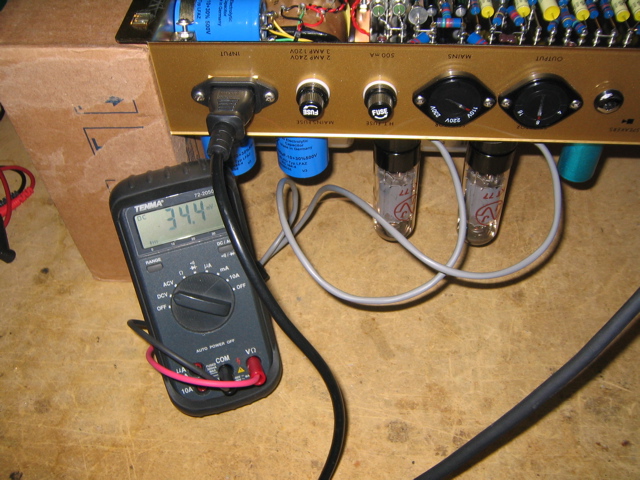
Here's how I did it. First I got the plate voltage by checking pin 3 on V4 and V5 (the power tube sockets)
to ground and came up with 435 volts. Exactly perfect on each pin 3.
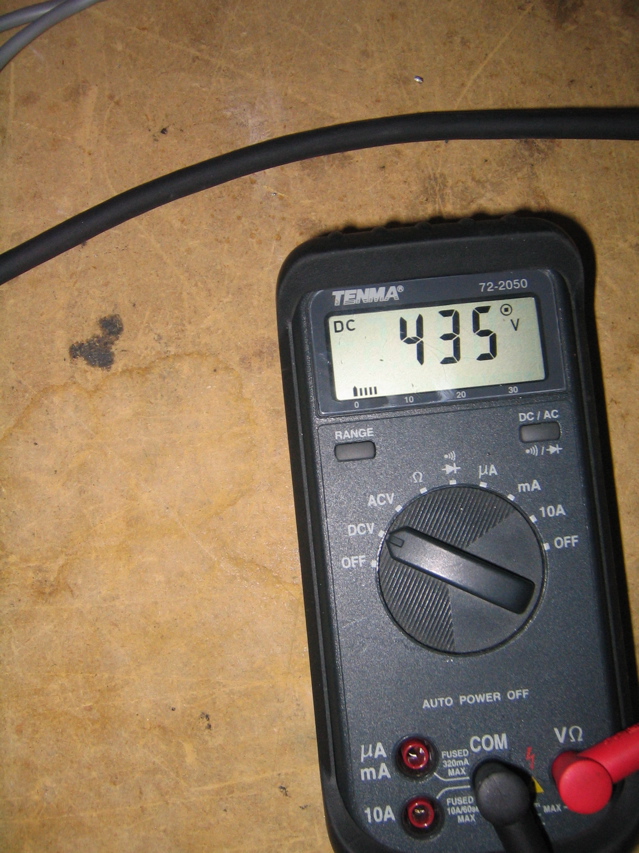
I took this figure and applied the following formula:
17.5 (desired watts)/435 (plate volts) = .04022988506 or about 40mV. This
is what I want to see on the meter when I hook up the Dual Head Bias tester.
I could have just soldered in a 1 ohm resistor and read across it instead of using the dual head thing,
but I want to keep anything out of the amp I do not need. Here is a makeshift stand that is comprised of
2 Maxtor Hard drive boxes (yes, the drives are in there!). Maxtor hard drives stink but at least the
boxes are good for something and the drives add a little weight to keep the boxes from tipping over.
I will eventually make a wooden stand if I can actually find a tree to cut down in NYC.
Better yet, I will recycle and make one out of
Ikea MDF (medium density fibreboard)
that litters the streets on garbage pick-up days.
I dialed around the small pot on the board until I got it to read right around 40mV.
I then let the amp heat up for about an hour and slightly tweaked it again. I plugged in a guitar and it sounds incredible!
I can't wait to record the clips!
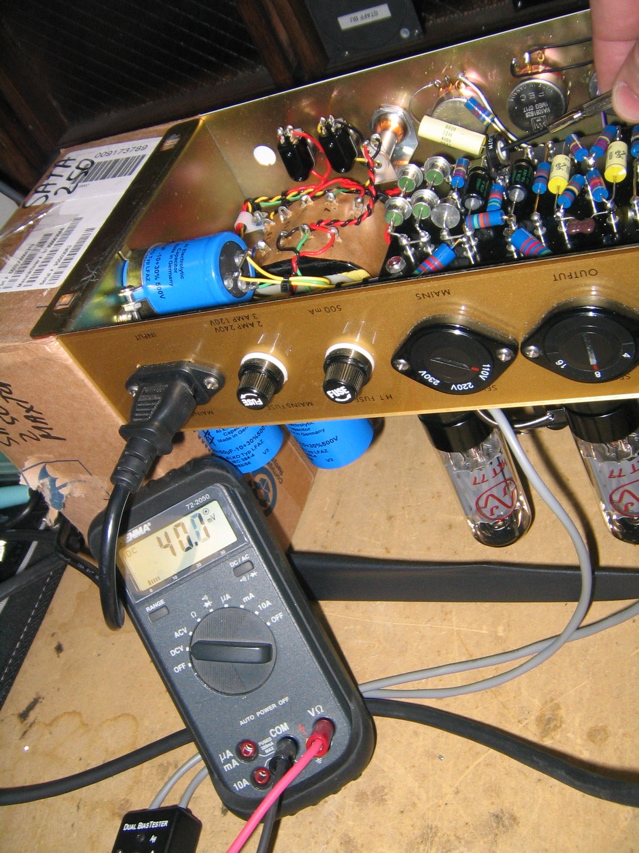
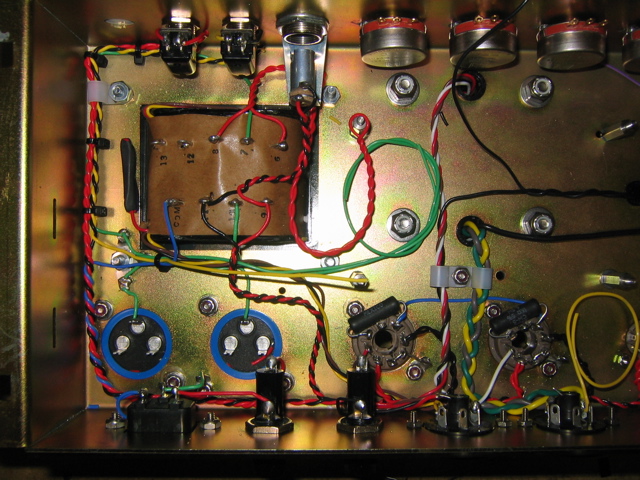
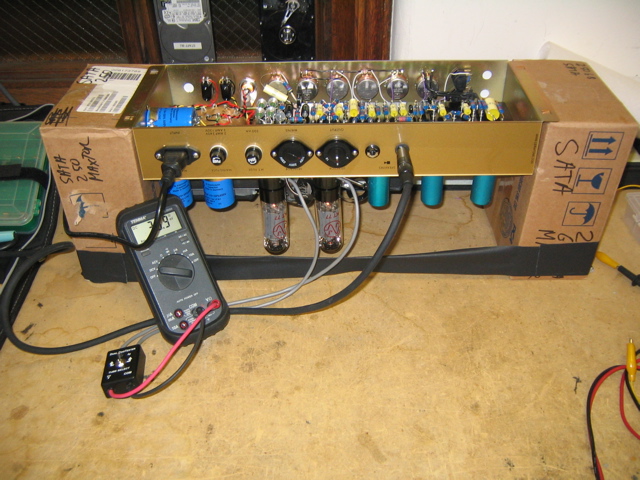
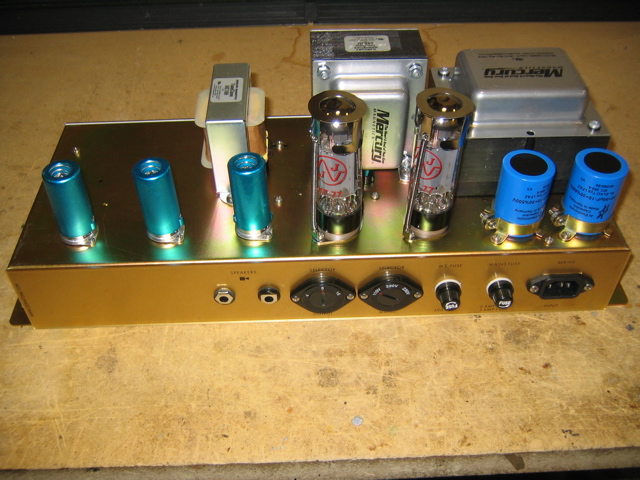
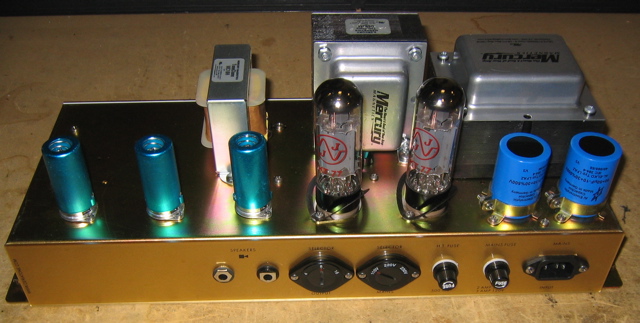
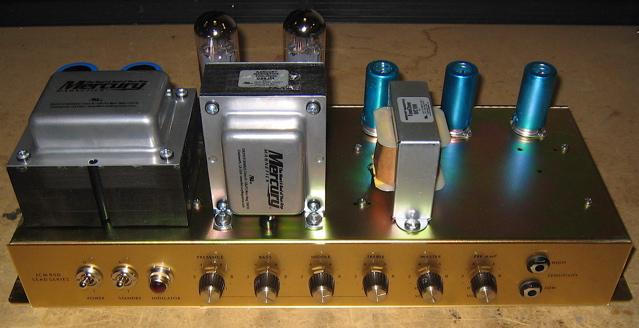
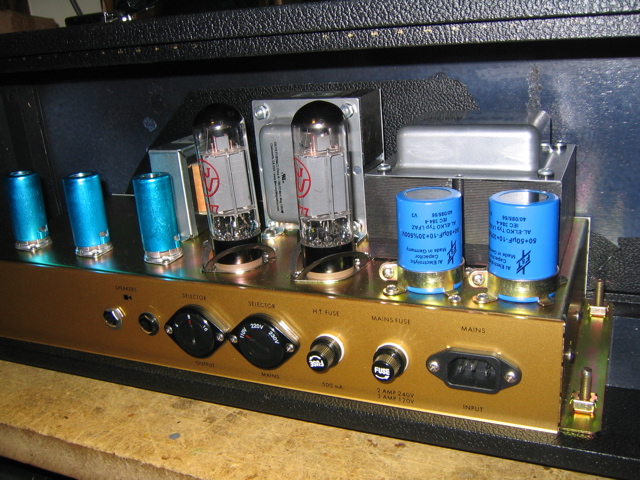
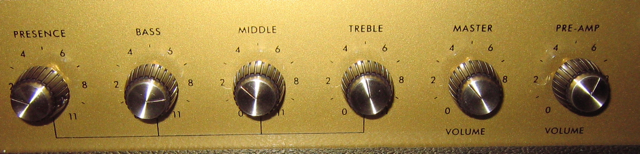
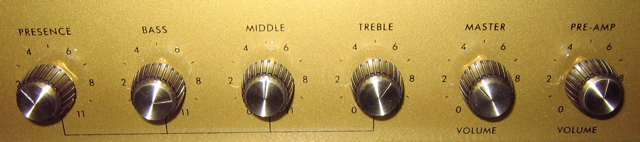
Here are some Chassis beauty shots:
Front
Back
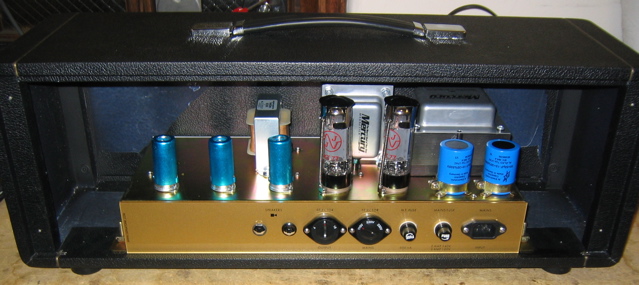
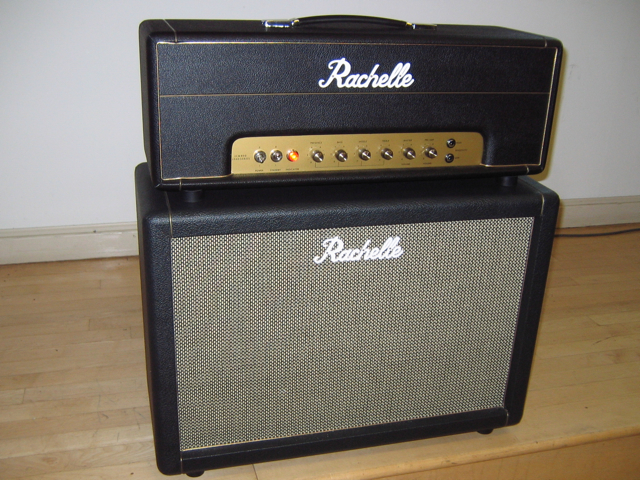
I then mounted the amp in the head cabinet. I am glad I drew those silver lines with the paint pen.
It makes lining up the chassis a breeze.
Back
Front
I screwed on the back cover of the amp head cabinet and threw it (gently placed actually) on top of my
Marshall 1922 cabinet - I do have the
Celestion Greenbacks
in there now. I played though it with
a guitar for a while, but I wanted to get the caps broken in as soon as possible. Hmmmmm.... I decided the
best way to break it in would be to play music through it every day until I reach the the recommended
100 hour mark
SoZo
recommends to
break in their caps.
I put a few adapters on my iPod, matched the
signal strength of the headphone jack to the output of an electric guitar, and (yes, you guessed it)
started playing the entire AC/DC
collection through the amp! What a better way to train an amp to rock then to
have Malcom
and Angus
blasting through it for 8 hours a day! I am totally excited and ready to rock this amp
on September 8th for The Hornrims
first gig. It will be my first real live performance in many years.
07.12.07
Ok, so I finally recorded some clips. These were recorded in my office at work through a Digidesign Mbox with ProTools 7.3 Software. No effects of any kind were used! The guitar is a Fender California Series Telecaster with a single Dimarzio Virtual Hot PAF DP214 F spaced pickup in the bridge. The guitar volume control is a push-pull type to make the pickup a single coil. The strings are
Elixir. Where's the neck pickup you say? Like I said in my last build - WE DON"T NEED NO STINKING NECK PICK UP!!!!
The cabinet is a
Marshall 1922
2X12 cabinet with Celestion G12T-75 Speakers (It's for sale! email me). I am awaiting my new
2X12 "B" cabinet from StoneAge Custom Cabinets and I will install my favorite Celestion Greenbacks speakers into it. My office has an Apple Xserve Raid and a portable Air Conditioner in it, so you may hear some background noise. Also, there is a mechanical buzzing coming from somewhere in my bench. I'm not making excuses! The amp sounds awesome, but wait until I get the new cabinet and record it in a proper space to hear the real deal!
I also removed the spring tube retainers because they were rattling. At first I though I liked this as sort of a reverb but when recording the amp it sounds bad. I will put in regular claw type tube retainers. Too bad, they looked really cool!!!
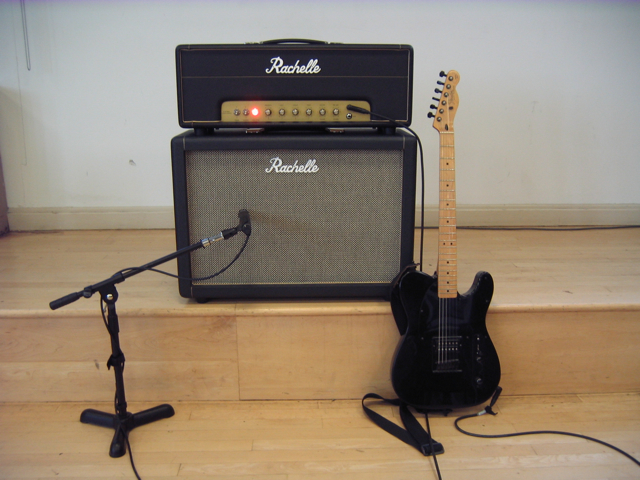
Here is my office recording set up. Just a single Shure Beta 57 micing the left speaker.
So, here we go with the clips:
Clip 1: Crunch!
Clip 2: High Gain
Clip 3: Clean - Single Coil
I pulled tha amp out of the head cabinet and installed the standard tube retainers.
Here's the new front beauty shot.
Since I had the amp out of the head cabinet, I decided to rebias it "colder" as I was planning too.
I had the amp biased at 70% power but I read in several places that 60% is really the best for JCM800s. So to recalculate, I took 15 watts (60 percent power) and divided that by 435 (the plate volts, I double checked the reading) and came up with, right off the top of my head: .034482758621. I rebiased to this exact number. I checked both tubes by flipping the switch on the Dual Head BIas checker
and one was slightly hotter. No big deal...
I popped it back in the cabinet...
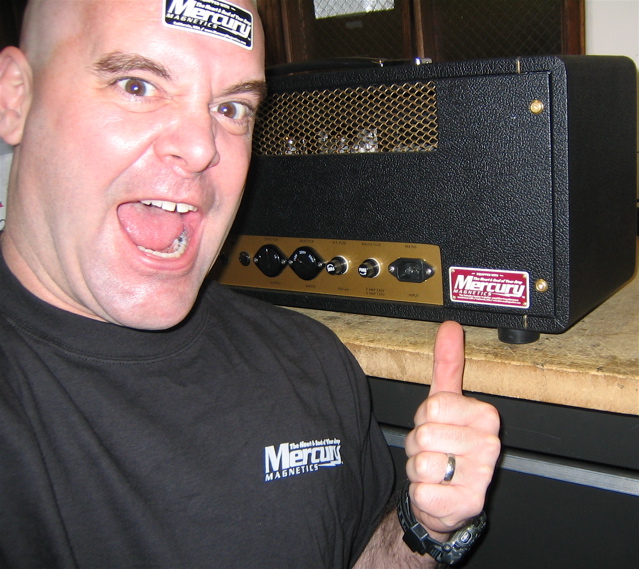
The great guys at
Mercury Magnetics
saw my blog and loved it! They sent me a bag full of shirts and Mercury Magnetics nameplates. I went ahead and installed a couple of the nameplates. Hey guys, how about a bag of those sweet transformers!!!
08.25.07
I have been working on my other amps, The Twins - Jeanie and Vickie,
so I have not updated this page in a while so here goes.
I got some really cool custom logos made with the "Rachelle" Marshall
inspired logo that my best friend, Hornrims drummer,
and all around graphics nerd Tylor Durand did the artwork for. I had a place called
Custom Laser Cutting cut them out of acrylic for me.
They came out really nice but I still want to see the gold metal ones I get from Paul Potenza. I am very happy with this amp after
living with it for the past month or so. It has a rich and powerful tone that I can't seem to get out of any other amp.
It's got to be the point to point construction and very clean signal path.
I think the Mercury Magnetics
output transformer plays a really big role but
you never know - an amp is a sum of all it's parts from the wire to the jacks, it all makes a difference.
I play through many Marshall amps at our rehearsal
space (including a vertical input JCM800) at Smash Studios
and they sound good but once I plug
this baby in it's a whole different world. It cuts through the band but still has really nice tone.
Here is a pic of the logo installed.
08.31.07
Well I am on my third cabinet. The Marshall 1922 I got was to heavy because it was made out of MDF. I also figured if
this is going to be my only rig I want it to be perfect. So instead of recovering and re-grilling the 1922, I ordered a very sweet
cabinet from StoneAge custom Cabinets. John the proprietor makes his cabs like tanks! He does finger-jointed corners and
uses some crazy epoxy on the joints. It wasn't cheap but I wanted the ultimate small cabinet for my New York gigs.
I wired it up really nicely using 16 gauge cable. I put a strain relief clamp near the input jack so the wires
will always stay out of the way of the connector being plugged in. I also put quick disconnects on the speakers.
I would have soldered them on but I may experiment with speakers so I want to be able to make quick changes.

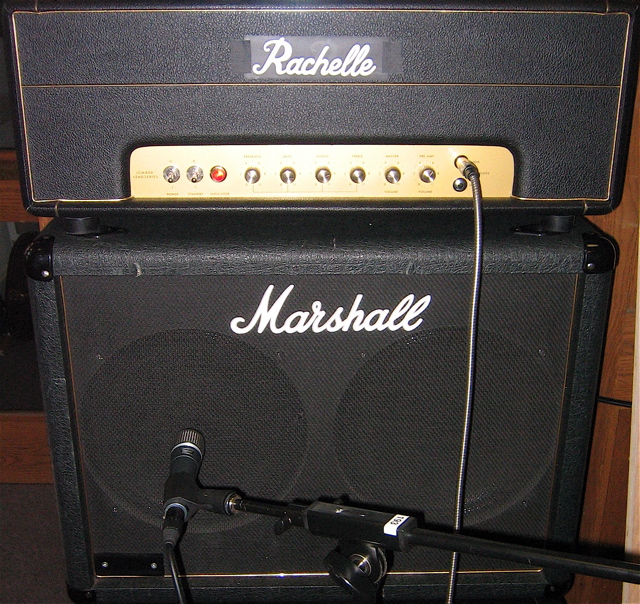
09.01.07
OK let's record this beast! Here is the setup.
I used a Digidesign Mbox with ProTools 7.3.1 cs4 software. No effects of any kind were used!
I used 2 mics. A Shure SM57
as in the picture and a
Neumann U87
for a room mic in omni pattern.
The guitar is a Fender
California Series Telecaster
with a single Dimarzio
Virtual Hot PAF DP214 F spaced pickup in the bridge. The guitar volume control is a
push-pull type to make the pickup a single coil Just to reiterate - WE DON"T NEED NO STINKING NECK PICK UP!!!!.
The strings are Ernie Ball Power Slinkys.
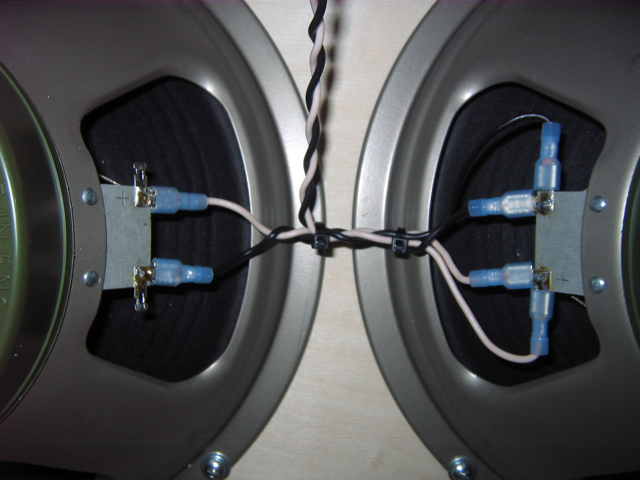
The Cabinet is a
StoneAge Custom Cabinets 2X12"B" with two
Celestion Greenbacks G12M
16 ohm speakers wired in parallel
to create an 8 ohm load. The cabinet has a 1/3 open back.
So, here we go with more clips:
Clip 4: Crunch!
Clip 5: High Gain

Clip 6: Joe Sound
Clip 7: Cleaner Single Coil

Clip 8: Clean Humbucker

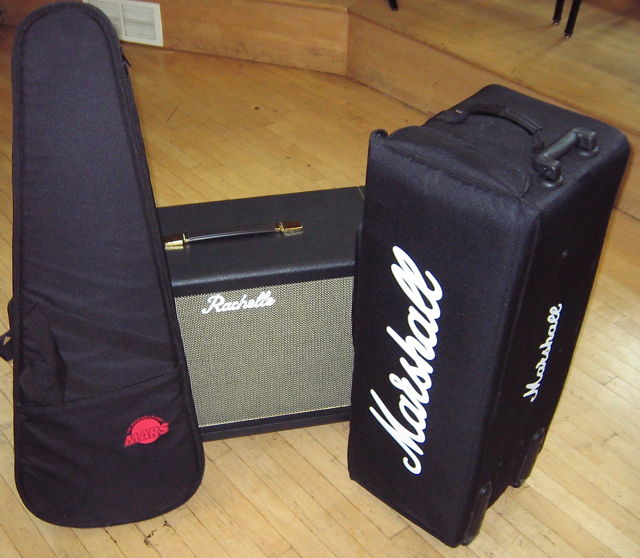
Here are some beauty shots. See how nicely it breaks down to achieve my final goal of a great sound rig
that can fit into an New York City Taxi.
Please visit my other build sites!
Other Builds:
JTM45
JCM800 2204 "Jeanie"
JCM800 2204 "Vickie"
JCM800 2204 "Prototype"
HOME
|